I am right in the middle of building six different pieces for clients and WHAM! - I had the urge to build a bed. I went to sleep with it on my mind the night before, and when I woke up, I couldn't stop thinking about it. If you've even been plagued with a focus like that, then you'll totally understand what I mean. It's consuming.
It's not a bad thing, though. I get a lot of stuff accomplished that way.
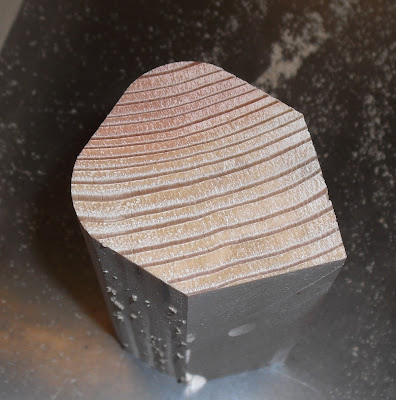
I went to the shop the next morning and cut a sample for the bed post leg that I'd been thinking about. It's a five-sided leg, similar to the one I'm making for the dining room table I'm building, too. Craig Vandall Stevens came up with this design, which is featured in the book - Creating Coffee Tables: An Artistic Approach.

I chose some nice boards of Ash that I had in my lumber stash,
 and laminated for the bedposts.
 Of course, they're bookmatched, so the grain is amazing.
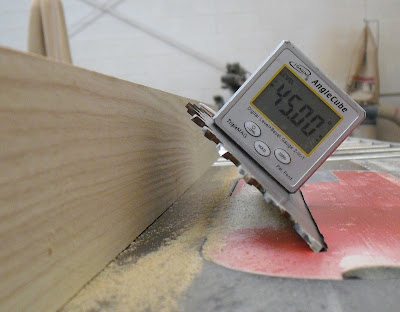
Set the blade to 45˚

and let's start cutting.
Now it's time to trim them to length
and rout a nice curve into the legs.
Using set-up blocks, I lay out the mortise that I'll be cutting.

And set the depth stop on the mortiser, so I don't drill them too deep. In this case, I want them to be about 2/3s of the way through the post, so that I can pin the pieces together, using small dowels. Pinning the mortise-and-tenon joint makes it much stronger.
 The cutting of the mortises is simple, I'm using a 3/4" bit here. Who knew you could drill a square hole?!
Once the lower mortises were cut, I used the set-up blocks again to locate the top headboard piece. The mattress I'll be using is about 8" tell, so those 1-2-3 blocks represent where the mattress will be sitting. The upper part of the post is where you'll see above the mattress, and that's where I'll be locating the headboard piece - where a pillow can be placed when someone wants to sit upright in bed.

After those upper mortises were cut, I needed to work on the head and footbaord crosspieces, cutting the tenons into them. There are a lot of ways to cut the tenons - I could have used a router with a straight bit in it, which is probably the most common method. But instead, I chose to use a radial arm saw with a stop block on the fence, to ensure that the length of each tenon was exactly the same. I was too lazy to put a dado blade in it, so the flat side of each tenon took a couple of minutes to cut.
People always ask me about dado blades - do I have them do I use them, blah, blah, blah. There is this love affair with them, probably from seeing them on too many woodworking TV shows or podcasts. My feeling about dados, and dado blades is this - if you have a tool that you can dedicate to a dado blade - so that you can leave it in that tool all the time, they're great. But - for me - switching back and forth from a dado to a regular sawblade is a PITA.
See, a regular sawblade removes wood 1/8 of an inch a time. But a dado blade can remove much more than that. So if you needed a 3/4" groove in a board, once pass over a dado blade would cut that groove. So would six passes over a 1/8" blade. Get it?
So in the time it takes to take the regular blade out, install the dado blade, and then cut the wider groove, I can simply make the six passes over the skinnier blade. It's a wash, in my opinion, so unless I have a butt-load of dados that I need to cut, I simply use my regular blade for most dado cuts.
The funny thing is - I have a killer Freud 10" dado blade set that I could install in my big radial arm saw. Maybe I'll do that one of these days, when I have time, just to be able to say - yes, I do have a dado set-up all ready to go. So what?
Here is a little diagram to show you what I'm trying to cut in each leg.

Anyway, once the tenon cheeks were cut, it was time to cut the vertical shoulders on each horizontal piece. I start by scoring the line with a chisel,

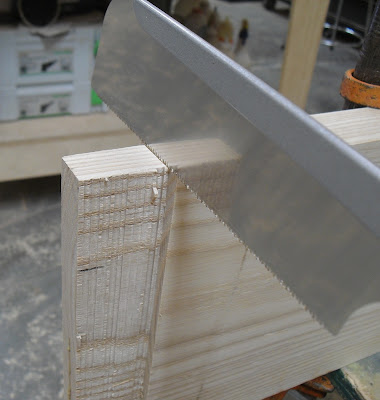
and then use a very thin kerf saw
 to cut the tenon area away.

With that shoulder cut at the proper depth, a simple tap of the chisel allows that piece of wood to snap away.

Like this. It's quite simple, it barely takes a light top of the chisel for it to pop off.

So far, I'm a day and a half into this project, and there are really only a few operations left - but very important ones. The vision I have for this bed is a very simple one - understated, with a zen quality to it. Years ago, I'd made a bed similar to this, and it sold immediately. I've been thinking of making another one ever since. I kept seeing a carving on the headboard in my mind - do other artists do that? Do they "see" things in their head, and then transfer them into physical pieces?
I play on the computer until I get the artwork sized correctly for the carving I want to use. This is a common method for me when carving - playing with fonts and sizes until I come up with something that suits the piece.

Here, this kanji symbol means "peace and harmony" - a fitting inscription for a headboard, I think. It's attached to the headboard with a glue stick,

and carved in place. I'm by no means any expert at carving, but I get by with a few chisels and some touch-up with a Dremel.

Sand the paper off, and here is what you get.

It's time to dry-fit everything together, to make sure all the joints fit well and everything will go together smoothly when I glue this piece together.

With all the joinery cut and the carving completed, it's time for some serious sanding on each component. There won't be a chance to sand in the nooks and crevices of this piece, once it is assembled, so I hook up the Festool sanders and go to work. Everything is sanded, to 180 grit, which is pretty fine. Then - it's a simple matter of gluing up the headboard and footboard. This is a queen bed, so it's about 60" wide. Since I only have two long bar clamps in my shop (the rest are at home, of course!) - I end up walking next door to borrow a couple of long clamps from my buddy, Eddie, who runs a countertop shop.
By now, it's the end of the second day, and the bed is nearly done. I'll clamp it up overnight, and work on the side rails in the morning.
1 comment:
I like how you work. Can't wait to see the finished project! The carving is so cool.
Post a Comment