Monday, December 28, 2009

A quickie cabinet

Many of the students who take classes at the woodworking school come straight from their day jobs, so the first thing they do is head to the bathroom to change their clothes. I was feeling a little guilty about the bathroom not being the most convenient place to change - there isn't even a hook on the back of the door to hang up a backpack or purse. So I just put together a simple cabinet out of some leftover Cherry door panels I had sitting on a shelf.


These door panels measure roughly 14 x 41, so I used those dimensions as a starting point for the cabinet. Since this cabinet is also going to hold some bathroom supplies on it's shelves, I decided to make the two adjustable shelves out of melamine covered MDF, with a solid cherry edge to match the rest of the cabinet. Melamine isn't exactly glamorous material for a piece of furniture, but if that bottle of glass cleaner or cleanser leaks, clean-up is much easier.


Of course, I had to rout a graceful curve on the top. The cabinet might not be in a place of prominence, but there's no sense in making it boring.

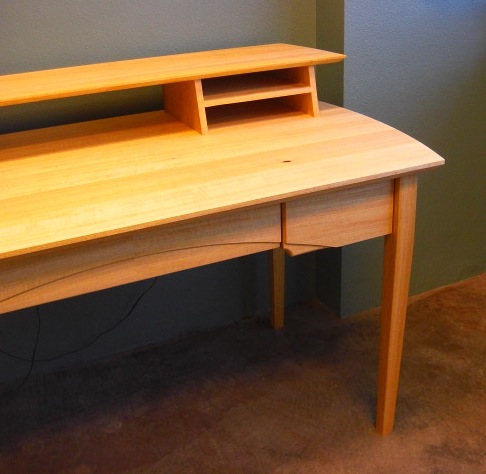
The top looks like it needs another coat of Watco.


My local Festool guru loaned me a Domino to play with, and this cabinet was a perfect opportunity to try it out. I have to admit - this piece went together in minutes, as opposed to hours. And as much as I want to complain about the price of the Domino, I am quickly seeing the merits of owning one.

Guess I'll be re-working my tool budget for 2010 and trying to fit this tool into my arsenal.


Friday, December 25, 2009

Sunday, December 20, 2009

What's on your nightstand?

It feels like most nights, I climb into bed and fall asleep so quickly, there is never time to read a chapter or two of a good book. But lately, I've been fighting a sore back, in which laying horizontal is just about the only way I find relief.

So much of the last week or so, I've found myself horizontal much earlier than normal. I'm fine with that, it lets me catch up on some books piling up on my nightstand. I thought I'd share with you what books I'm reading.


If the cover of this Michael Pollan book looks pretty beaten up, it's because it's been following me around for almost two years. I took it to Hawaii with me a few years ago, but just couldn't seem to find the right frame of mind with which to read it. I'm glad I finally made the effort, and reading it may have forced me into some deep thinking about becoming a vegetarian. I know one thing - I learned more about corn, and the whole food movement in our country, than I'd ever thought possible. If that sounds boring - trust me, it wasn't.


I threw this on my nightstand yesterday, when it came in the mail. Sometimes I just want to read something short and simple, so my mind isn't cluttered up right before falling asleep. It looks like there is an interesting tribute to James Krenov in this issue, as well as a gallery of some of his past student's work.

Also, since I teach boxmaking at my school, I was quite interested to see an article about boxmaking that included some alternative methods for making lids. The article has some innovative ideas, but one of the things I like about the way I teach boxmaking is that the grain of the wood matches around the perimeter of the box. Only one of the methods in the article allowed for this, but I felt like it was the more difficult (and easier to screw up) approach. Still... if you're a boxmaker looking for an alternative to installing hinges, this article might be of interest to you.


I think I found this book quite by accident, but I'm fascinated with the thought of hearing from our loved ones who have passed away. This book explores a connection with that other world, and although I'm only up to the first chapter, I can already tell it's going to be a fascinating read.

And finally... a blast from the past.


I have no idea if this author is still alive, but this book by George Grotz is classic. Published in 1962, it covers all sorts of topics related to woodworking - repairs, finishes, restoration, faux finishing, bleaching, wood info, and much more. He's hilarious, and his humor comes out in every chapter. For example, the chapter about bleaching has a subtitle of "blonds I've known".


Yes, much of the information is dated; there was no Gorilla glue then, nor some of the tools and finishes that are so common today. But he includes some very simple repair information that most homeowners might find helpful. Check out the illustration below for removing the warp from a bowed tabletop.

Speaking of that, yesterday I received a question on All-Experts, a site on which I volunteer. about a warped tabletop. Someone wrote to ask about a bowed table top, and as he described the problem, my head wanted to explode. Here's a link to the question and the answer.

The back cover of George's book offers a peek at some of the topics he covers inside.


I bought this book used on Amazon for next to nothing. You can find some really obscure, out of print books there. And even with shipping, the cost is very reasonable. At a recent Sin City Woodworkers meeting, Dennis Patchett gave an amazing demo on carving linenfold panel doors. He brought along an old carving book that he says taught him the basics of how to make these panels. I just picked up a copy of it on Amazon for $9, including shipping. Not a bad deal, considering the amount of information that this book contains.


Here's the one last item you'll always find on my nightstand.

Anyone else want to share what's in your reading cue right now?


Thursday, December 17, 2009

Bookcases

Here's a very cool article on bookcases. My favorite is the first one, the "cave" by Sakura Adachi.

Which one is yours?

Wednesday, December 09, 2009

Repairing cracks in wood

One of my students sent this link to a really simple method for repairing cracks in wood. Thanks Christine!

Woodworkers Journal : Gluing Techniques : Easy (And Instant) Crack Repair


Friday, December 04, 2009

Winter gardening


Here's a little glimpse of my Friday morning. I've been spending way too much time in the woodshop lately, so I thought I'd work in the garden today.

Last night, we finally had some cold weather. Cold enough to freeze the last fruit and vegetables that are still on the ground. So when I went outside this morning, the first thing I saw was a wilted, lifeless eggplant vine.


Of course, I had a "crew" to help me cut the plant down.


There's nothing better than sliced eggplant, drizzled with olive oil and grilled. Toss it with some feta or layer it on pizza, it's fabulous.


Looks like I've got my work cut out for me on the grill.


About a third of the eggplant were a sick, golden color.
If anyone knows what causes that, could you let me know? After cutting down most of the plant, I raked up the layer of dead leaves.

Ruthie ended up with a beard full of leaves.


After the eggplant, I turned my attention to to the citrus trees. The oranges were perfect.


So were the limes.


One of the limes rolled across the brick pavers, which of course, made Stella think we were playing catch with them. Here she is, looking remorseful, after sinking her teeth into one of them.


The grapefruit were looking gorgeous, too.


We're ready to play, mama.


The last plants left are the artichokes. Who said you can't grow artichokes in the desert? I have absolutely no idea what I'm supposed to do with them for the winter. Leave them as they are, or cut them back? I've searched a few gardening
sites, but can't find any information.

Any ideas?

Back to the sawdust in the morning!


Sunday, November 29, 2009

Walnut Bench with hunter green tile

No rest for the weary. No sooner did I finish my desk, then I completed another piece - one of my filing cabinet benches. The part that I love best about these benches is the tile.

Here's a set of hunter green tile I've been working on - modular and textured.


These pieces are roughly one, two, three, four, and five inch squares.


These sizes allow me to make various patterns in the tiled areas.


And the texture is amazing with this glaze - a Waterfall Green that I developed a couple of years ago. Cool colors like greens and blues look amazing next to the warm colors of wood.


Here's the bench, awaiting one last detail - the lid support that needs to be installed inside.


This piece features a full length piano hinge, an aromatic cedar bottom, and is sized to hold hanging file rails. These benches can be used as blanket chests at the foot of your bed, or as a filing cabinet in an office. A recent buyer of one of these told me she stores all her knitting supplies in the chest she purchased. What a great idea!

We have three of these chests in our home, and I'm going to add some cool wooden casters to the bottom of one and turn it into a coffee table.


It will be perfect for stashing the dog toys or holding an afghan for a chilly night.


Sunday, November 22, 2009

Drawer fronts

Hanging drawer fronts might be one of my least favorite things to do. All of your work can be for naught if one is hung crooked. And it's not easy to do, regardless of all the tips and techniques you read about in woodworking magazines.


This three piece front started out behind the eight-ball because I'd run out of an attractive piece of wood. So I had to take the last board left, rip it into strips, and re-glue it back together, changing the grain orientation. I decided to take it a step further and create a faint herringbone pattern, with a center seam, for the center drawer front.

Luckily, my local Festool rep gave me a Domino to play with, so that joint is beefed up with some large tenons inside of it. After it was glued and planed, I routed a large sweeping curve into it.


And then laid out the three pieces in order to line up the curve on the two outside pieces.


I couldn't decide if I wanted to keep the curve aligned along the entire front, or jog it down a bit on the two outside drawers.

But the drawer faces were a little oversized, so I had some material with which to experiment.

Routing those curves was the easy part - I used the original template (that I used for making the desk top) and made a "mate" for it - that gave me a set of matching 48" radius circles - an inside curve and it's matching outside curve. Why did I need both pieces?

Anyone that's done routing knows that a router can have a mind of it's own, often traveling into areas in which you didn't intend to be cut! So I wanted to protect the drawer faces by using a plywood template that wouldn't allow my bit to veer off course.

I clamped the template to one of the outside pieces.


Then I routed out the area, using a straight bit and a template guide.


Someone asked me about my blog, specifically - how I shoot the photos and capture the various steps along the way. Honestly, I feel as if I do that pretty haphazardly. My workbench is always a huge mess, which is why I shoot these photos fairly tight. No sense in letting you see my clutter.


Once the curve was routed I had to do a little hand work with a chisel, since the router bit couldn't reach into the far corners of that curve.

In the end, I decided to align the routed curves on the faces.


To me, it's always the most stressful part of the building process to hang these fronts. If anyone out there has any tips (besides using two sided tape or those concentric drawer face adjusters), I'd love to hear how you do it.

Meanwhile, I'll just start "moving" into my new desk.


Friday, November 20, 2009

Building a desk

Way back in 2001, I taught a class where everyone made a Roll-Top desk. Or a desk with a tamboured hutch, depending on what you want to call it. Instead of this class being a typical six-week long session, we doubled it and built the desk in twelve weeks, or roughly 36 hours.


It was an amazing class, and to this day, I still hear from some of the people who took it, saying how much they love the desks they built.


Imagine this desk being passed down through the years to family members.


Cool.


So along with everyone else in the class, I built a desk too. Instead of including a upper hutch, I added a smaller storage area on top, where my laptop could be stored. I also played around a bit with curves, which I love, Love, LOVE.

Anyone who is familiar with my work knows I have an obsession with circles and squares. I'm not sure what that's about, but they're everywhere.


In tile.


And tops.


And insets.


And relief carving.


It's a weird thing - even one of my favorite albums of all time is In Square Circle.

And though you can't tell by the angle of this photo, the top on this desk has a large sweeping curve on both ends.

The fronts of the three drawers mimic this curve, and tie it all together. I was also experimenting with Milk Paint at the time, and decided to add a little color to the piece, so the teal areas that you see are milk painted and slightly sanded, so the wood grain shows through.

All of this leads up to the new desk I'm currently building.


I loved the design of the original desk so much that I'm building a duplicate - for myself.


People who hang around my studio/school know I've been working on the desk for probably three months. It's tough to finish something like this when I only get about five hours a week to work on it.


So I'm in the homestretch - all that's left to do are the drawer fronts. Now usually, finishing the fronts is a little hectic for me, as they're the last thing I work on, and one of the more noticeable details.

Imagine my horror when I planed the piece of wood I'd saved for the drawer fronts, only to discover that the grain on it was awful. And of course.. it was my last piece of this wood.

What wood? Good question.

I bought this lumber at an auction, it wasn't labeled, but it was gorgeous. After a little calculating, I decided I had just enough to build this piece. I've been trying to identify the specie ever since, but every time I decide that it's a certain wood, I do a little research and decide it's not that wood afterall.

A little research helped me locate a wood identification service, so I recently sent a small sample of it off to their lab. Hopefully, I'll soon know what the hell this wood it! (And as a professional, I'm a little embarrassed that I can't identify it!)

So stay tuned - I'll be finishing the drawers in just a few days, and will post my solution to this design problem.