Sunday, December 19, 2021

Holiday woodworking @ Wood It Is!

 Wondering where I've been? 

We're making so many things in the shop these days, that this blog is at the bottom of my energy list. I'm really sorry about that, but there are only so many hours in a day!

Every single day is different, but one thing is certain - people want their "stuff" now! - whether it's a repair, or a new project. Or a replacement part for something that's broken... the list is never ending. 

I'm amazed at the volume of work we handle at the school - Saturdays are the only day the shop is open to the public... people can stop in and bring projects that need help, like this fellow who stopped in with a sculpture that needed a base. 


When it was finished, I got a high-five!


So many of the projects involve repair - and in this town, there's virtually no where to have wooden parts made.

 This rocker needed a new arm support spindle, not too difficult.


But this bench needed completely rebuilt. 


When someone shows up with random parts and asks to have it re-built, a little research was in order. Luckily, I had worked on a similar bench about a year ago, and I was able to refer to my notes to find the dimensions of the wooden parts.


Christmas is always busy, but this year is a little different - lots of corporate orders, like these gift crates that will be filled with goodies for one company's customers.


We've also been doing a ton of turning lately - from duplicating these small parts 

to making these massive (and ridiculously heavy white oak) table legs.


We're doing so much lathe work, that we bought a lathe duplicator... it's pretty handy. Although it doesn't work exactly as advertised, it works well enough to save a ton of time. 


All of this doesn't even include the classes going on - 30+ students come to the shop each week... and this time of the year is all about Christmas gifts.


This pecan charcuterie serving board is simply stunning!


We scooped these boards on the tablesaw, and created some really amazing pieces in the Instant Gratification Woodworking class. 


And Andrew, from Reclaimed Secrets, sent over some small boards with resin in them, for us to sand and finish. Gorgeous pieces!


Our Thursday night class, in conjunction with Clark Country's YO Court, produced some very nice handmade 4-in-1 screwdrivers...  a quick turning project that everyone loved.


All in all - it's been a remarkably creative session! Here are a few more happy students...


Sunday, November 14, 2021

Back to my ceramic roots... sort of...


Back  in the day, I used to make a ton of ceramic tile - utilizing the amazing glazes that came from Mastering Cone Six Glazes... a book that changed my (ceramic) life.  I was mixing my own glazes, and developing some variations of the Waterfall Brown glaze that was featured so prominently in the book. 

I was completely focused on developing a blue and a green version of this glaze - and my experiments were pretty successful. Here are my blues 


and a couple of greens - both colors compliment wood so well. 


I made this tile medallion using a green version of this glaze many years ago, and frankly, I'd forgotten about it. I'd inlaid it into a walnut tabletop, and it was floating around my shop, moved from shelf to shelf, awaiting the perfect project. 


So when one of my friends spotted it and asked if I could turn it into a table, it was the true definition of serendipity.  We agreed on a few design decisions (size, and the addition of a drawer and a shelf) and away I went.  

Now - I've made dozens of tables - maybe hundreds - who knows?  One of the first things I consider is grain. (Thanks to The Fine Art of Cabinetmaking!) Seriously - if you want to become a better builder, you need to read this book. 

The legs were first - one inch boards laminated to highlight bookmatched pieces of wood, since I couldn't find solid lumber that was a full 2" thick. Not only do I mark where they will eventually land (left front, right front, and so on...)


 but I mark the edges that all be tapered. The white lines indicate the surface that will be shaved. 


Taper jigs make short work of this! I've always felt like taper jigs are a little dicey for a novice, but it seems like everyone I know owns one of these cheap $20 aluminum jigs. My advice - build your own, using toggle clamps, and make a safer version. There are thousands of plans out there for safer ones. 


Once tapered, I set the legs on the top, which allowed me to choose the right overhang. 


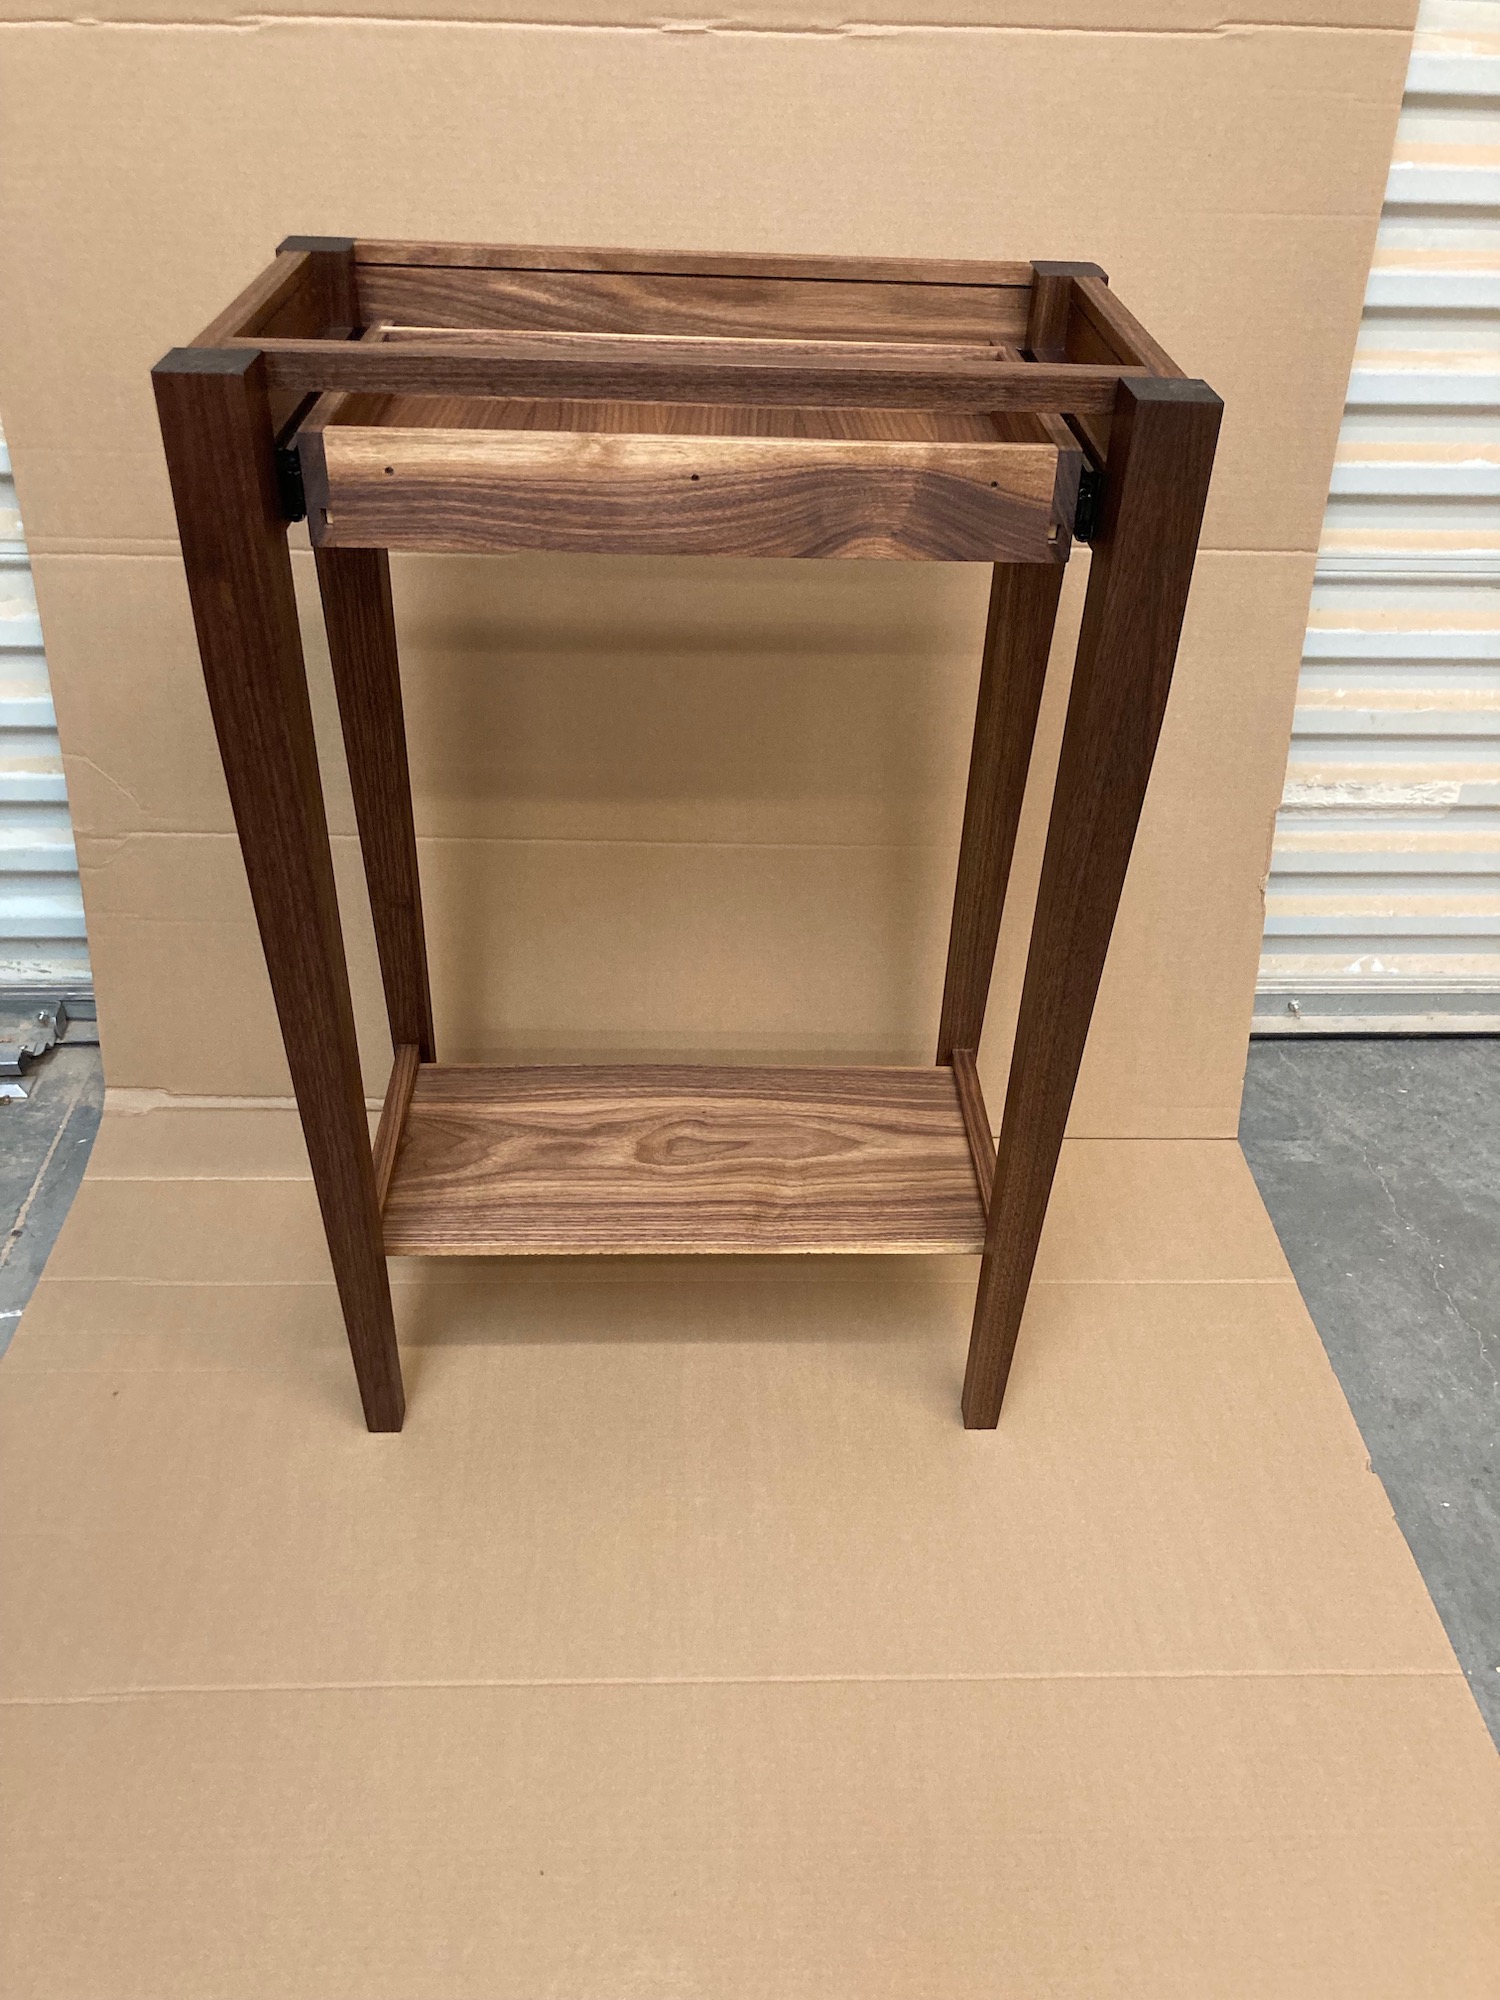
Some measuring, cutting and a few hours later, This table was coming together quite nicely.... here's a shot before the top and the drawer face were attached. 


And finally - the finished table - a lovely foyer table that will greet my friend every time she walks in her front door.


 I am finally getting caught up on some projects that have been in the pipeline for a while - am SO psyched to start a few new ones.  I need to start researching guitar humidors, as that's my next build. 

Stay tuned...