Whenever I see stories in the news about people who have to evacuate their homes, I wonder what I would take with me. Sometimes people have advance warnings, like with hurricanes. But in the case of wildfires or
tornados, there is little time to pack. News programs show people throwing clothing in suitcases, along with family photos and valuable paperwork.
I know what I would take - my sketchbooks.
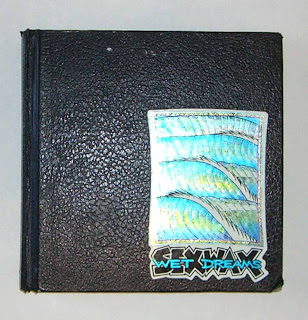
Ever since I was a college Art major, I've kept a sketchbook. I don't remember which college professor gave the lecture about sketchbooks, but his ideas have stuck with me over the years. He had a few tips about sketchbooks- like attaching an envelope inside the cover, so that you always have a place to keep random important bits of paper. It's an easy way for me to keep track of business cards, pictures of interesting things, receipts, etc. And he suggested using a hardbound book as a sketchbook, rather than a spiral notebook, where you might be tempted to rip a page out if you didn't like something you'd drawn. That makes a lot of sense; a drawing of something today might not interest you, but in a different situation, it might work perfectly.
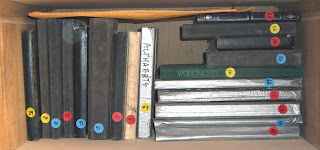
I've kept all pf my sketchbooks since 1980. The collection has gotten so big, I've had to place a sticker on the outside of them, dating them, to keep them in order. I keep all of them in a bookcase in my
woodshop, where it's easy to locate something in them.
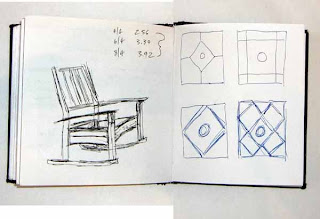
Over the years, my sketchbook has become a "filing cabinet in a book." When I finish one book, and start with a new one, it takes a little preparation. I paste a sheet with phone numbers of all my suppliers, so that no matter where I am, I can make a quick call to find a price or learn about availability. I also keep a current price list of the woods and hardware that I often use. (I keep it stored in my computer, and update it periodically.) This makes it really easy for me to come up with a price when a client asks me to design something. The list includes current lumber and plywood prices, as well as hardware, like hinges, lid supports, levelers, drawer glides, and so on. So the sketchbook isn't just about sketches, it stores a lot of current information that I need.
Some of the students that used to take woodworking classes with me have complained that they can't draw. I used to think it was a talent you either had, or didn't. But I've had a change of mind. When I was younger, I could barely draw a simple sketch. It's a skill I've learned, and one that needs to be practiced in order to get better.
A few years ago, I attended a design seminar at Anderson Ranch, in Aspen, Colorado with Rosanne
Somerson. The first couple of days, we did nothing but sketch, sketch, sketch, and sure... we all groaned about it. But one particular drill that we did was fantastic.
I nicknamed it the "60/60" drill.
You take a simple object, anything will work. I used a plastic case that holds drawing leads for my mechanical pencil. Using a minute timer, you do 60 quick sketches, allowing only one minute for each one. Yes, that's 60 drawings in 60 minutes.
If you're groaning, don't. It isn't as bad as it sounds. Oh sure, I struggled with the first 15 or so drawings; I was trying to put too much detail in them. Just when the drawing was taking shape, the timer would ring and we had to stop. I'd start up again with that same level of detail, only to be stopped again. But when I hit the 20
th sketch, something magical happened. All of a sudden fluidity and abstraction crept into my drawing. There were about 10-20 sketches in that middle period that brought out something I can't even describe in my drawing skills. A freedom, if you will.
Every now and then, when I'm stuck on a design that I am working on, I do that same exercise with a photograph of something similar to my design. It frees up my design mind- I don't get stuck on the minutia of joints or dimensions, but rather- this allows my eyes and my sense of scale and proportion to take over. It's liberating.
You should try it- I promise it's not as bad as it sounds.
 For the past few years, I've become very interested in making dinnerware sets. I use slump molds for most of the tiles I make, where a slab of wet clay is draped over a plaster shape. It's an easy transition to go from tile making into making dinner plates. Our cupboards are filled with handmade dishes, bowls, mugs and serving pieces. And our love of sushi has led me down another path- making the perfect sushi plate.


