My Festool Domino and I have a love/hate relationship with each other.

Lately, I've been trying to find a way to use it more. So when the current Bookcase class started, I decided to attempt a bookcase using nothing but Festool joinery - and I have to say.... (swoon) ... I was reminded of how this tool can really simplify things.

I'm building a very narrow bookcase in the class, along with everyone else, and I decided to use Dominos for the corner joinery. Maybe it's not even a bookcase - it's only two feet wide, and I plan on putting a stack of drawers in the bottom of it. It may not even hold any books. OK, the more I think of it - this piece is going to be more like a narrow dresser than a bookcase.
Here's the sketch that led to this piece.

My sketches are pretty simple, just some dimensions and an overall shape. As I'm building the piece, I work out the details in my head - for example - this piece is going to have some color added to it, with Milkpaint. And possibly some carved drawer fronts. I totally got the carving bug after Dennis taught his carving class last summer.
So this post isn't about the Domino, but rather making some plunge cuts using the tablesaw. Once all of the joinery was cut on these components, I needed to cut a 1/4" slot to hold the back.
I'm not one of those furniture makers that likes to slap a back on the back of a piece, with its edges exposes. Rather, I house the back in a groove so the edges are hidden. I think it's a superior method, neater and streamlined.
The two pencil lines below mark where my bottom rail will be located. The plan is to cut s dado that stops in the middle of that rail.

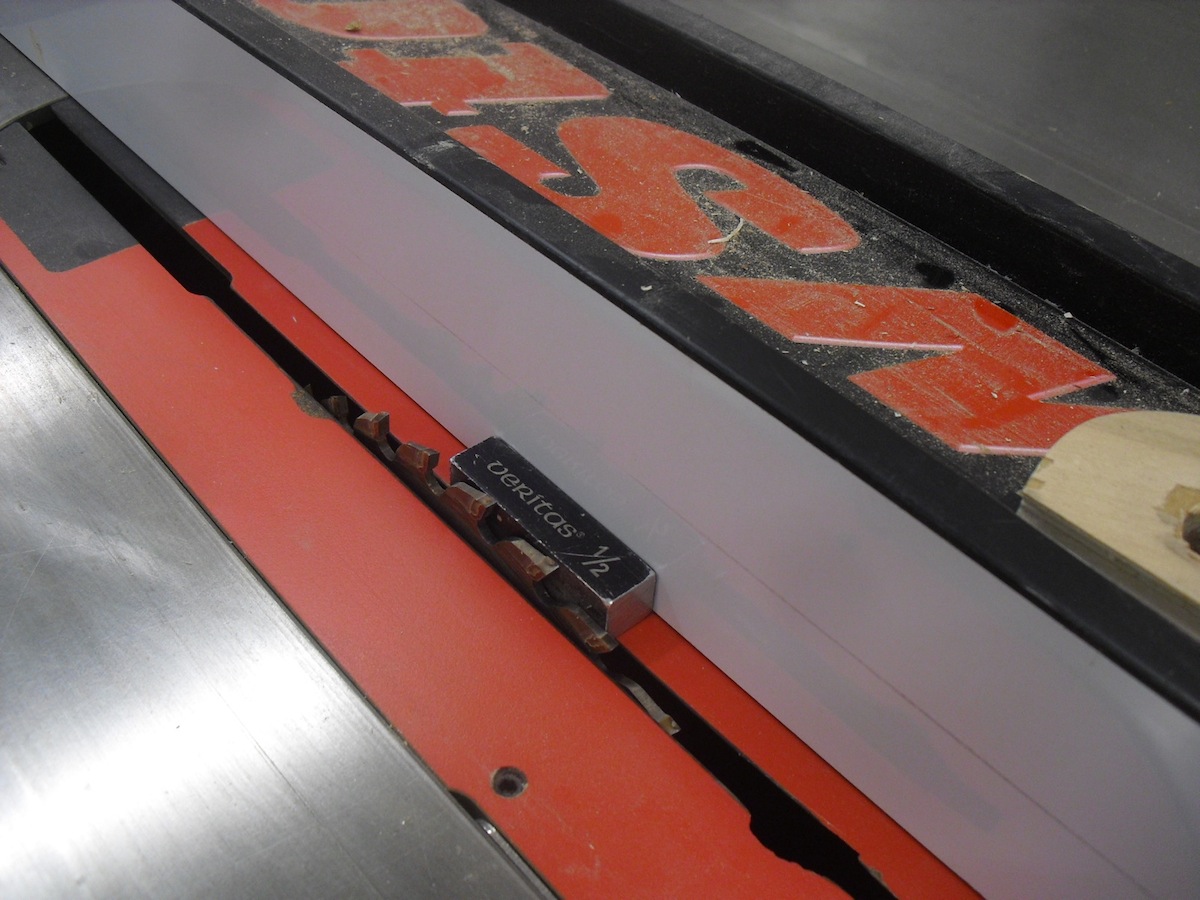
The blade is lowered to half the height of the wood,

and the fence is set a half-inch away from the blade.
With a shoulder square,


Before I begin cutting, I need to know exactly where that blade will cut into the wood. Here's how I determine that.
With the fence marked, I can start cutting.
The blade leaves a rounded edge in the dado,

but nothing a little chisel work can't fix.

After cleaning up the corners, I assemble the corner to see how it looks.

Here's that scrap of plywood in place. Sweet.

Time to measure the back.

Doesn't everyone jot their measurements down on the closest thing - a scrap of wood?

The center shelf needs to be trimmed, it's going to sit just in front of the plywood back.

I make a small test cut, to ensure it's the right size.

Yup. It. Is. Perfect.

I had every intention of showing you this piece clamped together, but I'm having some issues with the MilkPaint. For the past few days, I've been trying to mix a chocolate-y brown to use on the back of this cabinet - and every time I mix something, the color comes out wrong. I've wasted a sheet of 1/4" plywood, and three days on finding the right color - being a perfectionist isn't fun. I'll give it one more shot before I go to Plan B.
Stay tuned....
Oh look - they named these 2x3s after my buddy Dan.

No comments:
Post a Comment