A forum for discussing woodworking, specifically furniture making. Feel free to post comments and questions about your current projects, tools, studio set-up, or whatever is on your mind.
This blog is moderated by Jamie Yocono, owner of Wood It Is! Custom Cabinetry in Las Vegas, NV. Her website is wooditis.com. If you need to speak to an actual human... call 702-672-8981!
Now...let's talk wood!
Those Air Force boys sure make life interesting! This week, someone brought another fighter jet control stick to my shop, and asked if I could make a display pedestal for it.
And... could I make it in just three days.
So after listening to what he wanted, I put together this small mock-up of what I had in mind, while he waited. It was such a rush order, I didn't have a lot of time to come up with a couple of sketches, like I normally do. So I grabbed some scrap MDF and cut the small cube that he had described.
The sample box was just a little too small for all the artwork that he wanted to include on this cube, so when I made the actual solid-wood piece, I made it just a bit taller. It's a good thing!
He came back later that day, and picked up the cube so he could have it engraved. The original plan was for me to stain this pedestal, so I started staining the top and bottom pieces, while I awaited the return of the piece he took.
When he came back with it, it had the artwork, which were cloth patches and some metal coins and plates, already glued down to the cube. Check out the very cool artwork of the plane, laser engraved onto the wood. You probably can't see it, but it letters about 1/16 of an inch tall, it says - United States Air Force.
Only problem - if I applied the stain as planned, the engraved artwork would have disappeared.
Uh... what's Plan B?
All four sides of the cube were covered with artwork.
The only alternative with just 24 hours to go was to apply a couple of coats of my new "go to" finish - a Minwax Wipe On Poly. It's easy to control, dries quickly, and makes the wood look great.
I'm not a big fan of two-toned projects, but I didn't have much choice, since the other pieces were already stained. Once I attached the base, I actually really liked the effect it gave this piece.
Mounting the flight stick was another one of those "design-on-the-fly" moments, as he wanted the piece secured with a nut from the bottom, in case it ever needed to be removed. (WTF?) Finding a nut to fit this controller proved to be the most challenging part of this whole piece, but - mission accomplished.
Here is the flight stick, attached to the top piece. They chromed it. Sweet.
And finally, the finished piece, completed with just hours to spare.
Like I said, those Air Force boys sure make life interesting!
I have to hand it to Grizzly tools, they did the right thing. Back in December, I ordered one of their 12" drum sanders, the very slick looking Polar Bear series sander.
Even though the tool's 12" capacity was fairly small, the price was right and I felt like it was worth the money, if the tool performed properly.
That's a big IF.
One thing I do when considering a tool purchase is thoroughly research the tool. So I read quite a few comments from people who had purchased this sander, like this woodworker's blog post, and knew going into it that it might have some issues. Still, it sounded like a good value, and since the tool was so small, it wasn't like I was going to use it all the time.
Right?
The tool was delivered very quickly, and I mounted it on a sturdy tool stand I had in the shop. The first thing I realized is that the handle that raises and lowers the conveyor table was very short, thus reducing your leverage. That made it very difficult to raise and lower the table smoothly.
Look how short this handle is!
OK, you get what you pay for, so I switched the handle out with another one I had in my shop, a few inches longer.Problem solved.
My second issue was the Velcro that held on the sanding drum paper started de-laminating from the drum. The machine was only about two weeks old, so a call to Grizzly did the trick. I had a new Velcro drum cover in just a few days.Later, I noticed that Grizzly recommends that after you install a new piece of hook and loop paper onto the drum, you tape the ends of the drum with 3/4" strapping tape.
Seriously?
If I did that, I would be reducing the size of the drum from an already small 12" to about 10.5". If that was the case, maybe they should advertise this as a 10.5" drum sander. Here is a picture of the ends wrapped with the tape.
Whatever. I didn't wrap the drum with tape on the ends.
Yup, you guessed it - it de-laminated again.I broke down and taped the paper.
Then - one day, the sander started tripping the circuit breaker for the outlet into which it was plugged. By the time I finally got the sander to start without tripping the breaker, the conveyor wouldn't move.
This was starting to look like a nightmare purchase.
After experimenting with it a bit, I realized that if I manually moved the conveyor just a tiny bit, thus rotating the motor, it would start moving again. Perhaps there were some bad windings in the small drive motor?
I barely know what the hell that means, but the damn motor ran intermittently, and it was completely frustrating.
But - at least I could get the conveyor to work when I needed it to.
Finally - and this was the last straw - the small worm gear that controls raising and lowering the table just simply gave out. This, unfortunately, happened with a piece of wood in the sander. I can't begin to tell you what a PITA it was to dislodge the piece of wood, not to mention the fact that I had a board that was partially sanded - it was one thickness on one end, and a completely different thickness on the other end.
My solution? A kick-ass pair of vice grips allowed me to manually rotate the chain and gears that raise and lower the table. I finished sanding that board manually and threw up my hands - the last straw!
All of this occurred in about five weeks of owning the machine - with approximately 3 hours of usage. Maybe not even that much. Wow.
Of course, the tool had a 30-day money back guarantee. Only I had owned the tool for about 33 days. D'oh!
Luckily, I always save all of the boxes and packing that come with the various tools I buy. A call to Grizzly gave me the necessary return authorization number, and that baby was on it's way back to their factory pronto. It took five calls to their service department, and finally - today I received an answer - they refunded my complete purchase. At least they did the right thing. Don't get me wrong - I am happy that they did that. Thrilled, in fact.
But wouldn't it have been easier to simply make a better tool? I am quite satisfied that Grizzly treated me fairly, and have nothing bad to say about them. This is truly a case of getting what you pay for.
So here is my new dilemma, - if anyone out there can recommend a small drum sander that is captive on both ends (no cantilevered ends for me, ever again!) - I'd appreciate the recommendation.
My friends always send me links to sites that show hilarious photos of ingenious ways that people fix broken things.
One is called - There, I Fixed It, which features red-neck repair solutions. It never fails to make me laugh out loud; Stella thinks I'm nuts.
My sister and her hubby live in rural (i.e. - out in the middle of effing red-neck no-where) North Carolina, which is pretty much Red Neck Central. They would probably love this site, if they had better internet service. Maybe they should try this solution.
Another one is called - I Can Fix That. It's so entertaining, you could lose hours checking out the various "solutions" that are posted.
So my buddy Jay sent me this picture last night. He knows how safety goggle conscious I am in the woodshop. I love this solution!
Maybe these pictures make me laugh so much because my dad was always doing things like this! To everyone who has ever come up with solutions like these - thanks for the laughs!
During the first session of every Basic Woodworking class I teach, we thoroughly discuss using a tablesaw. We talk about buying one, assembling it, setting it up, calibrating it, and finally, proper methods for cutting and ripping wood.
But one of the things I tend to forget is that not everyone is familiar with a SawStop Tablesaw. The flesh-detection technology utilized by this saw is nothing short of amazing. Here it their famous video showing what the saw will do if it comes into contact with a "finger" - it's awesome.
Here is another SawStop video, much more interesting.
So what to you think - would you have the courage to test your invention in that way?
I received an e-mail last night from Chase Gugenheim, who runs the website ConstructionManagementDegree.com. Chase wrote to tell me that he chose and blogged about the top 50 Woodworking Blogs, and mine made it onto the list.
Number 17, baby!
I spent a good deal of time last night, checking out some of the other blogs mentioned - some of which I read all the time, and some I'd never heard of. There are some incredibly talented people out there, doing amazing work.
If you love woodworking, you should definitely check the list out!
There is nothing like an old fashioned cold to stop me in my tracks. I've been sick for about a week, and it's wiping me out, energy wise. Yes, I've been taking everyone's advice - rest, liquids, chicken soup - nothing is helping.
Until I get back into the woodshop, there isn't much to blog about. But I saw these videos and thought they were pretty great. .... enjoy!
This is one of those times when blogging gets in the way of woodworking! When that happens, you (meaning - me!) have to make a decision about your priority.
So here is my confession - it's all about the wood.That has to be my priority.
Remember in my last post, I was hired to turn this fighter jet control stick into a walking stick for a pilot who was retiring. A few different people who inspected this piece speculated that it was either from an F-4 jet or an F-15.
Whatever. Let's make the stick.
The pilot who is receiving this retirement gift is tall, maybe 6'3" or more, so I grabbed a few of my height-endowed buddies and had them hold the handle in a comfortable position, as if they were hiking. That gave me the rough length of this stick. It also told me that my drill press didn't have enough capacity for me to cut a tenon on the end of the piece of wood. I was just short a couple of inches, so I lifted the drill press up on the step next to it, and swiveled the head around. I also had to tilt the table 90˚ so that I could clamp the piece of wood to it.
There is more than one way to skin that proverbial cat.
Then - things got dicey. I had a class starting in an hour so, and I wanted to finish up on most of the work on this. So I forgot to take pictures along the way. Sorry.
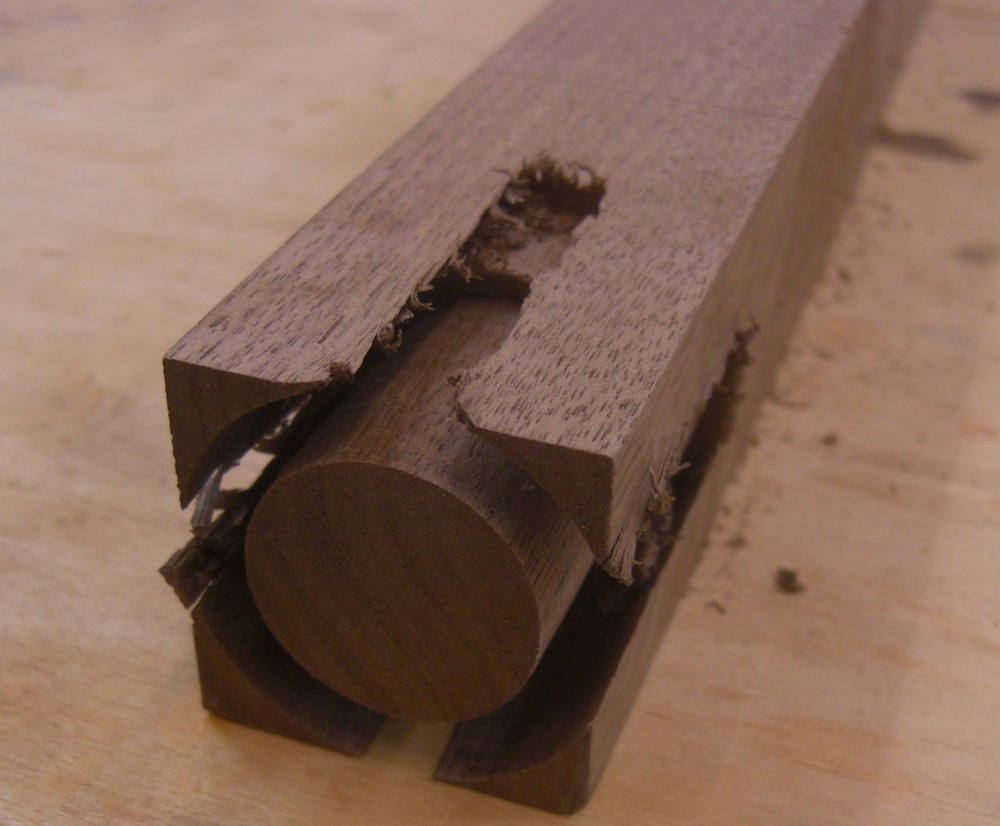
Here is the tenon formed on the end of the wood.
Next stop? Tapering.
I'll try to describe it - but it might make more sense if you scroll down to the bottom to see the finished picture of this piece. Notice how the wood tapers from about two inches at the top, to about 3/4s of an inch at the bottom? Cutting a taper like that using a taper jig with the tablesaw would have been nearly impossible.
The next best tool for tapering is the jointer, which is where I headed. Once you've tapered on the jointer, it's uber-easy. But here's a video that more or less shows how I cut them. I cut my tapers a little differently than this fellow cuts his - more conservatively, by taking many small passes over the blade, rather than the two big bites that he took. Also, He cuts his taper at the end of this piece of wood, and I start mine the nose of the piece of wood. Again - ask ten woodworkers how to do something and you'll get eleven answers. Whatever - as long as you accomplish the same end result, it really doesn't matter if everyone is safe while they're doing what they're doing.
Once the wood was tapered, I rounded over all the edges with various round-over bits on my router, so that the stick was perfectly circular. I started with a 3/4" bit, and then as the piece of wood tapered to a smaller dimension, I switched to a 1/2" bit, and then at the end, to a 3/8" bit. Again, being rushed for time didn't allow me to photograph any of this. But - it's a very easy way to make a long stick of wood appear as if it was turned on the lathe. Yup, a easier way would have been to simply buy a wooden dowel and use that, but it wouldn't have had the same, graceful tapered appearance. I considered putting a small metal cap at the end of the stick, to protect it from splitting in case it was actually used as a walking stick. Since the metal on the flight stick was silver toned, I wanted to use a material that would look similar. A stainless steel cap was a perfect solution. But - after putting a sample cap on the end, I decided I didn't really like the look of it. So I left it off. That's called artistic license, and I use mine liberally.
Next step was to apply some finish to the stick and mount the handle. I applied a couple of different finishes - first a coat of Watco Danish Oil, to bring out the color of the walnut. Then - after it dried for a few days, I applied a few coats of a handrubbed varnish, for extra protection. Using the combination of these two finishes gives you the best of both worlds - the great color that comes from using oil, and the protection that varnish provides. Sweet.
Finally, a coat of paste wax was applied. I masked off the tenon while I was applying the wax, as I didn't want to get it on the area where I would be applying epoxy.
Some five minute epoxy and a screw through one of those holes, and that handle will never come off!
Just as I was taking these last two photos, my client came in to pick up the piece.
Congrats to the pilot who received this walking stick, thanks for your many years of service. I love making unique pieces like this - enjoy your retirement!
Last night, one of the largest group of students I've worked with gathered in my studio to begin their woodworking journey. That might sound hokey, but that is the truth, and their enthusiasm was contagious. We went through a amazing amount of information, and later, they finally got some one-on-one time with wood and glue.
Does it get any better?
When I got home at the end of the night, I was running over the class in my head, thinking about how much material we used and that I'd need to prep more wood for the new class starting in just two days.
Wood, wood, wood... our lumber industry seems so antiseptic and tidy - you go to the lumberyard and pick out a board. If you're lucky, it's straightlined, relatively flat, and ready to use. But wood has changed so much over the years, do people even realize that?
Not to get all "old timer" on you, but when I was in high school, the lumber was had available was amazing - mahogany boards that were often 15" wide, with stunning color and grain figure.
Now? Narrower boards with dull color.
Think about it - how long does it take to grow a tree large enough to produce boards to use for furniture making? Are the lumber companies replacing what they cut, or is sustainability just not possible? When you read in the news about logging and deforestation, are you outraged, or do you just want that nice new bedroom set, regardless of the impact on the environment?
I've been trying to lessen the impact of the woodworking classes I teach on the environment - from the materials we use, to the finishes we apply. Students are encouraged to donate items to the shop - everything from old rags for applying finishes to carpet scraps to protect our work while sanding. Many have been much more generous - donating tools and time and woods that they no longer need. It all helps, and lessens our dependency on purchasing these items.
All of this is on my mind because I recently saw this video. The footage is stunning, showing one of the last uncontacted tribes living in Brazil, unaware of the rest of the world. But that could be about to change, with lumber companies moving in, hoping to get their hands on all that virgin timber. In this day and age of iPods, cell phones and Facebook, how is it even possible that tribes like this still exist? Amazing.
What will become of them? Is it possible that the tribe and their land will be protected, or will some large lumber conglomerate move in and take what they want? Who will step up and protect them?
What can you do? That's a good question, and I don't have an answer for it. But I do know this - we have to start replenishing this planet if we care at all about its survival. Use less plastic products. Buy less junk. Recycle. Plant a tree this spring, when you're putting your garden in the ground. Get together with your neighbors and clean up your block.
And if you're a woodworker, consider the impact of your work on the environment. Can you find a use for your sawdust? Do your wood scraps end up in the trash, or could a neighbor use them? I know that I've started donating scrap to various places around town - everything from kindling for woodstoves to sending boxes of interesting wood cut-offs to other artists for use in their work.
Oh don't get all pervy, rub blocks are one of the last steps for finishing the table in my shop. The leaves and top are getting their final coats of rubbed on poly,
and next, I'll climb underneath and apply some rub blocks to the new table extension slide. They're not totally necessary, but better quality tables use rub blocks to reinforce the slides.
So... you know I'm all about that.
Make some quarter-round molding, and cut it into 3" lengths.
Then coat the edges in glue, and rub them into place, against the slide.
Make sure you apply them on the side that stays in place, not the one that needs to move!
This has been a week of finishing up some older orders around the shop, and getting prepared for UNLV classes starting here next week. Cleaning, organizing, getting the clamps back into some semblance of order, even though that won't last. A big thanks to my buddy, Danny, who welded a new rack on top of the clamp cart, for my baby clamps.
I even hung a new self portrait in the office.
Things are getting pretty orderly, there are various projects stashed all over the shop, like Coach's set of dressers for his grandson Noah.
A little zen area of the shop - one of the Peace tumblers, and the all important carry-out menus. Nothing like picking up a steaming bowl of pho on the way home.
Finally, on to my next project. I get some of the coolest orders in town, and this is another one of them. Someone brought by a fighter jet flight stick and asked if I could turn it into a walking stick for a retiring pilot.
It's a little grubby, and needs some TLC, but entirely awesome to hold in your hand. The ergonomics of it are amazing. I'm sure those buttons do things I don't even want to think about.
So for now, I'll just concentrate on making the walking stick and think about the fellow who is retiring, thanking him for his years of service.
Back in December, I was doing some repair work to an old dining room table when I had a small accident. The finger is better (still pretty ugly, though!) and the table is finally close to being finished. With repair work, you never know what you're getting into - sometimes you'll find parts that you didn't realize were broken, or joints that need disassembled and completely rebuilt. Even worse, sometimes the wooden pieces are too warped or cracked to use again, so new pieces have to be built from scratch. Finally, getting it all to match is difficult - in short, that's why I don't take on a lot of repair work!
Here is the table with it's new top, awaiting some final coats of polyurethane.
Poly isn't my finish of choice, but for tables, it's really the best protection.I added some extension slides so that the table will hold three new leaves that I also made.
Wooden extensions like this are quirky - prone to humidity fluctuations, so I had to wait until the weather calmed down a bit. We had a rainy spell a few weeks ago, and if I had installed these then, they would have absorbed some ambient moisture and probably been difficult to open. Another thing about these slides - the manufacturer lubes them up with a greasy substance to keep them traveling smoothly. That makes them messy to handle, and if you get the lube on your hands and transfer it onto the raw wood, the finish will not absorb correctly. So the slides are one of the last parts to be attached to the table.
Here is one of the leaves, ready for drilling.
I put four wooden pins on each leaf, to align them,
and used a doweling jig to drill the holes perfectly plumb.
A simple wooden height gauge cut on the table saw ensures that all the pins are set at the same height.
Nothing glamorous going on in the woodshop, just a whole lot o' drilling.
If you know me, you know I barely use a tape measure in my shop for most tasks. Here, a series of 1-2-3 set-up blocks helps me space the holes the perfect distance from the end of each leaf.
Ready for some final tinting and poly coats.
A test fit in the table, and a big sigh of relief that this job is nearly complete!
I've been taking film classes and working on my video production skills - gotta love being a Mac user and using iMovie. Here's a little video on drilling all the leaf pin holes. (As usual, I work better to loud and fast music, so if that bothers you, turn the volume down.) The video is mostly for wood geeks, but have a look.
Sometimes watching how something is built is much easier than having it explained to you. Here's a lovely, folding bookstand, somewhat complicated to build. Check out this nicely produced video to see how it's made.