
This three piece front started out behind the eight-ball because I'd run out of an attractive piece of wood. So I had to take the last board left, rip it into strips, and re-glue it back together, changing the grain orientation. I decided to take it a step further and create a faint herringbone pattern, with a center seam, for the center drawer front.
Luckily, my local Festool rep gave me a Domino to play with, so that joint is beefed up with some large tenons inside of it. After it was glued and planed, I routed a large sweeping curve into it.

And then laid out the three pieces in order to line up the curve on the two outside pieces.


I couldn't decide if I wanted to keep the curve aligned along the entire front, or jog it down a bit on the two outside drawers.

But the drawer faces were a little oversized, so I had some material with which to experiment.
Routing those curves was the easy part - I used the original template (that I used for making the desk top) and made a "mate" for it - that gave me a set of matching 48" radius circles - an inside curve and it's matching outside curve. Why did I need both pieces?
Anyone that's done routing knows that a router can have a mind of it's own, often traveling into areas in which you didn't intend to be cut! So I wanted to protect the drawer faces by using a plywood template that wouldn't allow my bit to veer off course.
I clamped the template to one of the outside pieces.

Then I routed out the area, using a straight bit and a template guide.

Someone asked me about my blog, specifically - how I shoot the photos and capture the various steps along the way. Honestly, I feel as if I do that pretty haphazardly. My workbench is always a huge mess, which is why I shoot these photos fairly tight. No sense in letting you see my clutter.

Once the curve was routed I had to do a little hand work with a chisel, since the router bit couldn't reach into the far corners of that curve.
In the end, I decided to align the routed curves on the faces.

To me, it's always the most stressful part of the building process to hang these fronts. If anyone out there has any tips (besides using two sided tape or those concentric drawer face adjusters), I'd love to hear how you do it.
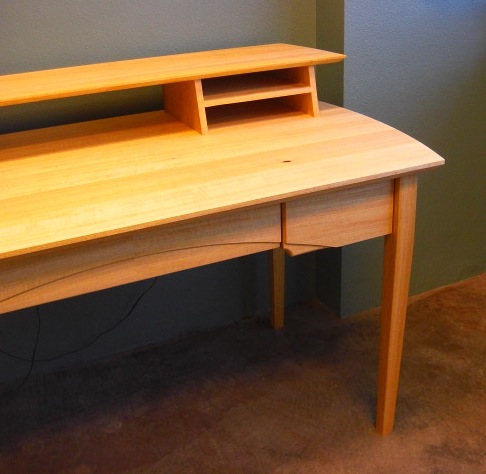
Meanwhile, I'll just start "moving" into my new desk.
2 comments:
That's beautiful, the way you did the drawer fronts. Do you find sometimes you turn out with the best results after being "behind the eight-ball?" I use double-sided tape to hang my drawers, what about a small dab of hot glue, would that work and then pop off after?
Jamie, I had to look at your desk again because I really like the lines of it. Adding that radius to the drawers really gives the piece movement. When I make drawers with a loose front I don't use the adjusters, rather I drill an oversized hole and then use a screw from McFeely's called Super Round Washer. You might check out this number B04C which is on a box of 8 x 1 1/8" that I have. I've got a box of 100 so if you want to try them I'll give you some. John
Post a Comment