About a year ago, I took a glaze making class with my local ceramic supplier, in hopes of learning some basic theory. It was helpful, no doubt, but there is SO MUCH seat of the pants knowledge that this requires. It's not something you can simply learn in one class, but rather, you need a lifetime of experience with glaze chemicals in order to know what you're doing.
How will a Red Iron Oxide wash behave under a white glaze? What will the addition of Chrome do to a recipe? Can I mix a white and a black glaze to achieve a gray color? The only way to know is to TEST, TEST, TEST, and even then, different clay bodies will give you different answers. Even different kilns will give you different results. Even different cooling rates can change everything.
To a beginner, it's a daunting challenge to absorb all this.
There is a certain elegance to the art of glaze making . There's no guessing, no "oh, let's add a dash of this" sort of experimentation. It's sort of like cooking, but not. Precision is perfecrtion. Pull out your triple beam scale and take notes. Take GOOD notes.
So imagine my surprise when I opened the kiln a couple of days ago and got a purple version of John Hesselberth and Ron Roy's Waterfall Brown. Gorgeous violet purple. Completely unplanned purple. Purple without notes purple. WTF?

It started by having a little extra shelf space in the top of my kiln load. I didn't have much, but there was a spot I wanted to fill, so I picked up a small medallion tile that I had fired a few months ago. I didn't like the way it turned out, and had stuck it on a shelf, trying to decide what to do with it.
Fast forward to this week, when I mixed up a batch of Nutmeg and White Satin glaze, my newest project. These glazes can be combined to mimic a wood fired look, and I had already thrown a few test tiles into this kiln, just for a little extra research.
I took that medallion, painted it with the Nutmeg, and sure enough.... purple. WTF Purple, which is what I may name it, if I ever figure out what the hell I did.
Which brings me back to my glaze making class. I remember one employee at the ceramic store told me a story of a glaze test he did - he could never reproduce the exact color of it ever again. EVER. He wasn't sure if his notes were bad, or his chemicals had changed, or whatever. All he knew was that he was on a quest to reproduce that, and after MANY, MANY attempts, he still wasn't any closer.
So even though I managed to achieve a lovely Purple Waterfall Glaze, Who knows if I'm going to be able to repeat it. Oy.
______________
One more thing... here are a couple of small soy bowls with some interesting results of the WF glaze:


Went to Hawaii for a much needed dose of inspiration, good food, and good company. Did some hiking, which is about as foreign to me as astrophysics. Here's a short video of me crossing a raging stream. Don't believe the smile on my face; the bridge was terrifying and the stream below had swelled, due to record amounts of rain. Normally, this stream is small and you can cross it by hopping on a few rocks.
This is the first time I've played around with putting a video on this blog- it's a humbling experience, trust me. The sound is hard to control, the editing is even more difficult, and on top of all that, this clip makes my legs look like sausages! They say that film adds 15 pounds to everyone, but no one mentioned the height compression factor. Oy!
I suspect much of my upcoming work is going to reflect some Hawaiian influence. The islands are filled with tribal art, ancient petroglyphs, and some incredible artists.
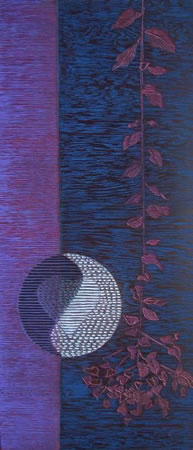
One of my all time favorites is Joelle Chicheportiche-Perz, who has been living in Hawaii since 1982. This piece is simply incredible, this picture doesn't do it justice. It's a solid block of Purpleheart wood, carved and painted in the most exquisite detail imaginable. Her work never fails to inspire and surprise me. If you visit her website and click on the"new work" tab, you'll see some fascinating information about her new work that explores her unique combination of oil paint on carved wood.
Viewpoints Gallery is a must see for me during every visit. And just a few steps from the lovely glass studio - Hot Island Glass.
Is it too early in the day to make a mai-tai?
It's important to know your materials, whether you're working with wood or clay. As many readers here might know, I've done extensive testing with the WaterFall glazes from the book "Mastering Cone Six Glazes" by John Hesselberth and Ron Roy. You may have to scroll back a bit through the archives, but you'll be able to see many of the colors I've developed.

And while that particular glaze continues to fascinate, challenge and surprise me, I must admit after 200+ tests, I needed a break! It had gotten to the point where I knew the base recipe by heart, much like I know my favorite cookie recipe.
When you can mix something up in your sleep, you know you've had too much exposure.
I was scouring through some old Ceramics Monthly magazines and something caught my eye in the February 2003 issue. Richard Busch wrote a fascinating article about his work developing a glaze that would makes pots look like they'd been wood fired. I remember standing there in my studio, mouth wide open at the lovely photos of his work. I was hooked.

There might be someone out there wondering why anyone would want to try this when... well, why not just fire a kiln with wood? Here in the desert, the drought has scorched our land. That's not even taking into account the restrictions on kiln firing within city limits. It's simply not a practical option for me.
Of course, anyone who pots knows that you can't just mix up some glaze and hope for the same results. Variables in clay bodies and glaze materials will produce different results for different people. Back to the drawing board for me.
In his article, Richard Busch gives three recipes, and a variety of tips for achieving what many people will have a hard time distinguishing isn't actually a wood fired piece. Only when the bottom of a pot is examined can someone discover that the unglazed clay body hasn't been reduced.
His White Satin Matt Glaze and his Nutmeg glaze can be mixed together and applied in various ratios, depending on the "toastiness" you desire. Also, these glazes can be layered on top of one another for different effects. Finally, he gives a recipe entitled "Sybil's black stain, for adding some brushwork and/or simulating the errant floating specs that occur in wood fired work.
Below are my experiments.

Above tiles are test #1, and are a 50/50 mixture of the White and Nutmeg glazes.

Pictured above is sample #2, which contains 1/3 White and 2/3 Nutmeg. The golden colors are rich and black stain pops out nicely.

I'm not sure if the above samples are that helpful, but these are glazes #1 and 2 dipped. The application was probably too thin; I will probably retest these using thicker glazes next time. Both tests are on the glossy side.

The above tiles (#3) are are glazed with a mixture of 2/3 White Satin and 1/3 Nutmeg. The color is a little too light for my taste, and because the white is predominant, it is more matte.

Test #4 (above) finally starts approaching what I wanted - a deep golden, toasty color. This glaze consists of 25% White Satin and 75% Nutmeg. This version seems to work best when applied heavy.

Dipped versions of #3 and 4. Once again, the glaze was probably applied too thin on these samples. I will retest all the dipped pieces.
There are so many possibilities with these glazes, and as time permits, I'll be testing and working out the fit on my clay body.
PS... I'm editing this post because I've located Richard Busch. He runs Glenfiddich Farm Pottery, outside Leesburg, Virginia, and his site has some lovely examples of his work.
 This is completely unrelated to woodworking, but then again... well, maybe it's not.
My New Year's resolution last year was to learn something new, and among the choices I gave myself, learning to solve the Rubik's cube seemed the most "doable" to me.
So I bought a cube and taught myself how do it. It took about a week of playing with it, on and off. Once you get it, you "get it."
And even though I'm somewhat of a math geek, the algorithms baffled me. There's a whiz online- Tyson Mao , who "taught" me how to do it. Check out this video of him, speedcubing.
My best time was about 15 minutes, which is a joke compared to Tyson.
Once I learned how to do it - and believe me, it was a bit of a struggle at first - I promptly put the cube on a shelf and forgot about it.
Fast forward one year, I saw something that reminded me of the cube, so I picked it up again. The biggest surprise? I solved the cube in about 4 minutes.
 Which brings me back to muscle memory.
As a woodworker, there are certain things I do over and over. Laying out mortise and tenons. Screwing pieces together, then plugging the holes with solid wood plugs. Cleaning up the edges of boards in preparation for gluing them together. Chamfering with a hand plane. You get the picture.
There's a certain fluidity of motion that comes from doing the same tasks over and over. In fact, I know I'm a better woodworker now that I was ten years ago, or even five years ago. I just do things better. It's all about the dance of motion, and that only comes from muscle memory.
Any you though this blog post was about a Rubik's cube!
Any woodworkers out there want to challenge me to a Rubik's duel?
An artist never argues with a little press. Well... unless it's bad press...
Recently, a midwest regional art based online journal featured a few artists, and I was fortunate to be one of them. Here's a link to the article on Art-to-Art Palette.
It's only up through February 4, 2008.
 I love CraigsList, I've found some of the coolest things there, and met some outstanding people, too. Some have even become great friends of mine. This, however, might take the prize for the coolest/most bizarre thing I've seen on CraigsList in a long time:
For Sale - beautiful pink “vagina couch” that I made in art school and no longer have space for. The couch is large: measures 5'3" long, 3'3" wide at the middle, and stands 2'3" tall (and is heavy like a couch). The pics are from my portfolio and are several years old; as a result, the couch has some scuffmarks and stains around the bottom from being moved, but otherwise is in excellent shape. A professional upholsterer helped me build the couch, so it is also functional and durable as a piece of furniture. The couch must be picked up in Mendocino, a 3-hour drive north of SF. I am asking for $600 and a loving home! Jeez, I thought the couch I made in college, out of a bathtub, was cool.......

Ever have a question about something, and you wish you knew an expert in that area, so you could ask him or her about it? Like a car repair question, or something about a medical procedure, investment advice, or even choosing a mover?
I've been volunteering for a long time with an online service called All Experts, it's a wonderful place to find answers to various questions that you might have. Once they've answered your question, you can rate the volunteer on a variety of things, from knowledge, clarity, and timeliness, to politeness. And you can nominate the person for volunteer of the month, should you be so thrilled with their answer.
I'm listed a volunteer in the "woodworking" section, with cabinets, furniture and woodworks as my area of specialty, and over the years, I've answered hundreds of questions, in fact, I just learned I've answered 1071 questions since I signed up to volunteer. I finally wised up and started saving my answers on my computer, because many of the questions I receive are similar. I've probably answered "how do I get rid of the greasy film on my kitchen cabinets" at least a dozen times, and the second most common question is about removing white water rings from furniture. So when I receive those duplicates, I cut and paste from my old answers, since usually the same information will apply.
And my third most common question from people on the All Experts site is about becoming a woodworker and making money from it. Apparently, people are under the impression that wood workers are wealthy! I liken woodworking to owning a boat. What's that line that a boat is a hole in the water you pour money into? A woodshop often becomes the black hole for your hard earned dollars.
Not too long after you become an "expert" woodworker, you'll want to buy those Beall wood threaders, Incra Jigs, Leigh Dovetailers, and so on.... and you'll probably use them probably once a year. OK, maybe that's an exaggeration, but there are a whole lot of gizmos out there you don't need, and it's easy to get sucked into purchasing them.
So those questions about "how do I get started in woodworking?" always make me smile. I usually list the necessary stationary power tools they'll need (tablesaw, planer, joiner, drill press, sanders, mortisers, router tables) and then casually throw in all the incidentals that you can't be without (clamps, bits, hand tools, supplies like sanding disks, glues, dowels.... well, you get the picture. A decent woodshop is expensive, and learning how to use everything properly is important.
Which brings me to my old buddy Tage Frid.
 We met a long time ago, at a workshop he was giving in Atlanta, at Highland Woodworking. There were about 30 of us in his class, and he was charming, and a great communicator of woodworking techniques. In fact, he demonstrated how to make a curved raised panel, which was an amazing technique to learn. After the demo, I asked Tage if I could have it, and today, it's still sitting on a bookshelf in my office, reminding me of that special week learning with him.

OK- so where is all this going?
When I graduated from college, one thing I knew for sure is that I still had a lot to learn about being a woodworker. It's a never ending education. But one of the best ways I learned about woodworking was to take Tage's book- Tage Frid Teaches Woodworking: Joinery: Tools and Techniques into my woodshop and use it as a visual guide for learning how to cut joints in wood.
I opened that book up on my tablesaw, and proceeded to cut every single joint in his book, from dovetails to fingerjoints, mortise and tenons to compound miter joints. It was like having Tage right there with me, at every step.
By the way, the second most popular boat quote is "The two happiest days in a boaters life is when he buys his boat and the day he sells it." Luckily, this doesn't hold true for woodworking. Most people I know enjoy it well into their golden years. It's a shame so many people wait until retirement to take up woodworking, it's a shame to miss all those years of enjoyment.
There was a story this past weekend in the NY Times Sunday Magazine that made me a little blue. Peg Bracken died this year. She wrote a groundbreaking book in 1960 called “The I Hate to Cook Book”. Something about that title fascinated me when I was young.
 I remember thinking that it sounded so nonchalant- like how could someone write a book about cooking, when she hated cooking? But later, I learned that it was all about understanding what you're doing well enough to fudge it when you need to. That if something is a bore to do, then find a way to make it more tolerable. Of course, the martini in her hand went a long way in making the daily ritual better. It dawned on me when I read her obituary that she probably made the Rachel Rays of today possible by making it acceptable to whip up a meal in 30 minutes.
Oh course, with titles like Hellzapoppin' Cheese Rice, or Hootenholler Whiskey Quick Bread how could anyone resist reading her books, let alone trying some of her recipes?
To me, there's a direct correlation between cooking and woodworking, it's probably why I enjoy doing both. (I only drink while doing one.) They're creative, rewarding, relaxing, fun... I could go on. I've learned about an "economy of motion", whether I'm in the kitchen or the woodshop. I can cut some corners if I need to, or do things exactly by the book.
What? Cut corners while making a piece of furniture? It's called outsourcing, and depending on the budget of my customers, I may choose to buy components like dovetailed drawers, raised panel doors and so on. A girl's got to know her limitations!
When I used to teach furniture making, I used to quote parts of Peg's books in my classes. I'm a big fan of throwing the tape measure out the window, and building by the seat of your pants. Oh, I don't mean you can just start cutting boards and gluing them together without having a plan. Not at all.
But so many beginning woodworkers start out with a plan they've purchased from a woodworking store or magazine. These plans often have mistakes, by the way; it's been proven. And then that same beginner ends up making one error after the other. In the end, they wind up with a piece that's not only sapped them of their money and their time, but their 'joie de vivre' for woodworking.
As Stephen King would say - it's rong, rong, R O N G - wrong.Over time, I made myself become a better woodworker by building in organized steps, sub-assemblies, if you will. I'll make a table, and if - for some unforeseen reason, the aprons end up being a half inch shorter, then so be it. Is it true to the original design? Not exactly. Does it accomplish the same thing? Mostly. Is it better? Sometimes. Call me flexible, call it whatever, but I'm not going to throw a table leg into my scrap pile because a knot ended up making it shorter than I intended.
It's "rolling with the punches" woodworking and we've all done it. Or at least, those of us who've built a lot of pieces, have done it. Knots happen, dings occur. Get over it. It's like life.
Which brings me back to Peg Bracken. I Googled her when I read of her death, I was trying to find a clip of her old TV commercial, where she snarls out "I'm Peg Bracken... and I wrote the "I hate to cookbook", with a cigarette in her hand. I was amazed at how many people have blogged about her. It's possibly a testimony of the times, but there seems to be a great number of people who loved her. Count me in. I wonder if Erma Bombeck ever owned a tablesaw?
OK, so I'm not the most techno-oriented woodworker around. I can barely figure out all the settings on my cell phone, not to mention that I had no idea how to set the old VCR. But I did learn something a couple days ago that was pretty awesome. Someone mentioned to me that my digital camera probably has a macro setting on it, allowing me to take close-ups of my work."Look for the flower" she said.Lo and behold, I found it. I've been playing with it ever since! Here are some of my latest shots of a couple of soy bowls for some sushi sets I've been making:


 Been firing the kiln nearly every other day, trying to keep up.
More later.....
I received an e-mail from a friend recently, he said he was busier than a one-armed paper hanger. I'm not sure that's PC, but I can relate.
It seems as if every time one project gets completed, another is lurking in the wings. On top of that, clay is my BIGGEST distraction. So even though I have every intention of finishing up the tile sets I've been making, I keep making new sushi dinnerware sets. Here are some of the small sushi plates/soy bowls that I pulled from the kiln this week.
 These dishes are part of small sushi sets I have been selling on Etsy.com. And since I recently expanded my shipping zones to include Europe, I've been getting a great deal of interest in these sets. Who knew?
Here's a link to that Etsy page.
In the book "Mastering Cone 6 Glazes", there is a recipe for Waterfall Brown, a gorgeous glaze that I've written about extensively in past blogs. These plates show some versions of that glaze that I've developed - a gold version, and a light blue version. This picture doesn't do them justice.
Incidentally, I took a sushi making class a local kitchen store that I adore, and started making my own rolls at home. If anyone wants the recipe for a killer spicy tuna roll, e-mail me.
Kanpai!

I hate to say that this blog is a low priority, but when things gets hectic and sawdust is flying in my studio..... well, this blog gets pushed to the back burner.
Meanwhile, I'm working on about 10 different pieces/designs/bids at once. Here are a couple of photos of two scaled models that I recently made for a client. They represent a couple of different table base styles, both of which I'm quite fond of making.
 The larger table will eventually be 12 feet long. Which makes my back hurt just thinking about it.Pass the Advil.
PS... I'd like to add something here about Blogger.com, which is the service I use to host this blog. It's been miserably difficult to use the past few days. For a while, it wasn't allowing anyone to upload photographs, which pretty much renders this blog useless.
And now, that the image upload issue seems to be solved, there is a text issue. The spacing and layouts are all wrong. So if this post looks jumbled and odd, I apologize. It looks particularly bad on AOL, so anyone viewing this on AOL must wonder how I can call myself an artist!
AOL users- try viewing this in Firefox, Safari, or Netscape and it should look better. My apologies.
 It's been a while since I posted any new glaze test results here.
If anyone's been following this blog, they know that I've been trying to come up with a green version of a glaze made popular in the book "Mastering Cone 6 Glazes. Every time I fire the kiln, I manage to place a few test pieces somewhere inside, hoping to find the color that I can see in my head, but I just can't seem to formulate. I've gotten tips and recipes from potters all over the world. I'm inspired by not only their encouragement, but by hearing about their work and dedication to ceramics.
These two test tiles came from a recent firing. The glaze has some lovely crystals and color, and perhaps I'm too critical, but the color isn't EXACTLY what I wanted. I've been wanting a deeper green, and these are more avocado. Every time I look at these, I want to reach for some tortilla chips.
I had a woodworking epiphany several years ago, at 38,000 feet while on my way to San Diego for a little R&R. Looking back, it was a benign moment. I was staring out the airplane window, studying the crop circles below, made from elaborate irrigation systems. Here are some table tops that came from that inspiration:


I make circular tiles to hold that "something special" that you don't want to misplace. It might be your watch, when you work out, or your keys when you walk in the door at the end of your day. There's a slight dip in the tile, perfect for holding whatever you want it to hold. These tops have morphed over the years, I started adding a little carving to some of them. But what these pictures really remind me of is how many large holes I have routed over the years.
Because the tiles shrink as they dry, their exact size is somewhat hard to determine. I like small grout lines, so even if the hole is 1/4" too big, the resulting grout line can be large and unattractive.
I needed a better way to rout circles, and I've been searching a long time.
Fast forward to this past July, when I attended the AWFS show (the Association of Woodworking & Furnishings Suppliers) here in Las Vegas. I usually try to enroll in a few seminars, and then spend some time touring the exhibitor halls. I'd seen a review of a new router accessory, called the Router Buddy, and thought it might work for me. So imagine my delight when the inventor, Louis Duplessis, had a booth, and was giving demonstrations.

It's truly a simple concept, you drill a small hole in the center of your desired circle. There's a small pin on the router base, which slips into the hole you drilled. The router rotates around that pin, it's very simple and effective, and easy to micro-adjust. In fact, it's the best system I've ever seen.

I liked it so much, I had Louis autograph the package!

I'm working on a few speculative pieces right now, there's a film maker who has expressed some interest in doing short documentaries on Las Vegas artists. So I'm trying to prepare a few things to work on when she arrives with her film crew. This piece is a current one- a small ritual table, perfect for everything from mediation, to using as a bed tray. It's Walnut, with a drawer that pulls out of the side, making access easier than a drawer in front. As usual, I'm inlaying one of my tiles. Here are a few pictures in progress. I'll post more when it's finished.


Meanwhile, if you're interested in the Router Buddy, here's a link to Louis' site.