One of the byproducts of this pandemic is all of the do-it-yourself-ers who have learned to build, and started projects around the house. Or just jumped back into hobbies that they used to enjoy, but never had time to pursue them. My friend Sharon Gainsburg, who owns and operates a stone carving school here in town often sends her students over to my shop,
to design pedestals for their sculptures. So with the boom of DIY work, there's also a boom of creativity - whether it involves stone carving, ceramic work, epoxy pours, spoon carving - you name it, I've been seeing it!Now, I enjoy a good challenge when making a sculpture base - sometimes it's locating an obscure color or wood (or dyeing wood to match something), or installing hardware I'm not used to... there are almost always some interesting challenges.
But a recent commission was not only a really fun piece to build, it was a bit of a math test for me. And I love math!
You remember back in Geometry class, when we learned about trapezoids, right? (Thanks, Miss Gibson!)
I'll make it easy on you...
What is a trapezoid shape? A trapezoid is a quadrilateral with at least one pair of parallel sides. No other features matter. (In English-speaking countries outside of North America, the equivalent term is trapezium.) The parallel sides may be vertical , horizontal , or slanting .
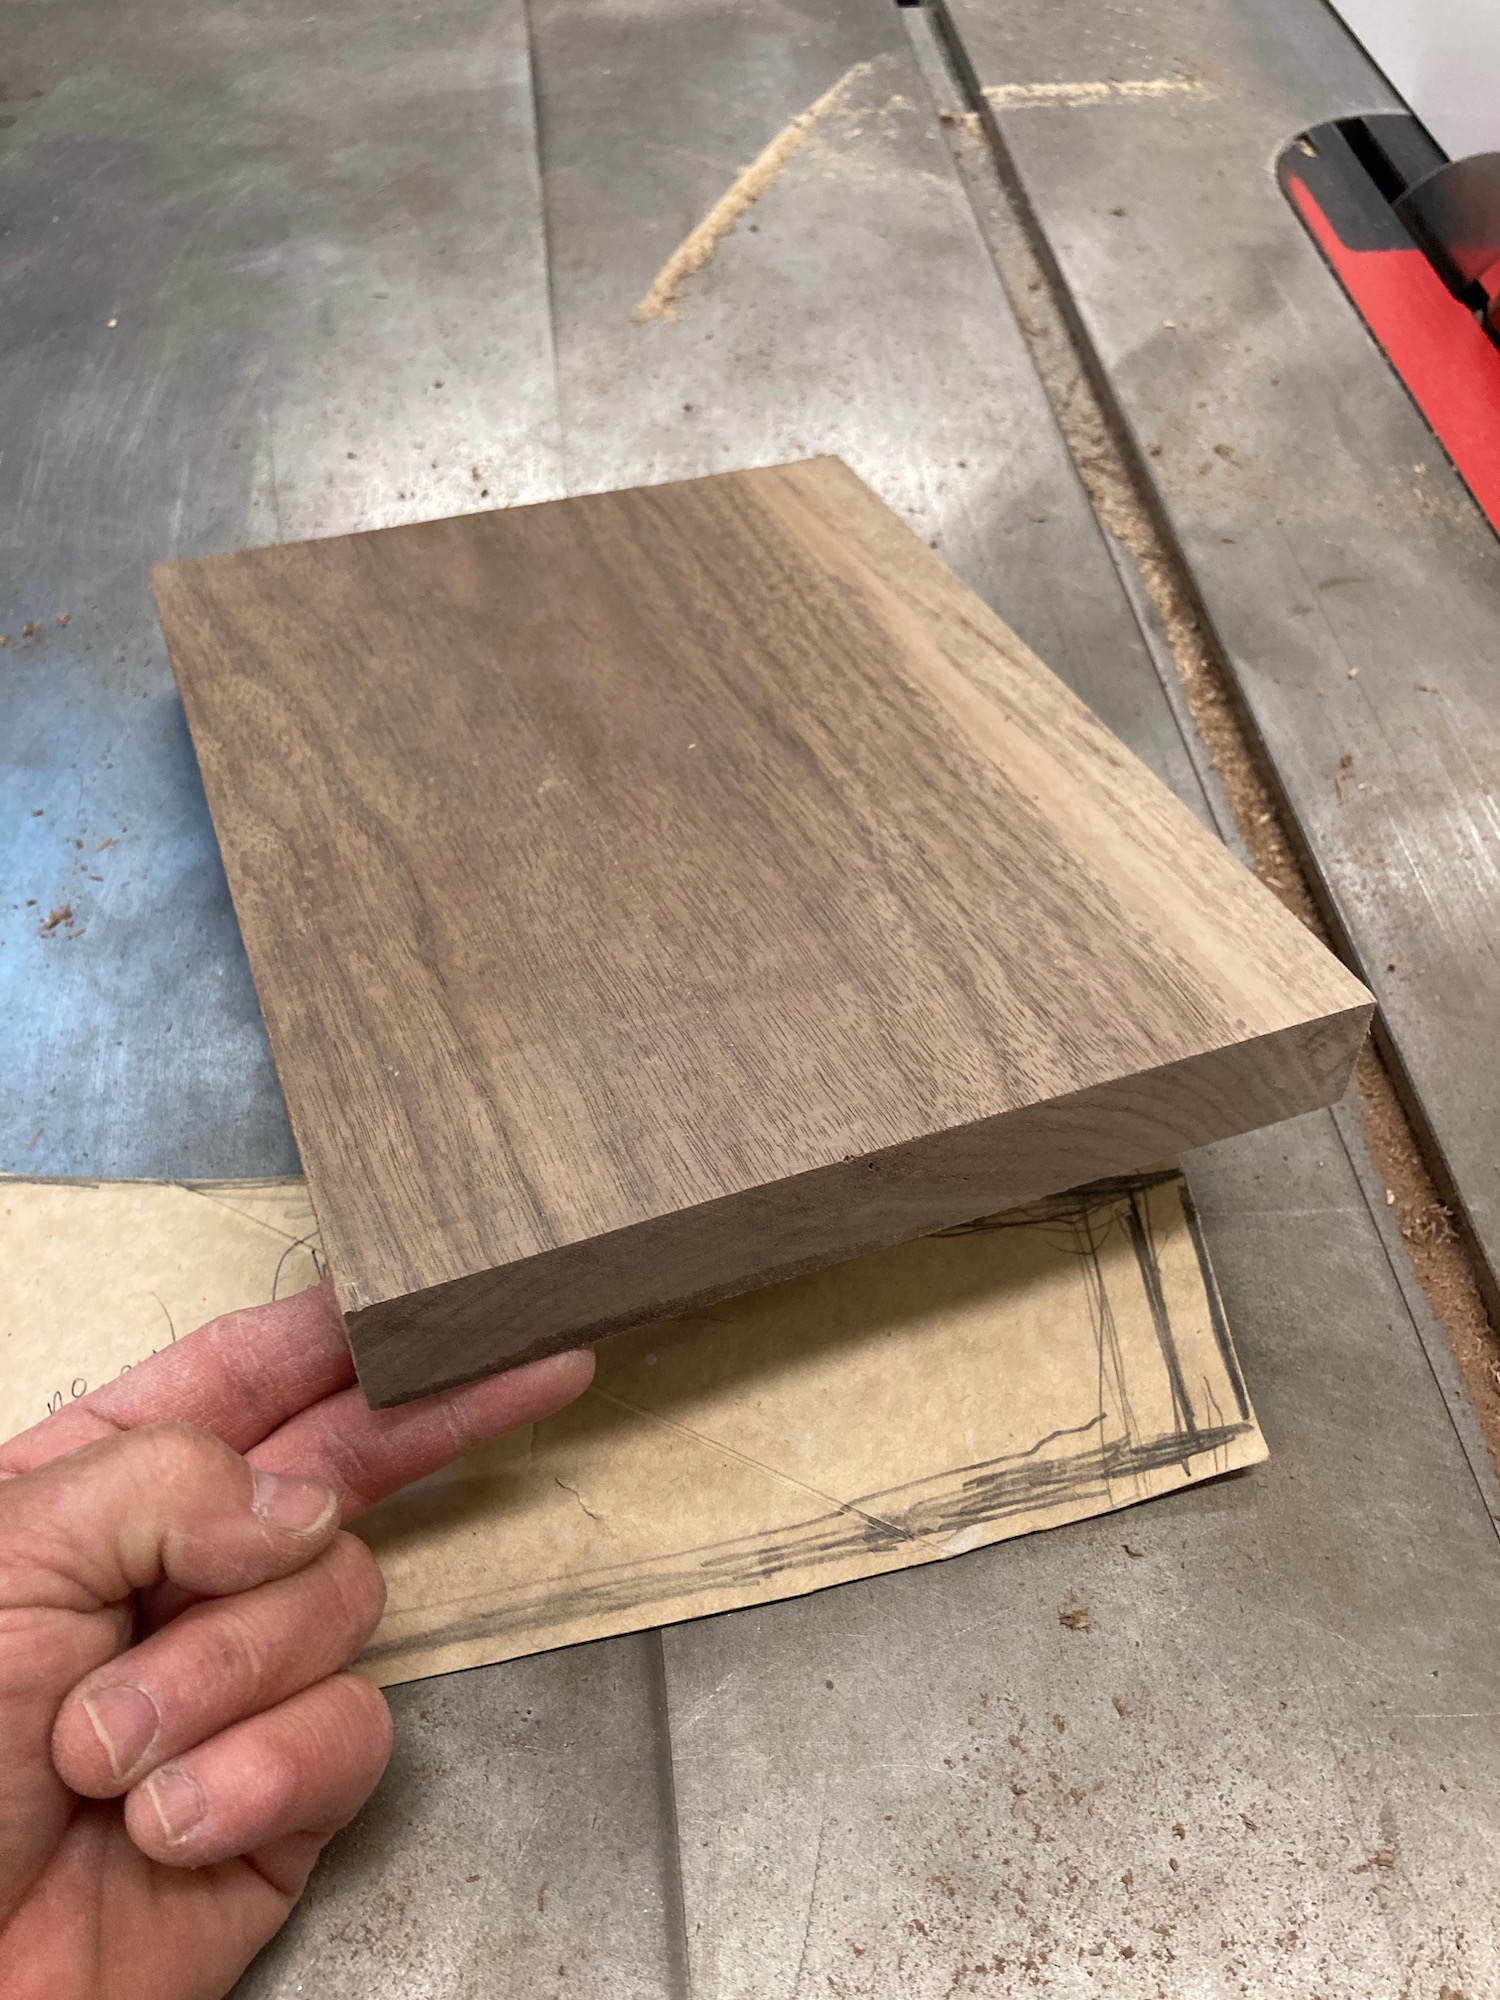
So when a sculptor asked me to make an odd shape, and the only thing I had to work with was this torn cardboard pattern - well.... challenge accepted!
I'd acquired a really nice 1" thick board of walnut - sometimes pieces like that present a problem. They're too small to make a large project out of it, but too big to be considered scrap. Those pieces usually just sit on a shelf, awaiting inspiration. Honestly, this board didn't know that it was destined to become a sculpture base, but I knew it as soon as I saw the cardboard pattern.
Again - math was the key, and I calculated that each board needed to have about a half inch of taper cut into it. So I taped a 1/2" shim on one end, and cut the excess away of the tablesaw.
I'm not sure what I'll do with these massive walnut shims, but they're pretty cool looking.
Meanwhile, the pedestal is taking shape,
which each tapered piece creating a lovely end grain pattern.
Once I had chosen the layout, I numbered them and braced myself for a bit of a clamping nightmare.
Tapered pieces always slip when clamping them, so I pulled out some extra clamps and cauls, and got to work.
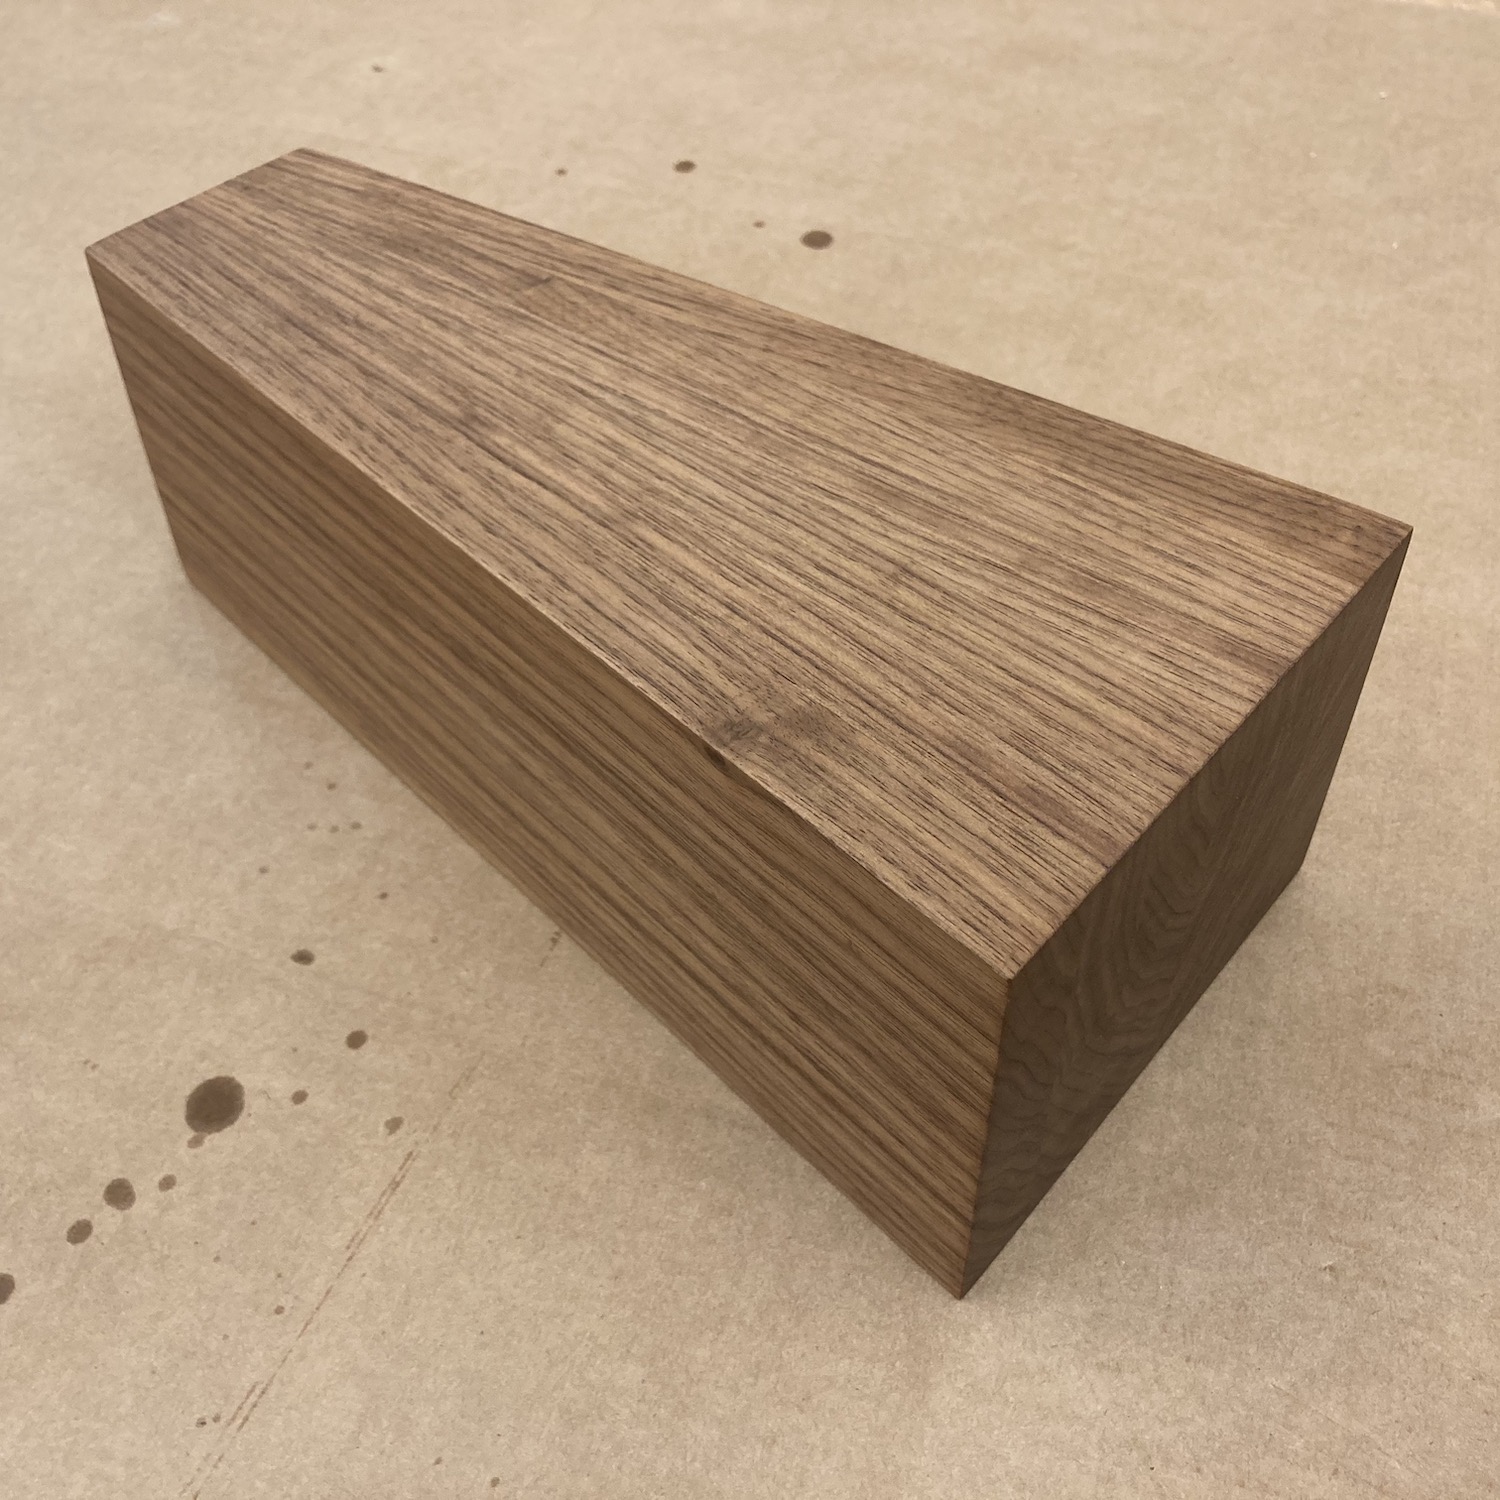
After it was dry, I little trimming and jointing was all that was needed to come up with this nearly seamless block of gorgeousness!
The end grain pattern almost hypnotizes you! And this block is nothing to sneeze at - almost 7 pounds of solid walnut.
I cannot wait to see this piece, when the sculpture is mounted to it! Hopefully, I'll have a photo to share with you.


4 comments:
Nice project, Jamie! It is a gorgeous piece of wood and you had nice results.
I always like to see how people solve woodworking problems and try to visualize their approach. I have a few questions:
What was the initial size of the piece of walnut?
What is the final size of the little pedestal?
Finally, when cutting the taper with the tablesaw, how did you position the piece of wood for cutting? Was the wood on edge with one front corner edge touching the fence and the shim touching the fence on the rear? If that was the case, how does one safely push it through when it is angled that way between the blade and the fence without some sort of jig or cradle?
Glad you are staying very busy and productive.
Be well and take care!
The original board was about 6' long, I cut it into 6 pieces about 12" long. Tapered every piece, and then glued them all together.
The dimensions of the base are 12" long, about 5" wide, tapering down to around 3" wide. Entire block was 4" tall.
Taping that 1/2" block to the side of the piece allowed me to taper/resaw the board without the need of a taper jig. But - since it was 4" tall, I had to cut it halfway through one side, and then flip it over to complete the cut.
Easy peasy!
Thank you for your response, Jamie.
I just went out to the shop, cut a 12" long scrap piece of wood, taped a 1/2" block to it, and made the cut. To my delight, it does work as advertised.
I love learning at least one new thing per day. This was it. Thank you for making my day.
Be well! :-)
Turned out beautifully. I thought your original piece was about 12” long and could not figure out what you did (other than magic) to create the piece! Thanks to your ‘conversation’ with Lupe, I now get it. I look forward to seeing the final piece. P.S. I also love math and find it really helps me in the workshop.
Post a Comment