It feels like I've been working on Lazy Susan installs all summer. Or spring and summer... or even longer. In other words, I've been working with Susans a lot lately!
Although I almost never paint anything I make,
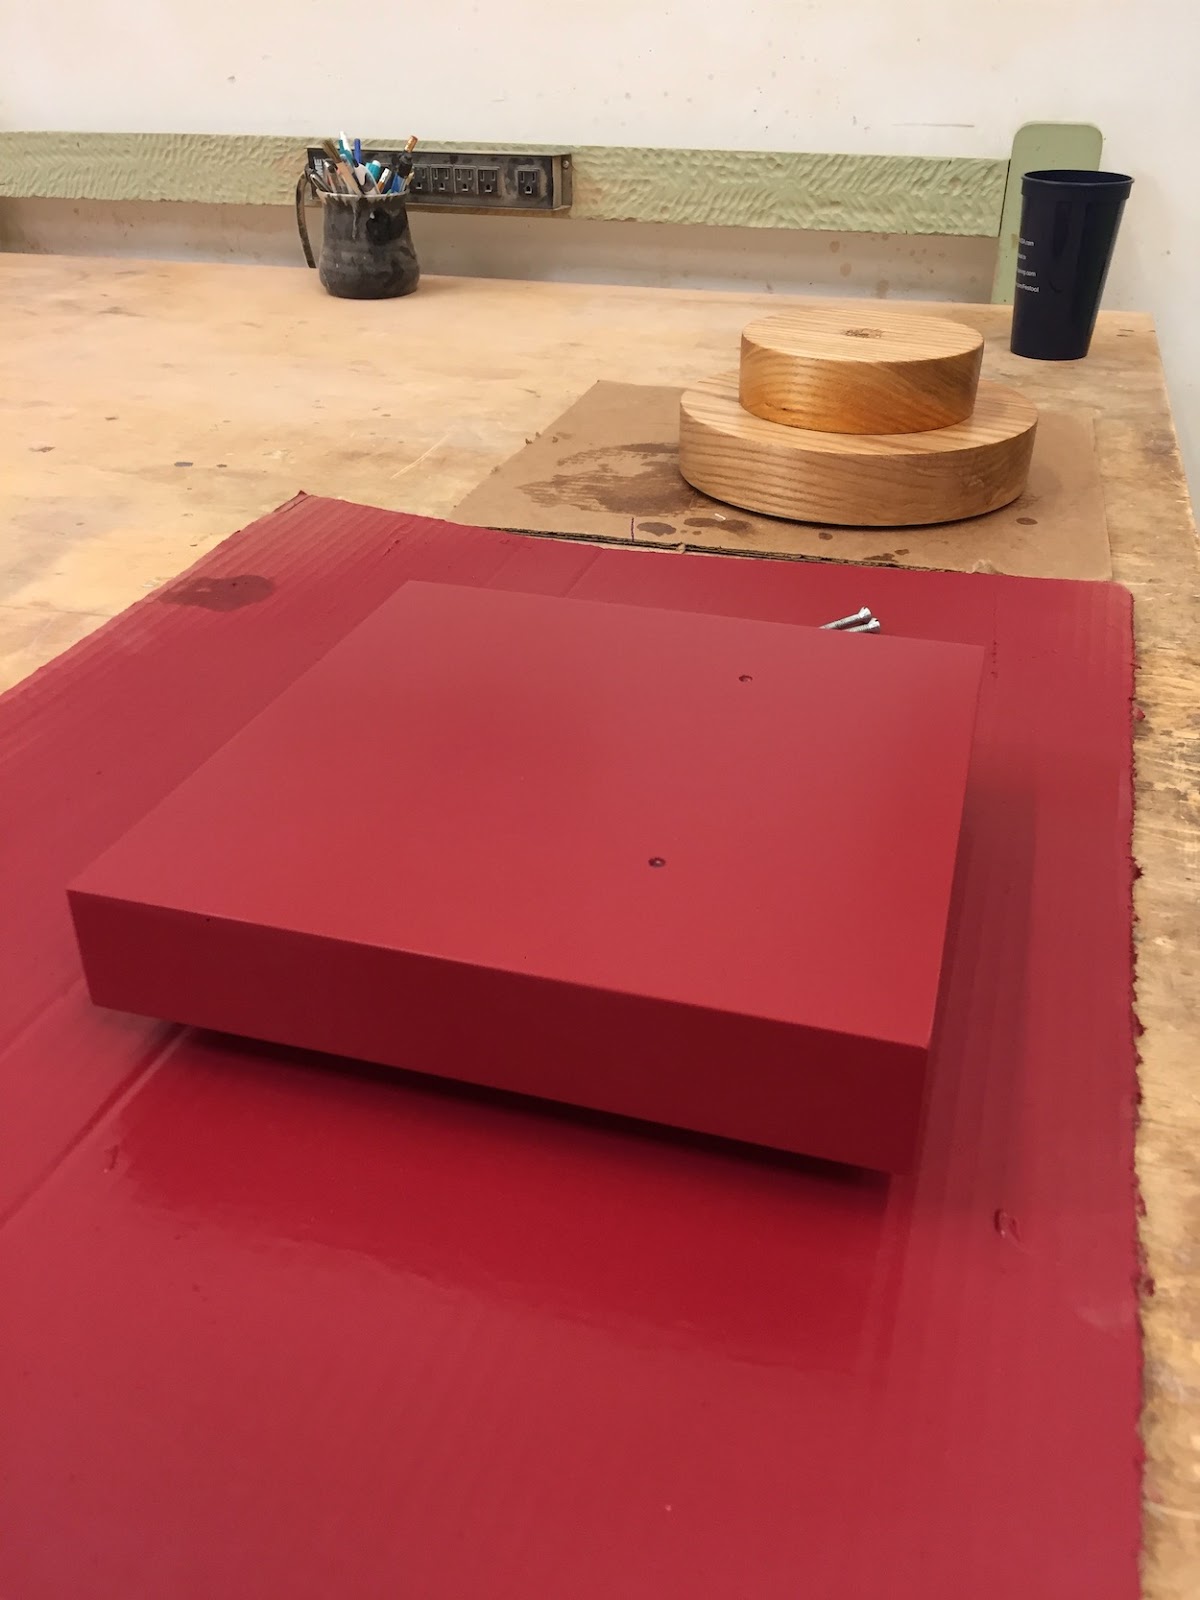
this red base fit perfectly with this metal piece.

I don't even remember what this double decker base was used for, but I ended up making a second one, after someone saw it and wanted a duplicate.

This natural live edge base, complete with worm trails on the front edge,

was a terrific way to display this fish sculpture.

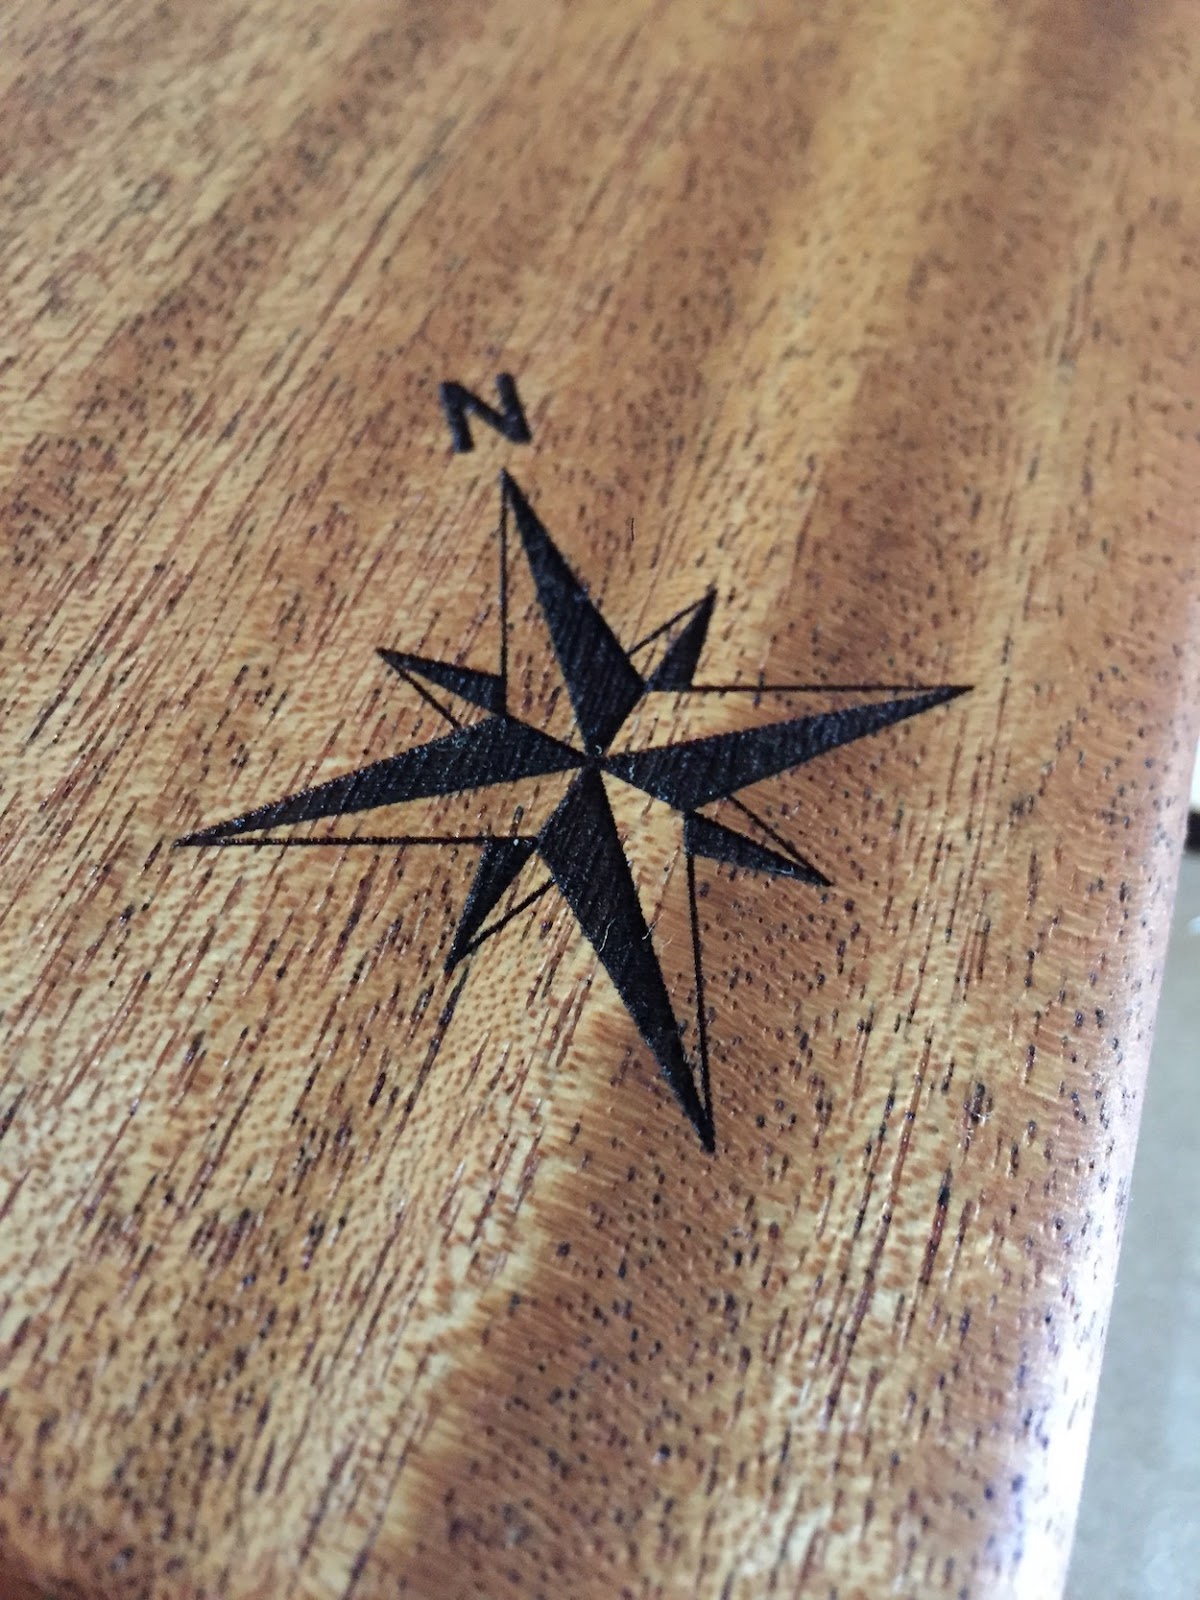
And this one was first base that I made after I set up my Glowforge laser. We tested a few stains on the mahogany, to bring out the color a bit.

The grain and chatoyancy was breathtaking,

and the lasered artwork fit perfectly on this base. The sculpture that was mounted on this had a nautical theme, and this base with that piece is one of my favorites
But almost every one of these sculpture pedestals has a lazy susan swivel inlaid into the bottom, so that the piece can be rotated.
You can't just mount the swivel directly on the bottom, as it is a little too tall (or thick), thus creating too wide of a gap under the base.
Sure, I've seen some made this way, but when it is inlaid about halfway into the wood - the smaller reveal looks much better.
So - it takes a little bit of work, but it's worth the trouble.
This week, I've been inlaying these like mad! Here's how I inlaid this small-ish swivel (say that five-times-fast!).

If you draw lines from corner to corner on your wood, the dead center is where the lines intersect. I have a very slick compass set-up in my router, called the Router Buddy, which needs an 1/8" hole drilled in the center of the area that I want to rout.


This pin on the bottom of the router base slips into that center hole, and allows the router to pivot around, cutting a perfect circle.
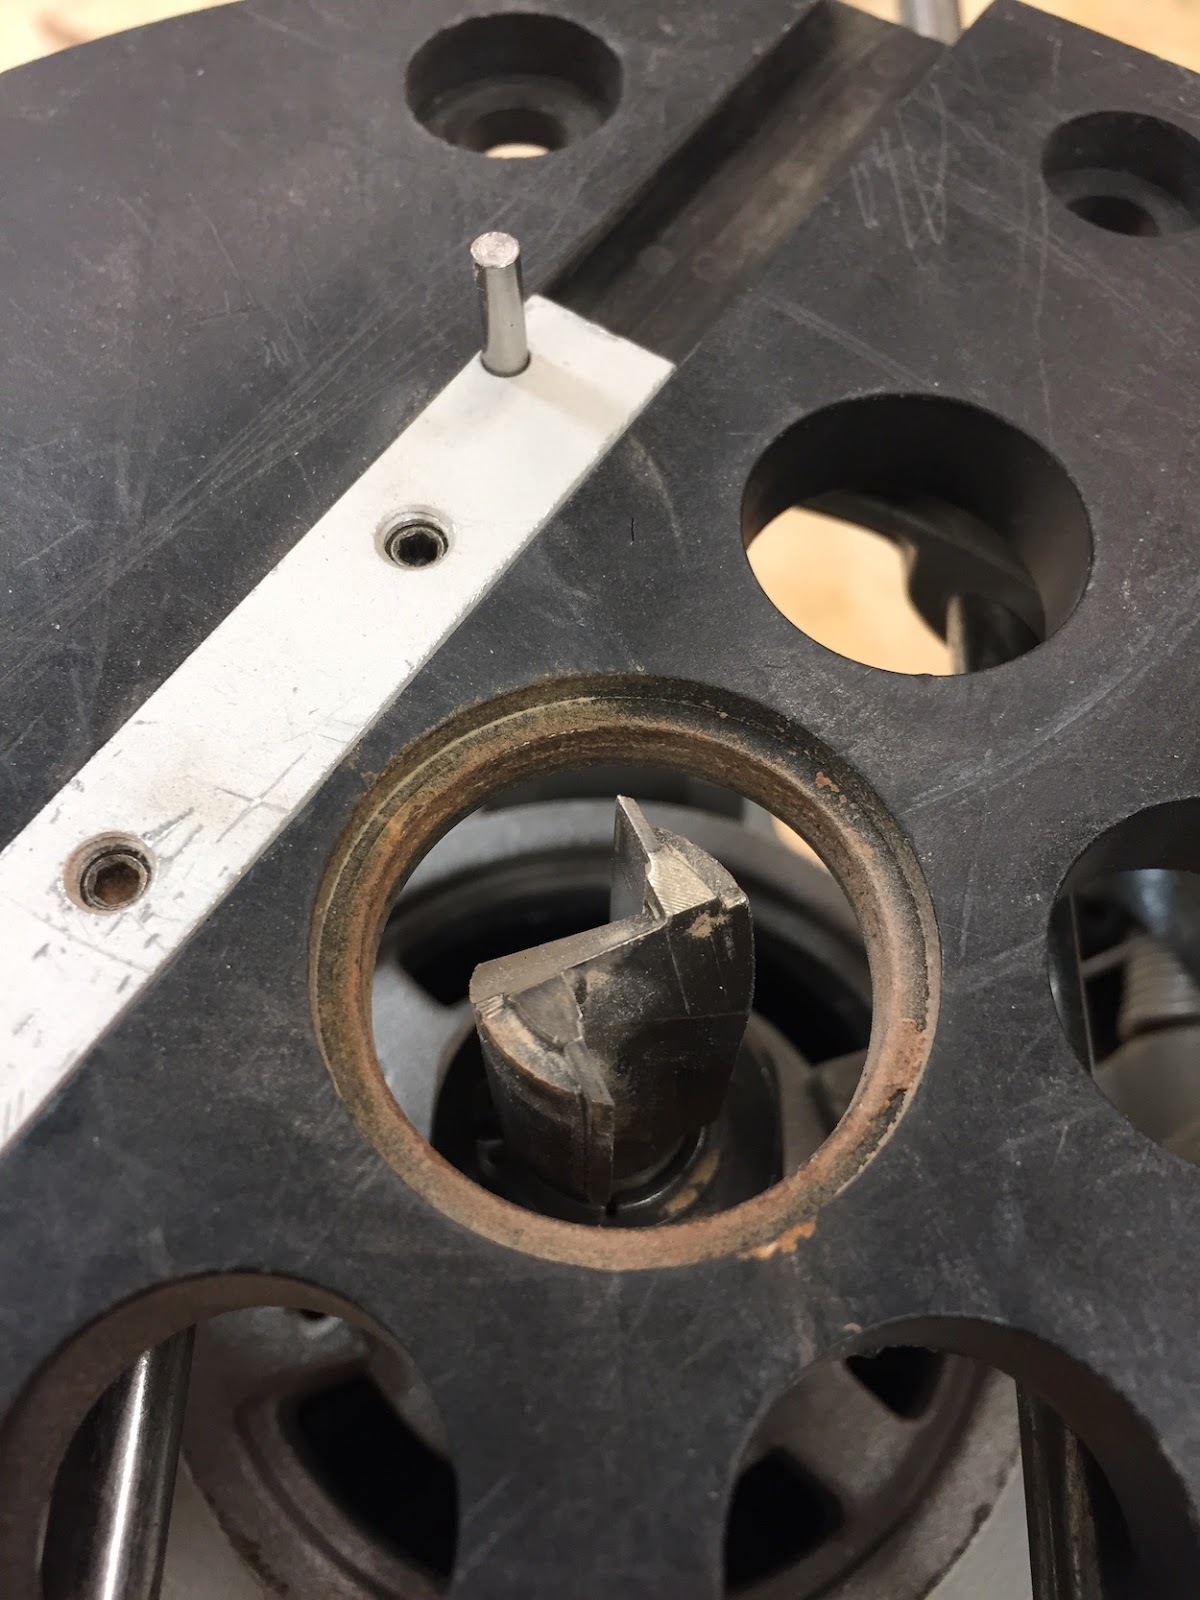
Because that pin is adjustable, I can cut just about any size of a hole that I need.

But first - I need to set the depth of my cut - in this case, an 1/8".

This setup block allows me to set that depth in no time. A single plunge cut with a flat bottomed bit cuts this donut in no time... maybe 20 seconds, at most.

I could have adjusted the compass jig to make one more cut, making the center just a bit smaller, so the swivel would have fit perfectly over it, but instead - decided to take out the entire center area. Since that center was about 2" in diameter, I simply drilled it out with a 2" forstner bit.
And - BAM! ... an inlaid swivel. It's not difficult to do this, but when you have a few dozen of these to inlay, you want to complete this in as few steps as possible.

Once this walnut base is oiled and the swivel attached, it'll be time to mount the sculpture. I'll leave that task up to the sculptor ... I have another few dozen swivels to inlay!
No comments:
Post a Comment