It's been said that chairs are the single hardest piece of furniture to build. Many woodworkers shy away from the challenge, but the ones who bravely (or stupidly!) attempt chair making often wind up with chairs that are either uncomfortable or poorly designed. Everyone of us has had a chair with stretchers that have loosened up, or with joints that have failed. In fact - a lot of people call me to repair those chairs!
Chairs take more abuse than just about any other piece of furniture in your home. People tip backward or rock on two legs, or they stand up on the stretchers, or slam their bodies down into the seat - whatever. They get abused.
Not to mention the design aspect of chairs – they have to be comfortable or you won't want to sit on them, right?
So – there is a lot going when you make a chair.
I've been without a set of dining room chairs for a few years - so it's finally time to build some. I have so many designs floating around in my head that I can't decide which one I want to make. And - truth be told, I get bored building the same thing, over and over again. So I came up with an idea - I'm going to build my chairs in sets of two. Four different designs. No boredom. Problem solved.
My first design is going to be a solid wooden chair, as opposed to an upholstered one. I love solid wooden chairs, similar to the ones Thomas Moser makes. They're comfortable, they look great, and there's something pure about them only being constructed of wood. No padding. No fabric. Nothing but wood.
A while back, Lupe made a shop stool after seeing the video made by Scott Morrison. There were a lot of nice features in the stool but I didn't like the curved legs, nor some of the design details that were included in this piece. Still - I decided to adapt this design to make my first set of two chairs.
Lupe scooped her seat by hand, purchasing a small hand-held grinder and a Holey Galahad, which is a grinding device. Carving the seat took about three or four hours, and made a lot of dust. More dust than I wanted to deal with, that's for sure. Luckily, someone sent her a link to a chair scooping video on the web.
She ended up building the jig for seat scooping, and demonstrated its usage at the last Sin City Woodworkers meeting held at my shop. It's a terrific device, and- I don't have any clue how someone could've invented this - but I'm glad they did.
So I borrowed the jig, and got down to business.
Here's the seat blank made in solid 8/4 ash – it's lovely. I cut the notches at the corners that will later allow me to attach the legs.


And here's the jig.

This is one of the dustiest procedures I've ever seen in the shop, but it's at least it's not as bad as carving the seat with the Galahad.

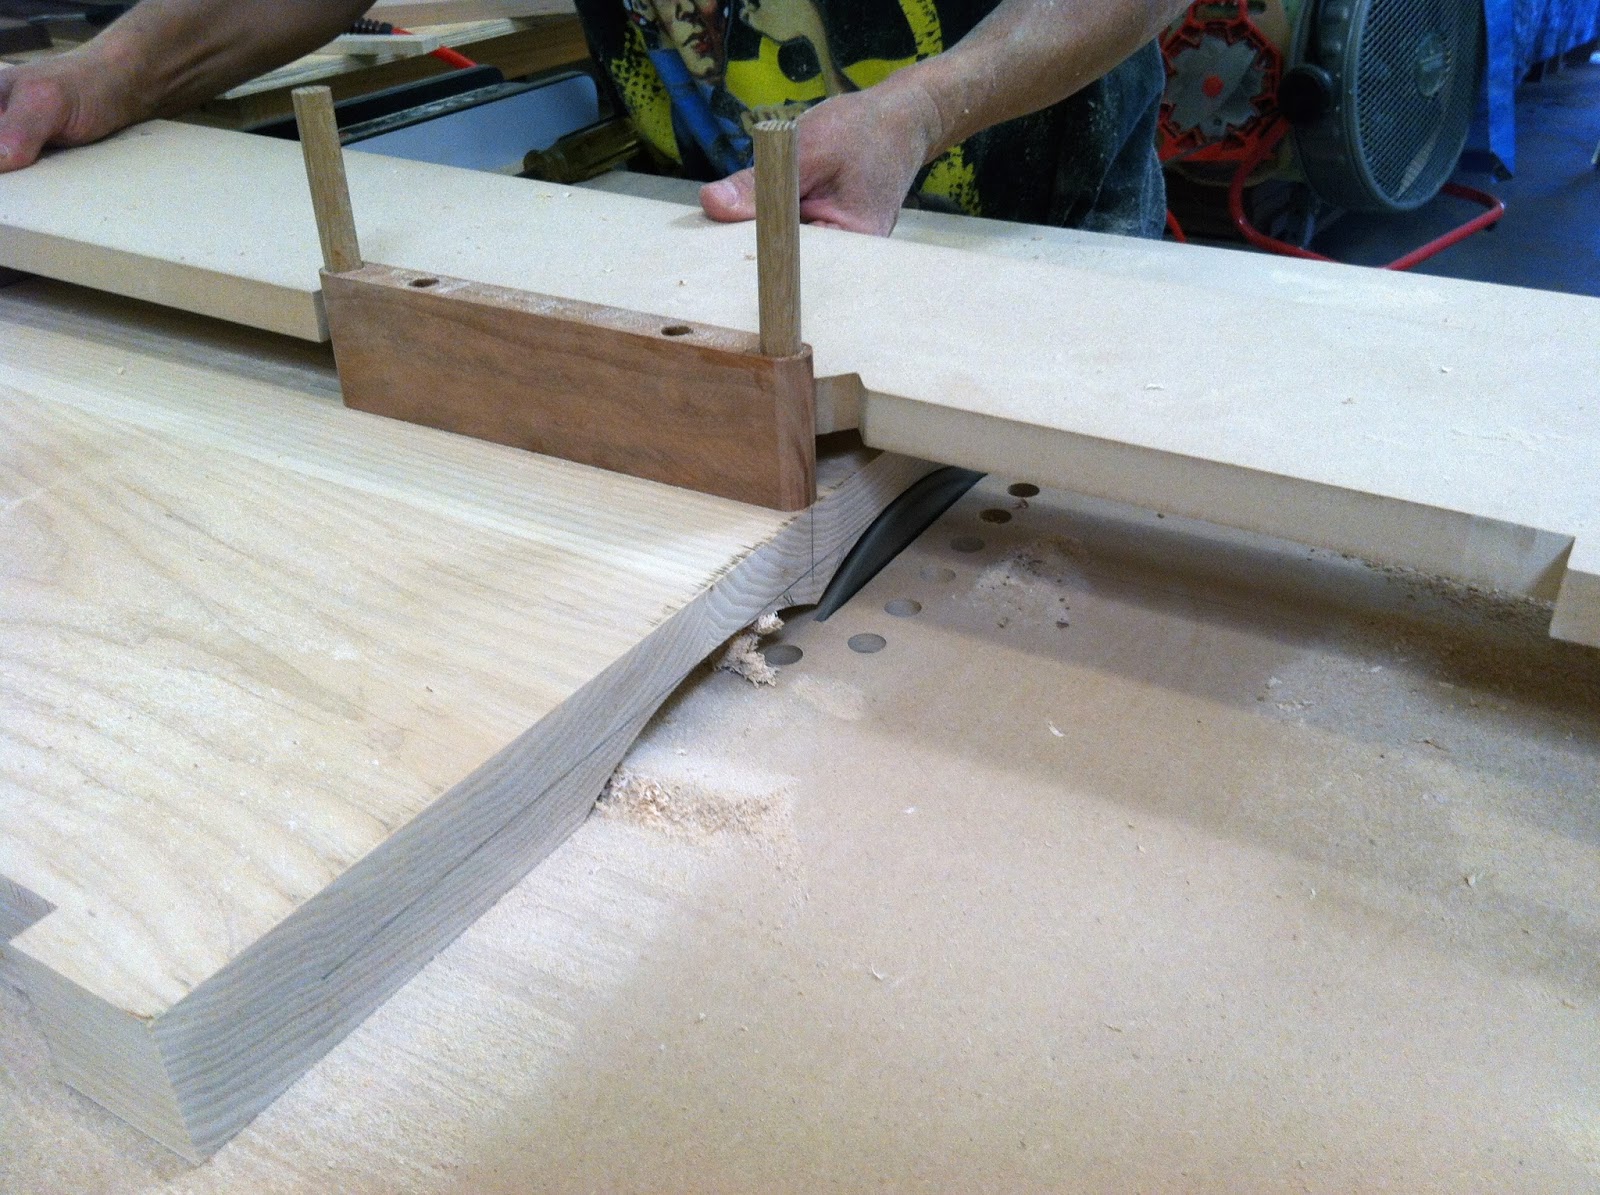
Each seat took about ten minutes for me to scoop, and I'll tell you - in all my years of woodworking,

I'm not sure I've ever seen anything so slick.

This device is screwed onto the bottom of your seat blank it is used to control the seat while you maneuver it over the blade.


How did someone come up with this?


It. Is. perfect.


Thanks for the video work, Lupe! Time for a break - I needed some Advil and some sustenance.


My next big decision will be whether I'm going to cut the curve in the back, or if I'm going to do a bent lamination. But for now - I'm just going to take a break and ponder this.
Stay tuned.
4 comments:
looks like a great idea.. i find the last comment on that video link great:
"if you superglue temporary 1/4″ or 1/8″ spacers at the front of the scooped side of the seat, it should make the scoop deeper at the back, right?"
sounds like an interesting twist to this method.
hope all is well in Vegas, wish I could stop by the shop!
Where can I get the plans to make the jig ?
You can download a digital copy of the magazine here:
http://www.shopwoodworking.com/popular-woodworking-magazine-august-2013?utm_source=popularwoodworking.com&utm_medium=referral&utm_campaign=pww-mfj-bl-170211
Hope this helps - it's a great jig!
Greetings from California! I'm bored to death at work so I decided to check out your blog on my iphone during lunch break.
I enjoy the knowledge you present here and can't wait to take a look when I get home.
I'm amazed at how quick your blog loaded on my phone ..
I'm not even using WIFI, just 3G .. Anyhow, great site!
Post a Comment