Sometimes these blog posts materialize quickly, like the last one,which popped up in a day. But this one has been in the works for a very long time.
See - when you have a woodshop where there are classes running constantly, and steady stream of woodworkers making things, then you have a ton of scrap material that builds up quickly. That's not always a bad thing - because you can turn this scrap into some of the most lovely end grain boards that you'll ever see.
I call them - confetti boards. They look like you've thrown a bunch of wood bits into the air, and they come down landing like this.

Years ago, I visited my buddy Larry's woodshop, and realized that he had more scrap than anyone could possibly use. Seriously, he probably had scraps from the 1970s laying around his shop. I showed him how to make this type of board, and he's been making and selling them ever since - commanding top dollar for these boards!
Yes, end grain boards are in high demand, as they are kinder to knives than traditional cutting boards, which look like these.

As the theory goes, end grain boards are "self healing" with knife marks and cuts eventually "closing back up." I'm not so sure I buy that 100%, but I know that the end grain's vertical wood fibers are more open to the knife edge. Or as Pete in the Sin City Woodworkers group described - imagine a broom turned upside down. Now imagine using a knife on the very vertical edges of those broom bristles. When the knife cuts into them, the bristles part. When the knife is pulled away, the bristles go back together. That's the concept of an end grain board.
Me? I just think they look WAY better, and the fact that they're kinder to my knives is simply a plus.
But they're a TON of work - in some cases - the amount of work is quadrupled. That's why they're so damn expensive. See - with a traditional board - you glue it up


Me? I just think they look WAY better, and the fact that they're kinder to my knives is simply a plus.
But they're a TON of work - in some cases - the amount of work is quadrupled. That's why they're so damn expensive. See - with a traditional board - you glue it up

and plane it down.
You can add some plugs to spice things up. Or not.

These traditional boards are pretty simple. Just a few steps and you have a work of beauty.
End grain boards are a whole different beast.
It starts with scrap.
End grain boards are a whole different beast.
It starts with scrap.

Lots of it.

You'll need more scrap than you could ever dream about, if you want to make a lot of these boards.

I save and eventually sort the scrap into piles.

Each pile is sorted into boards that are relatively the same thickness, so that I can glue up the "blanks" that are needed for these boards.

Each blank is glued randomly - and honestly - the more random, the better. Thin strips work really well - so even if you have a quarter inch piece of material, it will play a part in this project. (This project may turn you into a hoarder.)

The only thing you should aim for is contrast - light/dark woods.

Over and over again.

And - over and over again.

When you plane these down, you want them in random thicknesses - honestly - anything goes!
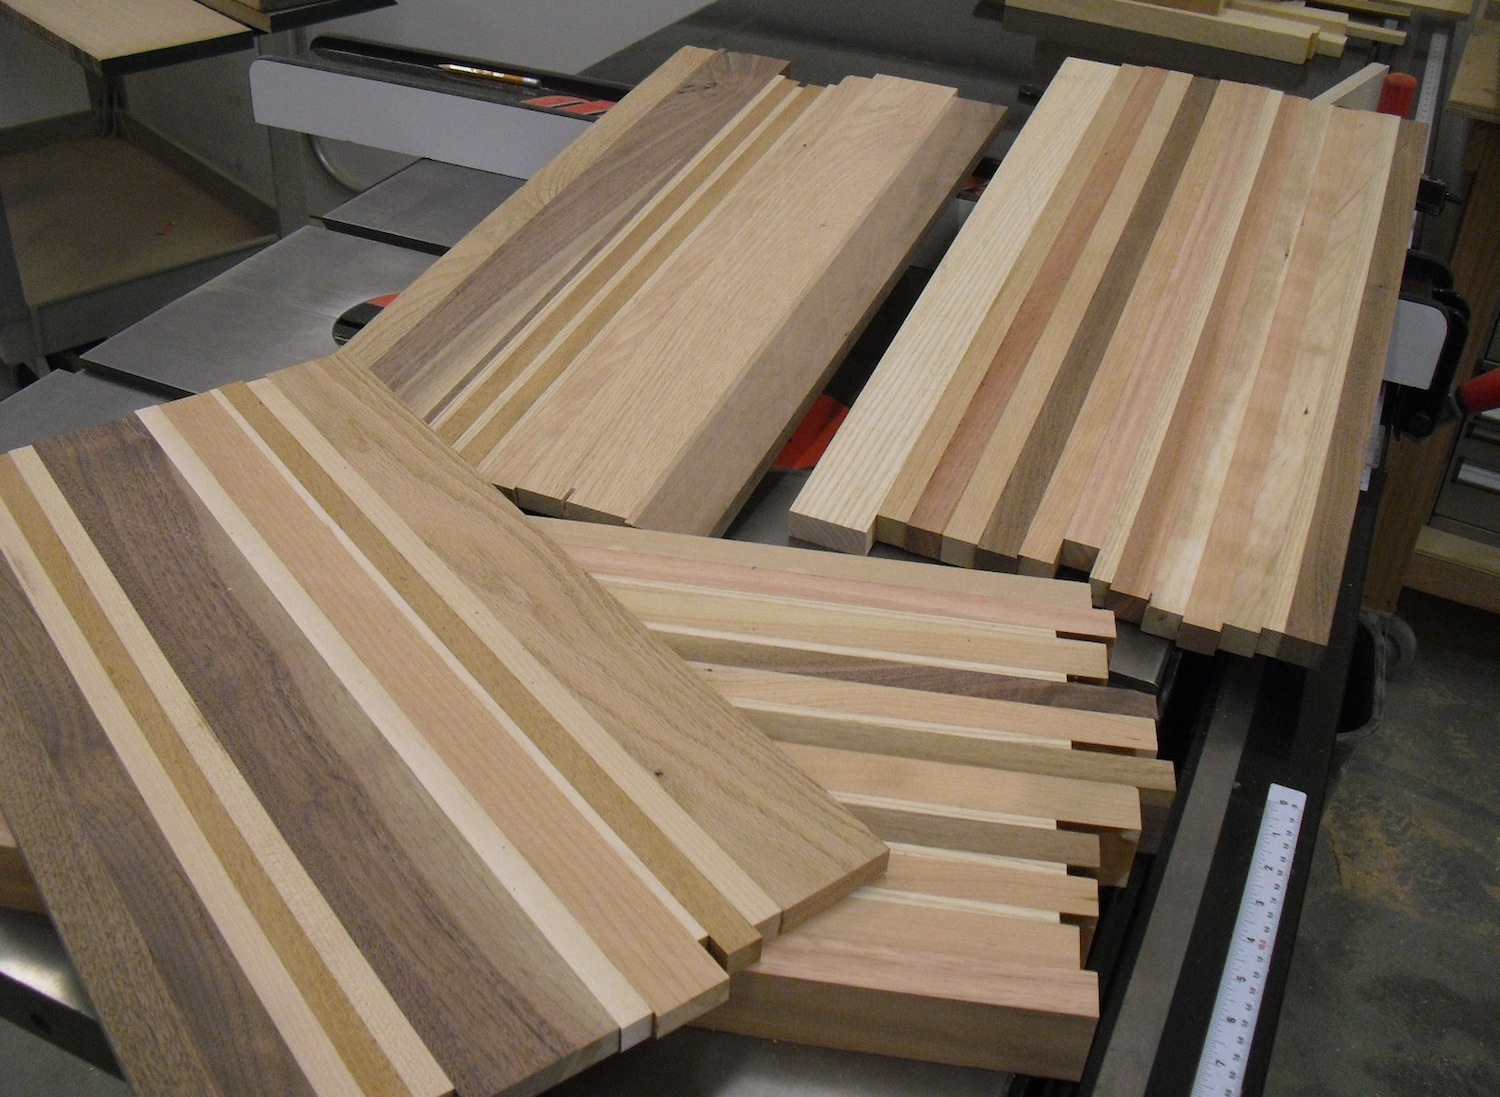
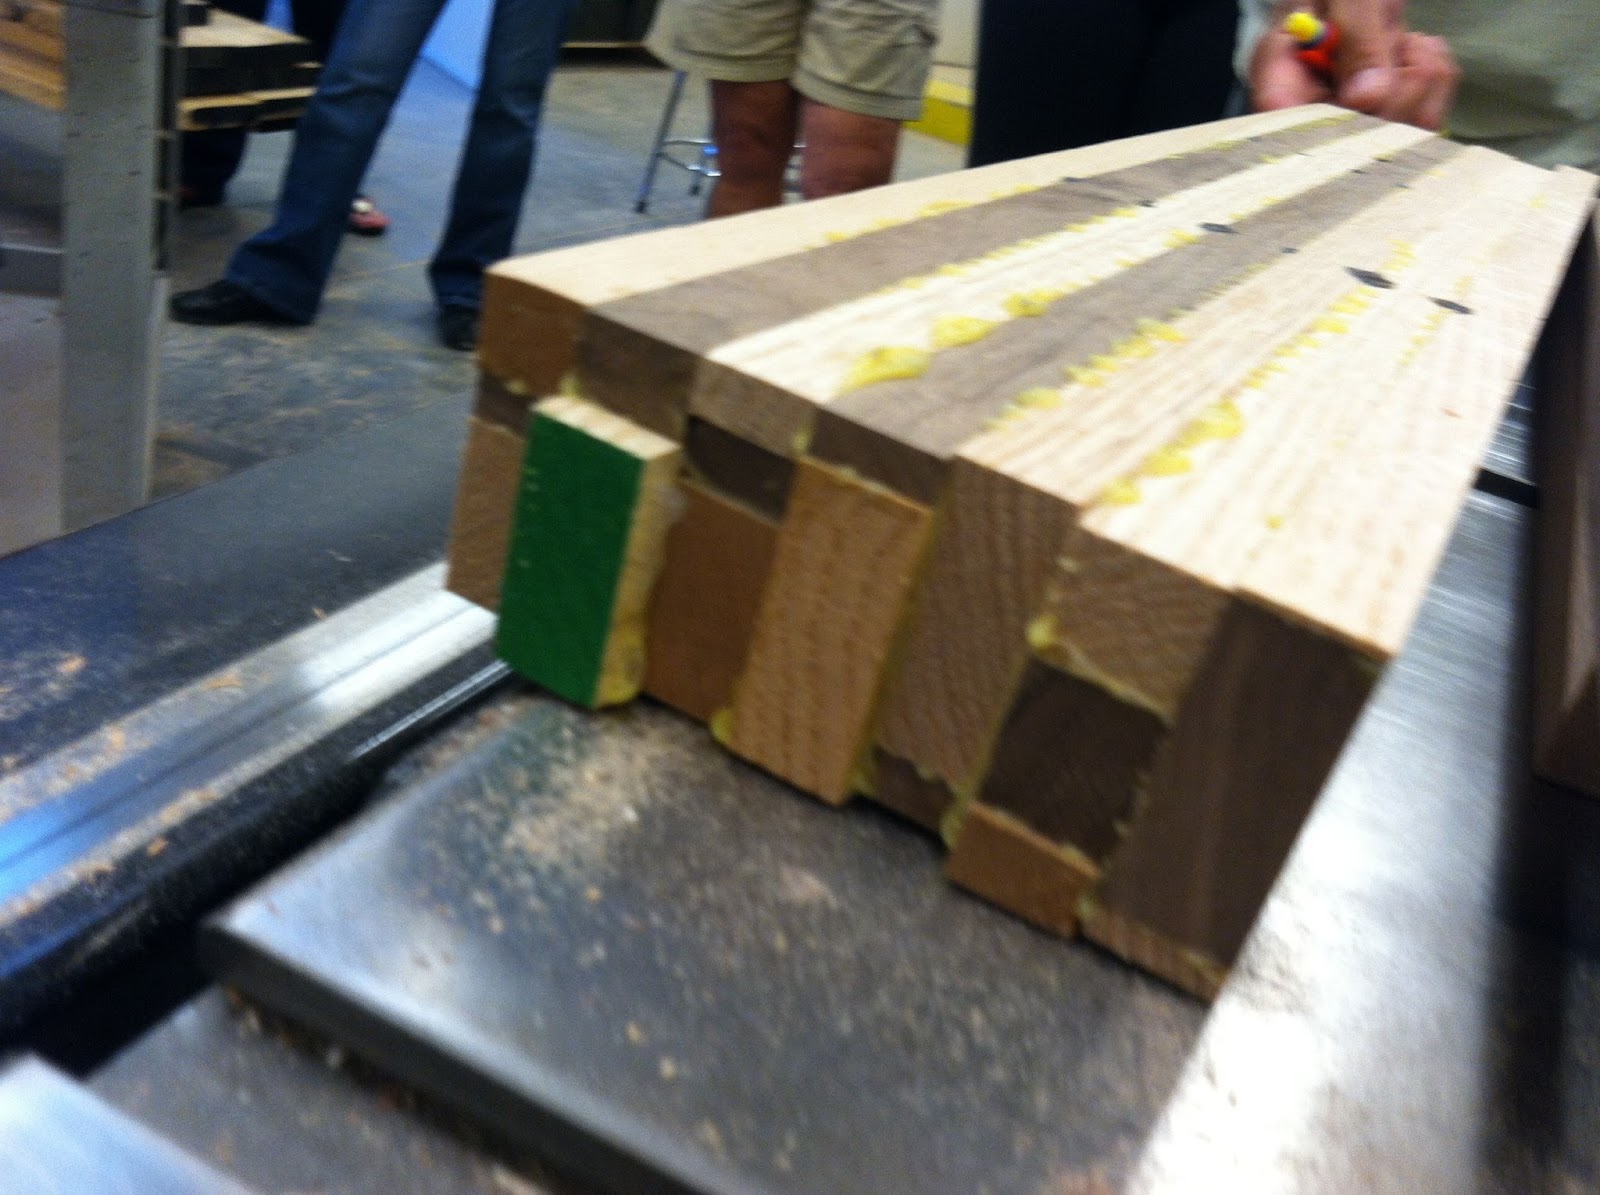
Now here's the tricky part. You're going to rip some of these boards into strips, turn them on edge, and re-glue them back together. Like this board - I ripped it into strips about 1 1/2" wide, and then flipped the strips up vertically.

Like this.

Now you can start to see how we're developing some vertical and horizontal lines in these "blanks."
I suppose there is one thing you need to think about - and that would be the width of your laminations. If you want your board to eventually be - let's say 18" wide, your final blanks need to be maybe 19 of 20" wide.
Still - we're only halfway there.
Stay tuned for part two....
No comments:
Post a Comment