Wednesday, April 12, 2017

What's the buzz, tell me what's a-happening?


Do you remember that VERY old song from Jesus Christ, Superstar - the one that had the running rift  "What's the buzz, tell me what's a happening?" 

I dug up this old video... once it gets in your head, it's hard to get it out!


I'll tell you what's a-happening...the Live Edge class might be one of the best classes we've ever held at my shop!

There's such a big trend these days to work with live edge slabs -  that's what led to this class being offered. Andrew and Nik from Reclaimed Secrets have been working with slabs and selling them for years.


Andrew was the obvious choice for teaching the course. 

We acquired some amazing slabs for everyone to purchase - everything from Claro walnut to Beetlekill Pine. 


Andrew started everyone off by prepping their slabs - sanding and getting them mostly flat before we could start filling the voids with epoxy. This is painstaking work - mixing epoxy with sawdust and forcing it into the cracks. 


Doni doesn't look too happy about it, and she had one of the smallest pieces to work with!


I'm not sure Joe knew what he was getting into when he chose two slabs - but damn, when he gets these pieces finished, he will have some very special pieces for his cabin up north.
 

This is such messy work, we moved a few people outside, and they sanded well into the evening.


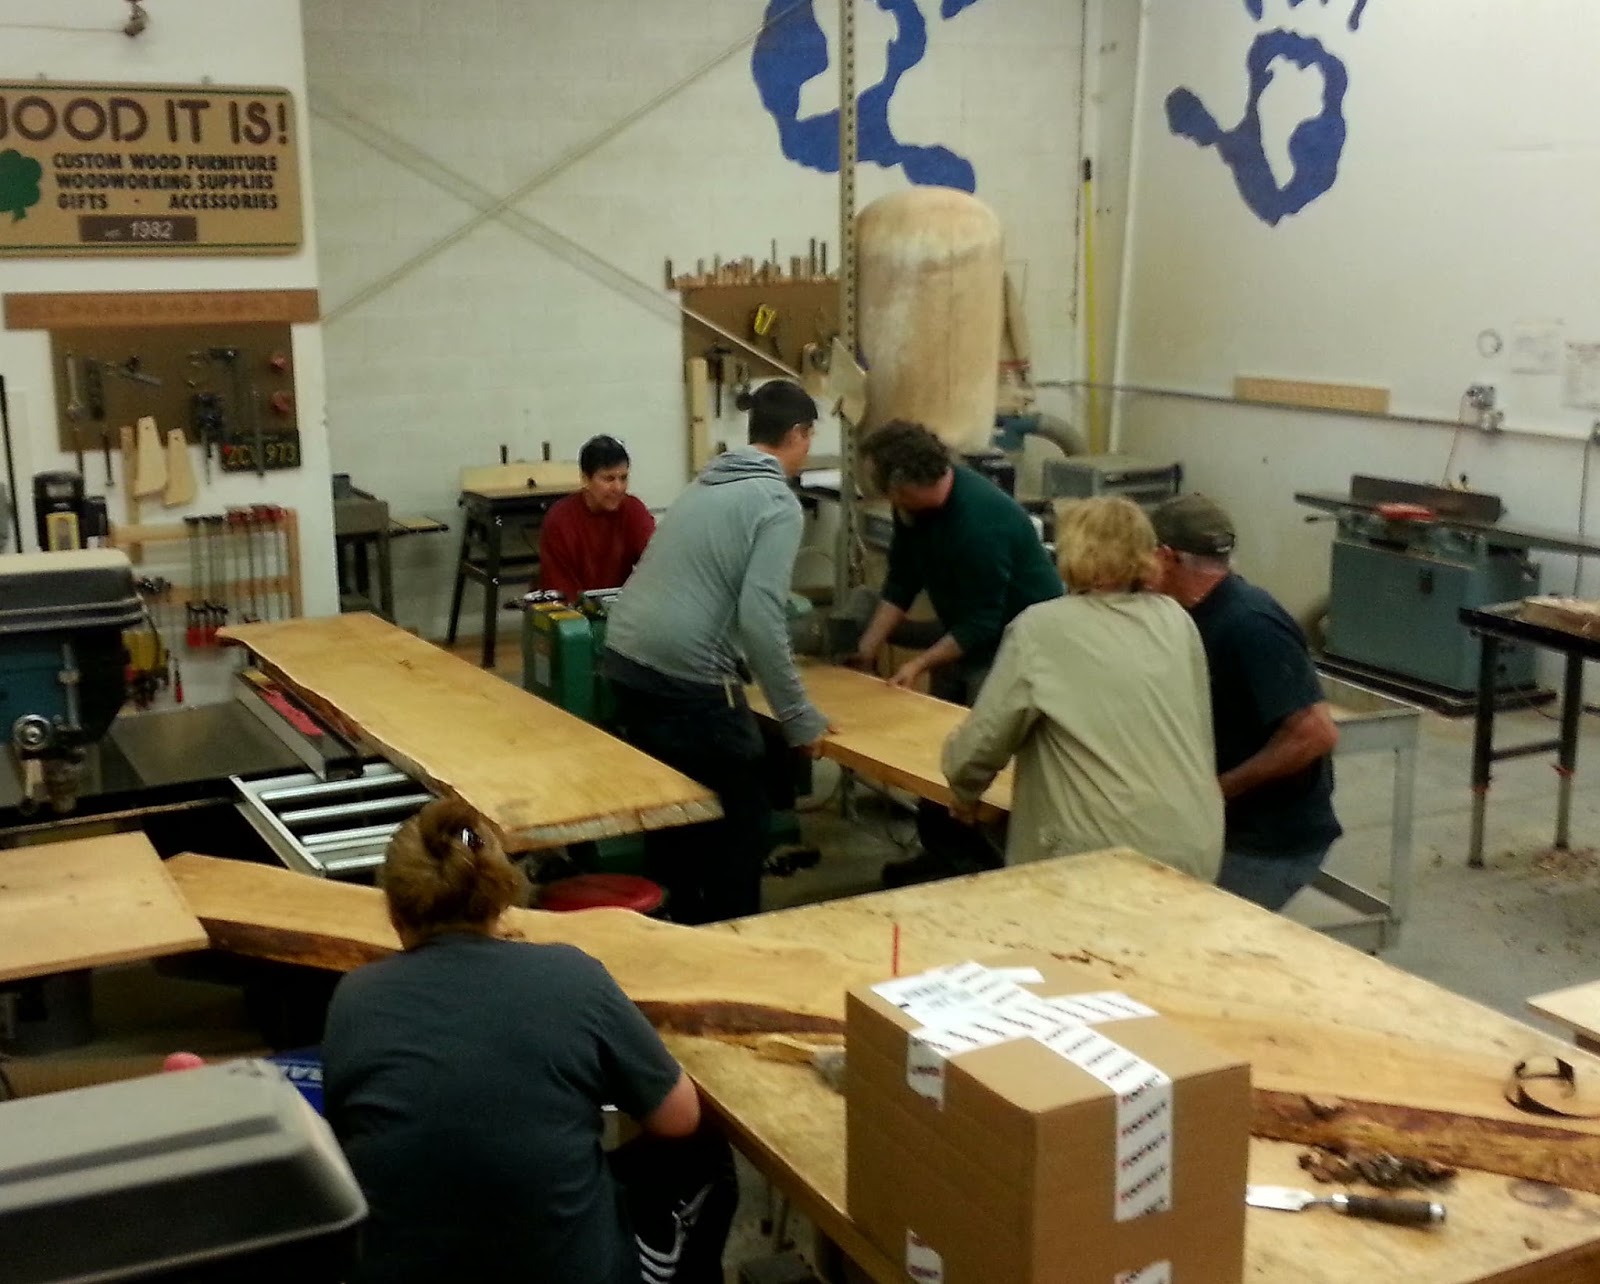
This group effort to (somewhat) flatten Mike's slabs was exhausting! He's making a huge English walnut dining table, and since he's a metal master, he'll be welding up a base for his slab, once it's finished. 


Andrew offered to plane and sand some of the slabs at his shop, and Summer and Lisa took him up on that! 


These two have been working at the shop about a year, 


and are consistently producing some amazing pieces! 


(She cleans up really well for her court cases, trust me!)


Esther chose a gorgeous slab from Andrew's inventory and has been prepping it for days! The small section she cut off of it will make a (future) smaller end table. 


Lupe is never one to back away from a challenge, 


and she's working on one of the largest slabs in the class. 


Here she's filling some cracks with a brass powder/epoxy mixture. When sanded smooth, it looks like metal has been cast into the slab. It's gorgeous!


John's working on several pieces, and choosing his layout carefully. 


He jumps back and forth between wood turning and making furniture - I think he knocks both of them out of the park! I can't wait to see how his pieces come out, he continually surprises me with his vision in wood. 


Ann's two slabs will eventually become a large dining table for her nephew.  (Duke's off in the corner behind her, experimenting with epoxy mixing.) 


One thing's for sure - no one shied away from hard work in this class - these slabs require a ton of work to get them flat and true. And everyone has really risen to the challenge.  


I will post some pictures when everyone finishes their pieces - but know this - in the eight years of offering great classes at the shop, this might be one of the best ones EVER.  

I'm not sure when I'll have a chance to offer this class again, but if you're interested in working with live edge slabs, THIS is the class you need to take. 


Wednesday, April 05, 2017

Hand tool work of a different kind!


If you have roughly 20 minutes, this is a great video on the Birth of a Dugout Canoe - I can't tell you how much I admire the dedication of these craftsmen! 

My hands almost developed blisters just watching this!


Wednesday, March 29, 2017

Ready for a spoon carving class?


It seems like everyone is coming out of their winter shell and showing up at the woodshop to work on Saturdays.


The Live Edge TableMaking class is building some amazing (and huge!) pieces, 


and the sawdust has been flying everywhere. 


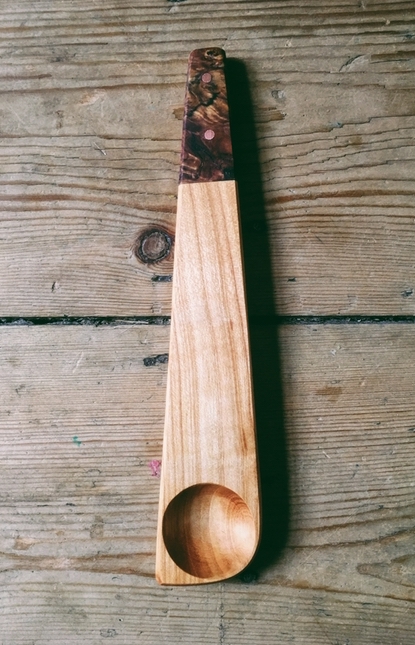
In between all the classes, commissions and commotion (I swear, I didn't plan all those C's...) I've been longing to work on smaller things. I was particularly inspired by this spoon made by EJ Osborne,  I saw it on Instagram and was mesmerized. Check out his work here - @hatchetandbear

 It's so simple, yet gorgeous.


 So I started fooling around with some Sassafras scrap that I had in the shop. It smells so amazing, and it's wonderful to carve. I finished this set of left and right handed soup spoons in an afternoon, and ...

That pulled me down the rabbit hole, where I ordered special spoon carving tools and well... 

I think it's time to host a spoon carving class! 


Here are two books to get you started in the right direction...  I will be using these as texts for the class.  Any thoughts?


Wednesday, March 22, 2017

A memorable repair...


There isn't a day that passes that I don't get a call about repairing a broken piece of furniture. I would guess that I turn down 75% of those requests. It's just not what I specialize in, nor do I make "house calls" to even take a look at some of the repairs. It's not that I don't enjoy that type of work, it's just that many of the pieces aren't worth what it would cost to repair them. Simple Economics 101.

True story - I once repaired a rocking chair what was in 40+ pieces - someone had thrown it off a roof. And they wanted it repaired and put back together, sort of like Humpty Dumpty.

Not quite this bad, but close...


 Let's face it - I'm a furniture maker, not a miracle worker!


Most of the time - I turn down the work, because frankly - when you start pulling apart some pieces of furniture, you end up discovering so many flaws, defects and problems that it's often a rabbit hole of woodworking hell. It's hard to give someone a quote on what it would cost, when you have no idea how significant the damage is...

So when someone contacted me recently about repairing a rocker, my first reaction was to turn it down. But - after a little explanation that there was a really good reason to repair it - I agreed. As the story went - this rocker was part of a beloved relative's passing -  so it held great sentimental value. 

How could I turn that one down?

Much to my surprise - this piece turned out really well on so many levels. Relatively easy to repair, and I even earned some karmic points for it!

This chair had these two broken legs, which required making some new components on the lathe. 

These two pieces snapped right off at the tenon!


 I couldn't figure out the type of wood these original pieces were made of, but I had some nice thick Cherry in the shop, so that pretty much made the decision for me. 


 I wouldn't say I'm a great wood turner, 


but I can get by...

Here's the old piece next to the new one. 


I had to find a gold Sharpie to do a little highlighting. 


The hardest part was drilling four angled holes, but tilting the drill press table solved that dilemma.  


After the new parts were made, I re-assembled the base to ensure that everything fit together. 


Bueno.


Time to put it all together.


There were a few cracks in the seat that required some creative glue strategies. With a syringe and some Titebond... I managed to squeeze some glue in the cracks and pull everything back together. 


It might not hold, but for now, the cracks were mended. 


Notice these two custom cauls - with a little sandpaper on them, 


so they don't slip out of place when I tightened the clamps. 


Here's the best part - after the owner picked up the chair and delivered it back to his mom (it was her chair) - he sent me this lovely note:

Jamie,

 I can't thank you enough for the wonderful job you did on the rocking chair. I just dropped it off to my mother and tears just keep coming. It was a priceless moment I'll never forget thanks to your hard and professional work. You have a customer for life. And thank you for taking on the task. :) I wish I could share the joy you created. My mother still in tears shares her thanks with a warm heart. 

I can't thank you enough, 

AJ


 It's corny to say this, but getting messages like this is what keeps me doing repairs! 


Thursday, March 16, 2017

"The main thing is that you... JUST DO IT !" - John Heisz 2016


This is ridiculously cool - but I'm not sure I'd have the patience to tackle it!


Friday, March 10, 2017

Krenov's Sawhorses


It's about to get a little crazy here in the shop,  but after two weeks off, I'm champing at the bit to get back at it. Usually this time off is spent on maintenance, and catching up on commissioned work. 

Knowing that we had a couple of table making courses coming up, I knew we'd be in need of some sawhorses in the shop, to go along with this new bad boy: The bad-ass Festool TS 75... which will make cutting through thick slabs of lumber seem like we're cutting buttah! 


A buddy of mine called to say that he'd found a stack of lumber for sale, so Denny and headed over with a trailer, and loaded up this load. 


Sweet.  

Most of the pile was Cherry, and even though there were some wonky boards, like this one,


I knew we'd be able to flatten some in order to make some badly needed sawhorses. 

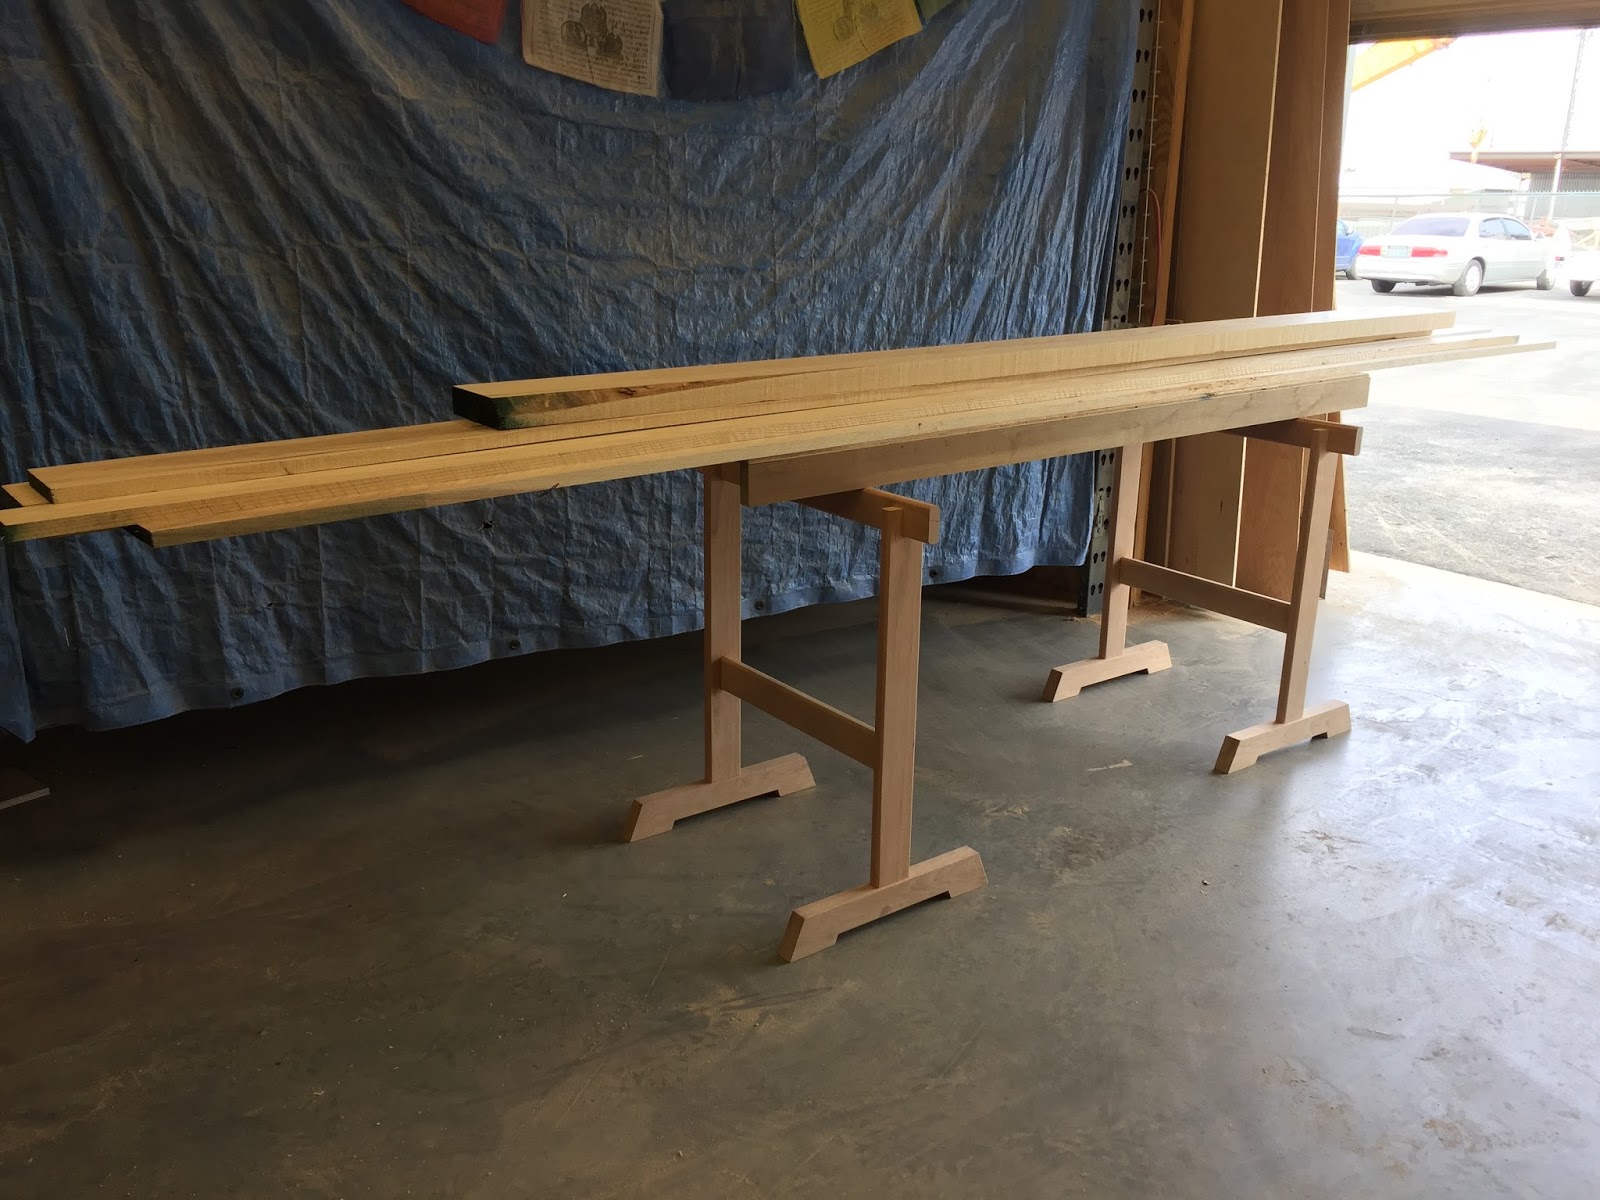
But not just ANY sawhorse - a James Krenov sawhorse. 


After flattening the boards on the jointer, I squared up the stock and cut a few dados, thus creating the simplest of mortises. The dados were cut,


 the boards ripped in half,


 and then folded together - and - voila! 


A perfect simple mortise. 


I finished the day by gluing everything together. 


In the morning, I cut the uprights and machined the tenon on the ends. Here's a down and dirty method for machining tenons. 


It's a little hard on the blade, but they were already dull since it was the end of the session, so they were ready to be sent out for sharpening anyway.  


The fit was tight and perfect, and everything was glued and assembled. 


Krenov scalloped the bottom of his sawhorses, so I marked out the cuts, made the first cut on the tablesaw,


and then removed most of the waste on the bandsaw. 


Cutting the top board (with notches) was a breeze, and you know what - these sawhorses lived up to their reputation of being super strong and super lightweight. 


They nestle together very nicely.


 I added this top deck, 


to keep the boards from sagging under long spans.  


If you need some great sawhorses, check out Fine Woodworking's December '09 issue (#208) for the plans.


 I suspect I'll be building another set soon!