Wednesday, February 15, 2012

Hand Care for Woodworkers

(Before I start blogging, let me say that Blogger, the website where I post my woodworking thoughts, is apparently having some technical issues. I can't seem to get the fonts to behave correctly, so the appearance of this post is going to look a little odd, especially down toward the bottom part of this post. I swear - it's them, not me!)
___________


My friends must be sick of hearing me complain about my sore hands.

Let's face it, the days of my hand modeling career are long over, especially since that belt sander incident last Christmas. And that drill press mishap a couple of months ago. And that screwdriver going all the way through my palm of my hand last summer.... the list could go on and on.

It’s really not a case of if you’ve gotten hurt, but when was your last injury.

One of the most irritating things are the small cracks one can develop in your fingertps - sometimes so small you can’t even see them. If you've had one, then you know they hurt enough to bring tears to your eyes. Ignoring them is the worst thing you can do; early prevention is smart.

So when I received these hand care goodies recently,


it reminded me that I've been meaning to blog about hand care for woodworkers for a long time. And I think I might have found the perfect one-two combination for healing my aching fingertips.

At the last Sin City Woodworker’s meeting, I brought this up for discussion, since I was suffering with three cracked fingertips. Almost everyone in the room nodded with compassion, and many held up band-aid covered fingers, in sympathy.

Solidarity, dudes!

I’ve been dealing with this for a long time. The worst was when I was working with glass block a few years years ago, using mortar and grout. Both products pull the moisture right out of your hands. My respect goes out to any concrete workers: you have the nastiest mitts on the planet.

Speaking of mitts, Lupe gave me this pair of gel gloves, apologizing for the color.

Hey, I do pink!


It is hard to describe what these feel like when you're wearing them - sort of like your hands are submerged in a bucket of slime. It is very odd! But - from the few times I've worn them, they seem to work.


Interestingly enough, this month’s issue of Fine HomeBuilding has a small Q&A about that exact question, and the answer they gave was - lame.

So what’s the real solution?

Without a doubt, keeping your hands and fingertips hydrated is far and away the best preventative solution. Your fingers usually won’t crack if they’re hydrated. Ask most people who work with their hands and they'll agree that Bag Balm and Corn Huskers are their favorite weapon again dry hands. Now I’ve tried both, and while Bag Balm doesn't feel as greasy as Corn Huskers, I still don’t love that oily feeling on my hands. And even worse - if I apply one of these at my shop, I leave tell-tale fingerprints on the wood I’m handling. Not cool.

Here are some of the lotions I've tried, Except for the Neutrogena, these lotions weren't that helpful.


If you catch one of those cracks in time and apply a liquid bandage product to it, you can stop the damage before it gets too bad. I've found that liquid bandages, such as the ones below, really help.

Of course, when you apply them, they sting like a mutha!


You're basically “gluing” the crack closed. Trust me, this works.

Skin Shield is my go to product. None of the other products work as well, in my opinion.

There are tons of tips and solutions out there, here is one that is mildly helpful. Some people even use Super Glue for finger repairs, but whenever I open a tube of it, it is usually dried up.

Now this will sound weird, but my secret weapon is to sand the skin surrounding one of those cracks a little bit. I use a piece of medium grit paper, or an emery board, to sand those areas where the skin around the crack is getting too thick. Sometimes I even use my random orbit sander to do a quick job of it. That might sounds extreme, but it works. I think that thinner skin is less prone to drying and shrinking and cracking than those hard leather paws.

Someone also mentioned Gloves in a Bottle, and I found a link for a free sample here.

Finally, my favorite lotions are Bag Balm and Neutrogena. Hands down. (no pun intended)


The Neutrogena never leaves a greasy film, and it comes unscented, for any of you out there worried about smelling like girly-men.

The Bag Balm works well, too, but leaves a slight residue that I can't have when working with wood.


So there you have it - keep your hands hydrated with Bag Balm or Neutrogena. And if you develop a crack, repair it with Skin Shield. I've been using this hand care regimen for about a month now, and my hands have been silky smooth and crack free.

Now if I could only find something that erases scars.....


Monday, February 13, 2012

Lamp shade on a lathe

In the past couple of months, a few friends and I have taken lathe lessons with Jimmy Clewes, who (luckily) lives right here in Las Vegas. If his class doesn't get your heart pumping to buy a lathe, I don't know what will!

In my Intermediate Woodworking class that's running right now, we were playing around with compound miters, and some of the students made lamps. The hardest part about making a lamp is finding an appropriate lampshade to go with it.

Here's a pretty awesome clip of a lampshade being made on a lathe. I'm not too sure of its durability; the heat from the bulb will probably dry out the wood and cause some nasty cracks.

Still, it looks awesome!


Monday, February 06, 2012

My current project - part two!


If you remember your Tablemaking 101 class, then you know there are three different types of table bases that you can make. I've chosen a four legged design, with connecting aprons for this table.


Luckily, I have enough Ash to sort through and choose some lovely pieces for the aprons.


As if my hands aren't rough enough,


I start the staining process a little early.


A very simple way to add a little more strength, visual interest, and leg room to your aprons is by adding a cutaway on them. The diagram below shows what I mean.


And one of my little tricks for making cutaways is to glue them up, rather than cut them from a solid block. I think it's just easier that way. I'll start with a solid block, rip off the strip, shape it, and then glue it back in place.


The grain matches perfectly, but I don't have to mess around with any tough cuts.


Here they are, re-glued back together. You want to be careful when you glue them, that you don't infiltrate that end grain with glue, which is tough to remove. Let the glue set up a bit, then cut it away with a sharp chisel.


After they're dry, plane them down and they're ready for tenons on each end.


I start by making my shoulder cuts all the way around the tenon. Then I remove most of the wood on my radial arm saw, using a dado blade.


There is just a bit of cleaning up to do with a hand saw, trimming this top area.


This tenon just needs a little TLC with a chisel and it's ready to test.


A nice fit, I can live with that!


Remember, there are two short aprons, and two long ones.


After all that fitting, I am pooped!


But - no rest for the weary. There is a stack of pieces that needs me. Time to assemble!


There are a couple of things to do before I glue this up - like adding dados to the long aprons, so that I can add some center stretchers that will run just under the table top. This top is pretty long, and it needs a little extra support underneath it.


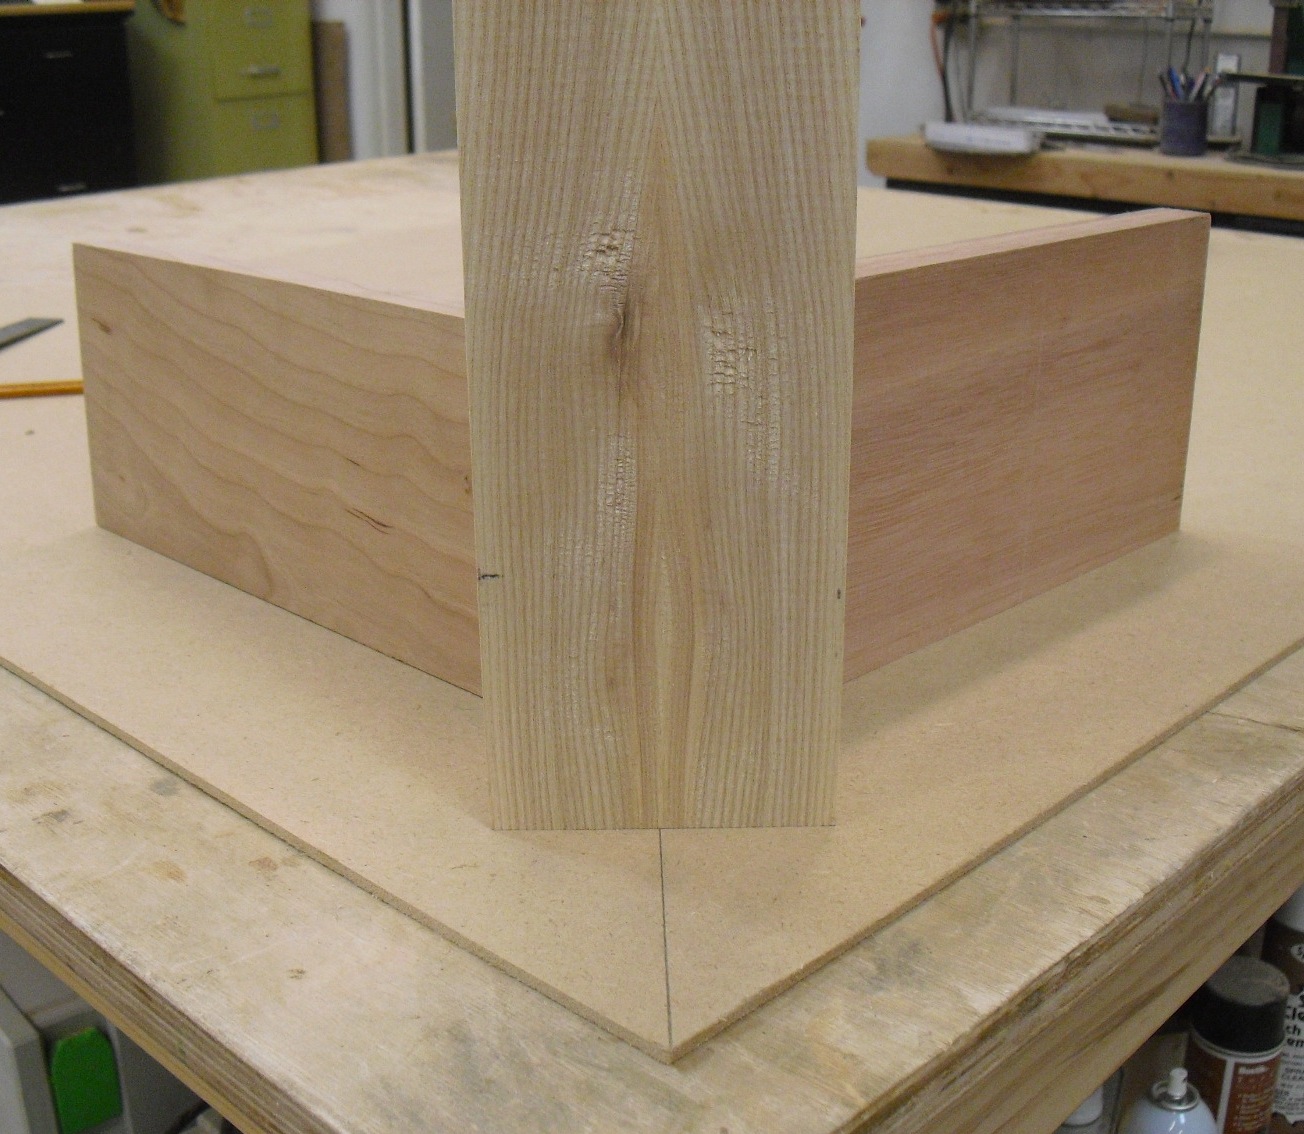
Finally, I just want to see what it looks like, before I glue it. I'm checking my overhangs, to make sure I haven't made an apron too long. So I cut a couple of pieces of plywood to the exact size of my top. And then position the parts over it.


Since everything looked good, I start gluing the sides. With a big piece like this, sub assemblies are the way to go. I plan on assembling the two short sides first, by gluing and pegging the joints. Dry fitting the pieces before you actually spread any glue is smart. Here is a lovely connection from leg to apron, no gaps, everything square.


The flattest surface in my shop is the tablesaw, so I glue up the sides there.


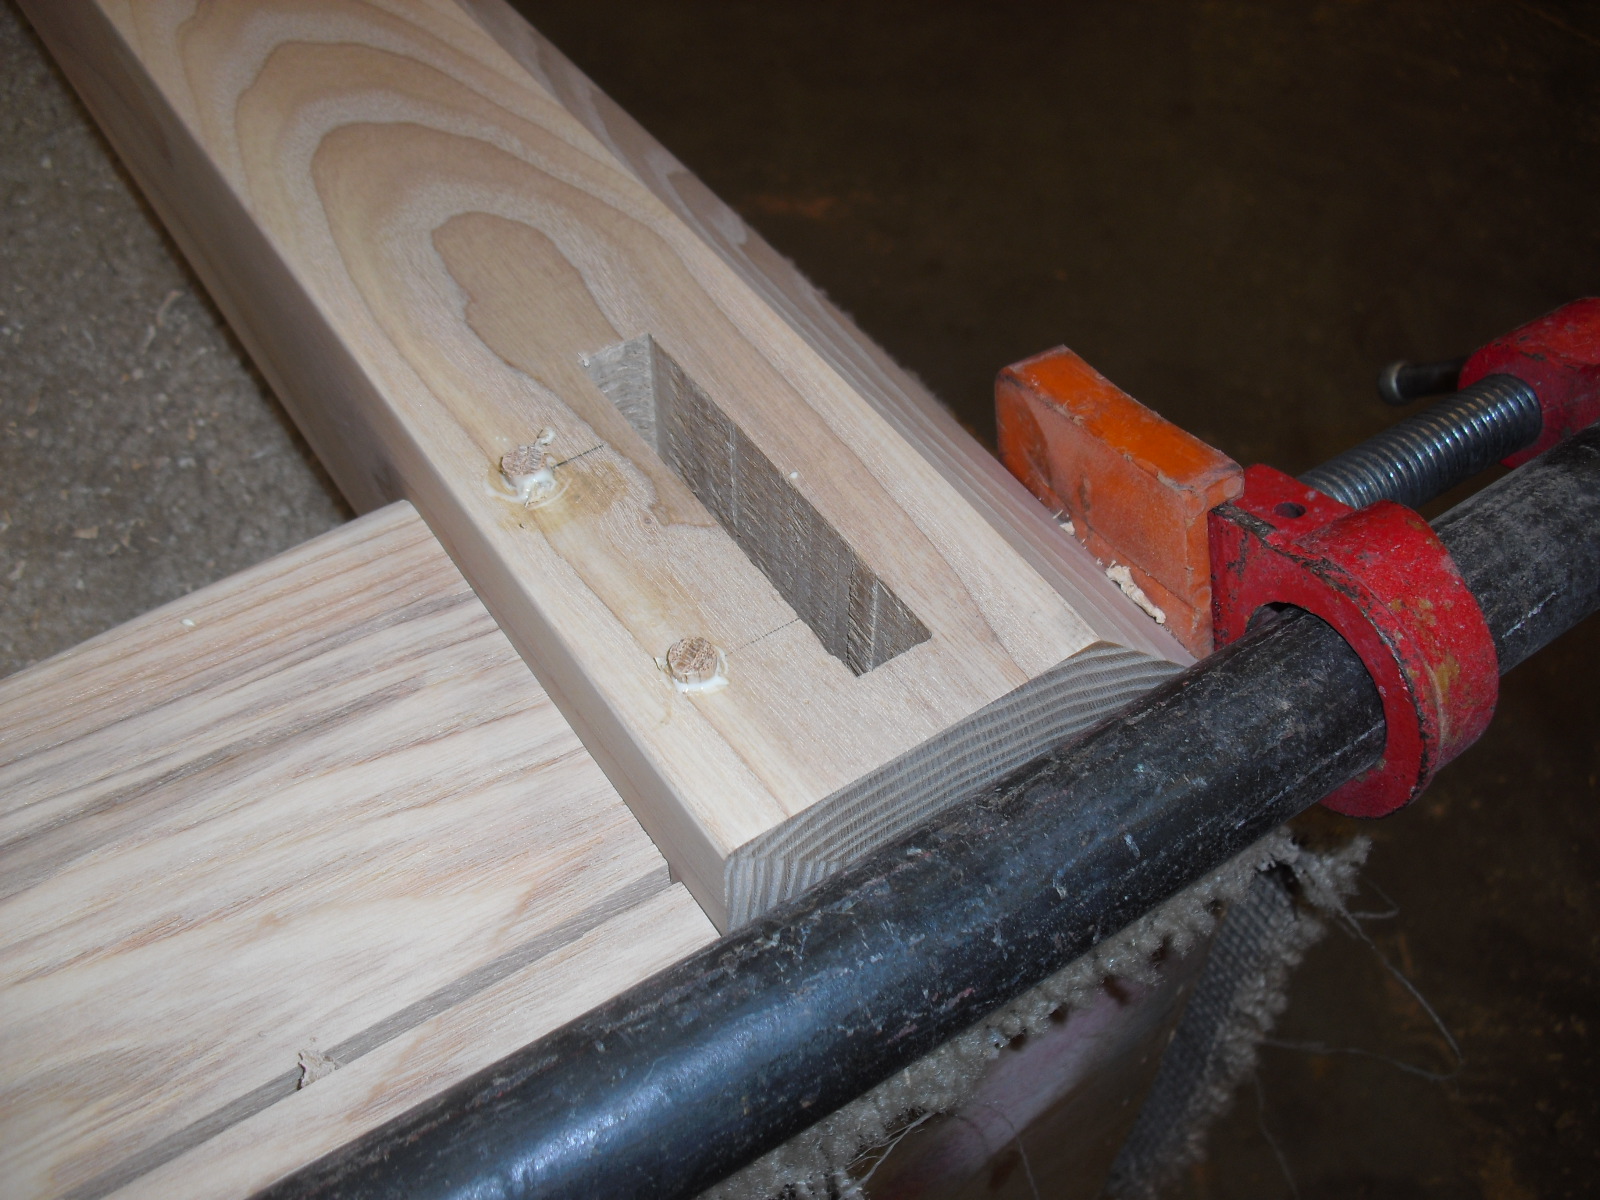
After the glue is set, I drill some holes for pegging the joint.


It pains the purist in me that I'm not using Ash pegs; these are Oak. Only you and I will know. Put a little glue on the pegs, tap them in until they're just a tad proud of the surface, and then use a small block plane to flush them up.


A completed side!


I clamp the whole thing together to measure the lengths of the three stretchers that I need to cut.


and once I cut them, it's time to glue the whole apron assembly together.


My next step will be assembling the whole base together. I'll borrow some long Bessey clamps from my neighbor for this. These clamps are pricey, so I've never invested in any for my shop. Considering I only need them once or twice a year, I'll borrow instead of buy!

Saturday, February 04, 2012

Woodworking - Designing by Doing

The moral of this post should be - trust your first instinct!

Everyone has a book rolling around in their head, right? Not the one you're reading, I mean the one you intend to write. I've had one that I started writing in my head a while ago, the gist of it is "seat of the pants" woodworking. Designing by doing. I do it all the time.

When I finished building the first dining table base a few weeks ago, I wasn't 100% sold on it. Don't get me wrong, it's gorgeous. It just doesn't "fit" in my home. So I hopped back on the saw and started building the base I should have been building all along.

I love Craig Vandall Stevens' book - Creating Coffee Tables: An Artistic Approach. His work is innovative and fresh, and I've been thinking about his legs ever since I read it. Well, not his legs; his table legs. Five sided and gorgeous.

I started by laminating some leg blanks, bookmatching the wood so that the grain would look amazing.


Next step was to start cutting the blanks, to create a square inside corner.


Once they're all cut, you can see how they will form the table base, which will connect via the aprons.

I checked their squareness,

and then found a scrap of plywood to play around with the amount of overhang that I wanted. This will determine the length of the aprons.


Working with a leg shaped like this is a bit of a challenge that can come back to haunt you. So it's really helpful to play with your design before you start cutting anything.

This line represents the center of my leg, and helps establish the exact position of the leg when everything is assembled.

Here, a couple of scraps of 1x4 simulate what the aprons will look like.

Notice how the leg is centered on that line, keeping the leg at its proper angle.


These legs are so gorgeous, I want to bring position them pretty close to the edge of the table top, instead of tucking them back under the table top. I use a couple of set-up blocks to set the proper overhang.

And then roughly mark the mortise locations.


Luckily, these clamp quite nicely in the mortiser, despite their awkward shape.


(Thanks, Lupe)


Perfect mortises


Before I get started on the aprons, I reposition the legs just like they will be oriented when the base is assembled. It might sound crazy, but the are subtle differences in the legs, and I want to control that. Laying them out and numbering helps accomplish that.


A few scraps of baltic birch plywood help me figure out the length of the tenons.


My next step will be to work on the aprons, but while I'm figuring those out in my head, I'll finish up the legs. Originally, I'd planned on rounding that front edge into a large gentle curve. Since I didn't have a shaper bit that large, nor the courage to use it, if I did have one, I decided to cut an angle the legs, and then finish up the rest of that curve with a sander.


Hot damn, indeed!

This is the base I should have made the first time! Remember, trust your instincts!