If you get bored reading about tool repairs, you may want to skip this post.
This drill press has seen better days.

In fact, I could barely believe my eyes when I discovered that every time I turned it on, the direction of the rotation reversed. One flip of the switch and it was drilling properly; turn it off-and-on and it would drill in reverse. Of course, this causes the bit to completely loosen up and fall out, so it posed a bit of a problem.
A little research, a few calls to locate the part (a capacitor from WW Grainger) and it was mostly back in working shape. All except for a nagging little issue - the chuck had very small amount of play in it, from side to side. As you can guess - drilling with a wobbly chuck results in slightly over-sized holes. Not a good thing, as Martha would say.

Over a couple of beers, my buddies suggested that it might be time to replace the bearings on it. Never one to argue with taking a tool apart, I grabbed the manual, and started the tear down.
First- off with the chuck, which was surprisingly easy to pry down.

And then depth gauge rod.

And the bracket that holds it in place.

Next comes the handle which has to disengage from the spring,

which was an interesting (i.e. - an "oh shit!" moment) part to disassemble. When you pull the handle out, the quill falls down.

Rather rapidly, I might add.
I kept I hoping that I would be able to get that same amount of tension back on it.
I could see three of the four bearings that I needed to replace, but the fourth was stuck up, under this top pulley.

Removing the pulley was the biggest problem, it took me a week or more just to locate the right sized deep socket. Thanks to Eddie and Thomas, I borrowed one from a local tire repair shop.

And with the help of Thom's big ass impact driver, we had the nut off in no time.

When you're working on something, does your workbench look like this - a big jumble of crap?


After the nut was off, the pulley should have slid right up and off the shaft, but it just wouldn't cooperate.
No amount of prying, cussing, penetrating oil or muscle would budge it. And finding someone with a pulley puller was even more problematic.
When all else fails... call the manufacturer.
The tool tech I spoke with felt there was no way that my machine needed new bearings, despite it's age (born in 1994) or the fact that it's drilled thousands of holes. Maybe tens-of-thousands. He said he'd never heard of one of their drill presses needing new bearings, so he suggested another remedy. A thorough cleaning of all the parts, to dislodge years of sawdust and grime was the first step.
From this

To this.

And this

To this.

And then reassembly. This particular drill press has a set screw rides in a slot on the quill. Here's the slot.

If the set screw either becomes loose, or wears down a bit, it can cause some side to side wobble of the quill. Here's the set screw, housed within a locking nut.

So once the drill press was reassembled, I adjusted the set screw. Too tight and it inhibited the action of the quill spring. Too loose, and it allowed that slight sloppiness.
In the end - simply adjusting the set screw solved the problem.
So the moral of this story? If you're experiencing a problem with one of your tools, a simple phone call to the manufacturer might save you a lot of time and aggravation.
This drill press has seen better days.

In fact, I could barely believe my eyes when I discovered that every time I turned it on, the direction of the rotation reversed. One flip of the switch and it was drilling properly; turn it off-and-on and it would drill in reverse. Of course, this causes the bit to completely loosen up and fall out, so it posed a bit of a problem.
A little research, a few calls to locate the part (a capacitor from WW Grainger) and it was mostly back in working shape. All except for a nagging little issue - the chuck had very small amount of play in it, from side to side. As you can guess - drilling with a wobbly chuck results in slightly over-sized holes. Not a good thing, as Martha would say.

Over a couple of beers, my buddies suggested that it might be time to replace the bearings on it. Never one to argue with taking a tool apart, I grabbed the manual, and started the tear down.
First- off with the chuck, which was surprisingly easy to pry down.

And then depth gauge rod.

And the bracket that holds it in place.

Next comes the handle which has to disengage from the spring,
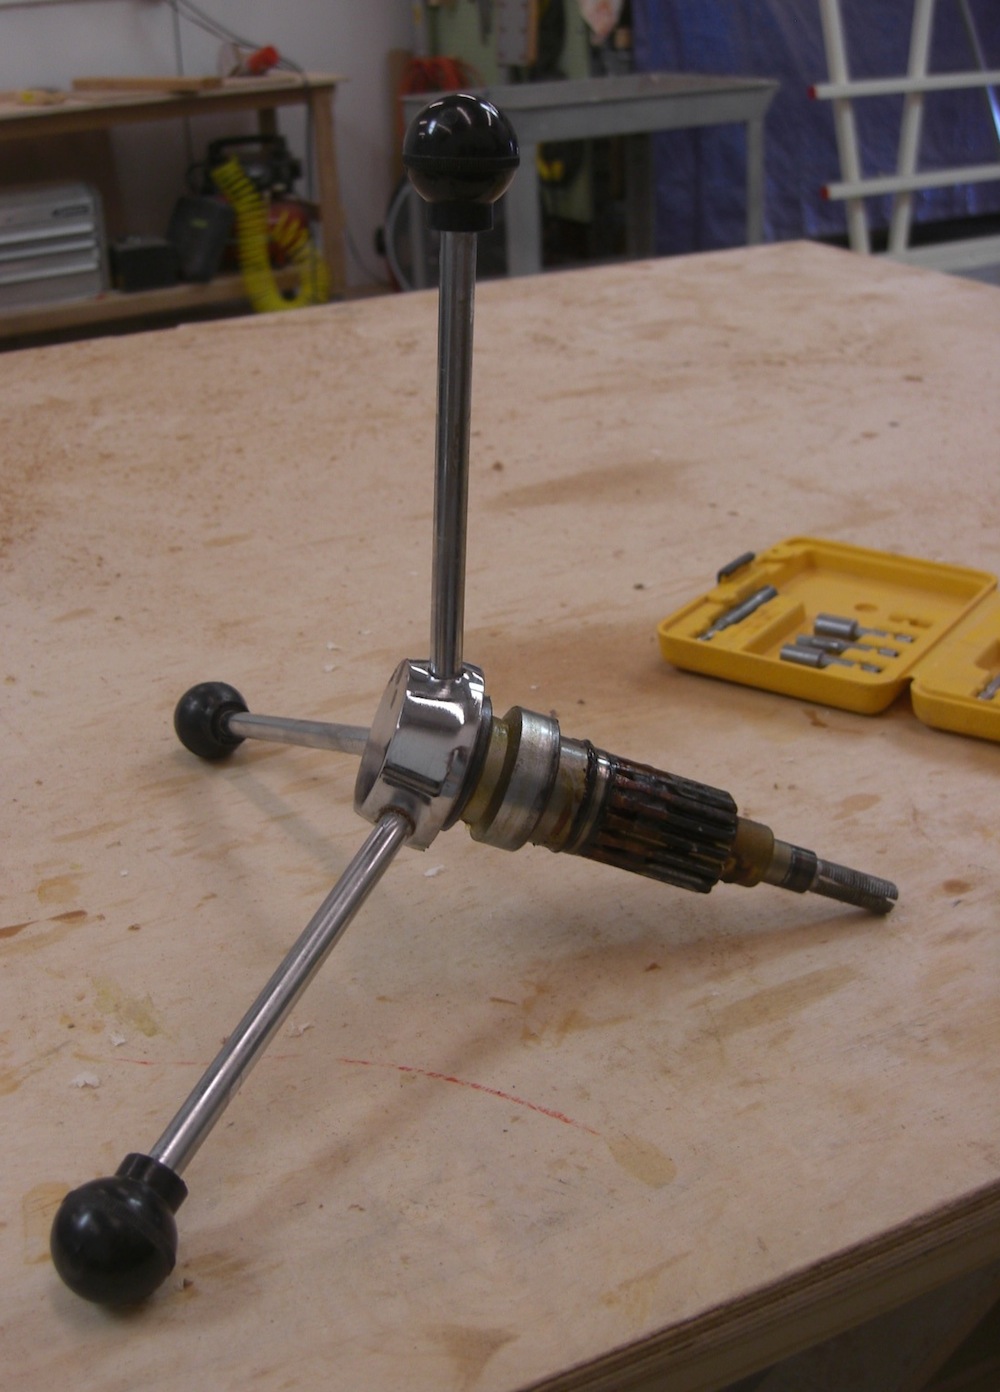
which was an interesting (i.e. - an "oh shit!" moment) part to disassemble. When you pull the handle out, the quill falls down.

Rather rapidly, I might add.
I kept I hoping that I would be able to get that same amount of tension back on it.
I could see three of the four bearings that I needed to replace, but the fourth was stuck up, under this top pulley.

Removing the pulley was the biggest problem, it took me a week or more just to locate the right sized deep socket. Thanks to Eddie and Thomas, I borrowed one from a local tire repair shop.

And with the help of Thom's big ass impact driver, we had the nut off in no time.

When you're working on something, does your workbench look like this - a big jumble of crap?


After the nut was off, the pulley should have slid right up and off the shaft, but it just wouldn't cooperate.
No amount of prying, cussing, penetrating oil or muscle would budge it. And finding someone with a pulley puller was even more problematic.
When all else fails... call the manufacturer.
The tool tech I spoke with felt there was no way that my machine needed new bearings, despite it's age (born in 1994) or the fact that it's drilled thousands of holes. Maybe tens-of-thousands. He said he'd never heard of one of their drill presses needing new bearings, so he suggested another remedy. A thorough cleaning of all the parts, to dislodge years of sawdust and grime was the first step.
From this

To this.

And this

To this.

And then reassembly. This particular drill press has a set screw rides in a slot on the quill. Here's the slot.

If the set screw either becomes loose, or wears down a bit, it can cause some side to side wobble of the quill. Here's the set screw, housed within a locking nut.

So once the drill press was reassembled, I adjusted the set screw. Too tight and it inhibited the action of the quill spring. Too loose, and it allowed that slight sloppiness.
In the end - simply adjusting the set screw solved the problem.
So the moral of this story? If you're experiencing a problem with one of your tools, a simple phone call to the manufacturer might save you a lot of time and aggravation.