I'm totally going to try and teach Stella this trick.
Saturday, June 30, 2012
Thursday, June 28, 2012
It Takes a Village - Part Deux
(Warning to my mom - this post may bore you, too.)
With the table base finished, I turned my attention to the table top. And all I can say is - thanks Eric, Nikki and Lupe.
Eric stopped by my shop when I was just starting to think about the tabletop construction. I had two choices - glue the top up as one single slab, like a common table top you would see on any typical table.
Or make a segmented top, which - on one hand, would be more difficult, but OTOH, would look SO much better. Guess which one Eric challenged me into making?

I sketched it on cardboard, which you might recognize as my favorite way of designing. Full sized drawings rock!
A few years ago, before I owned a digital protractor, I wouldn't have been nearly as accurate as this. I set my miter gauge to cut the angles, and then tested a piece I'd cut.
Perfect!

Cutting the angles required a special angled stop block.

A stop block is the only way to ensure all your pieces come out the same length.

Once everything was cut, I clamped it together without glue, to make sure the miters all closed up nicely. Having a gap on one of the miters would seriously piss me off.

I added a piece across the middle

and Domino'ed the whole thing together.

This piece was beefy, with perfect joints, once it was glued together.
I needed to make a recess in the center of the top, to hold an engraved piece of plexiglass. Turning my router into a compass was the best way to accomplish this, but - as in most woodshop situations - I had little room for error.
Here's where the second part of my "village" stepped in to help. Nikki and Lupe were hanging around the shop as I was preparing to finish the top. I'm not sure if it was curiosity or moral support that made them stay to help me. But - whatever it was - I appreciate it!
I needed to make a recess in the center of the top, to hold an engraved piece of plexiglass. Turning my router into a compass was the best way to accomplish this, but - as in most woodshop situations - I had little room for error.
Procedures like this makes me extremely nervous! Here I am, contemplating my next step!

It was going to take a few different passes with the router to create the perfectly sized recess, and after a few passes, I started to get close to my target dimension. I added some tape to reduce any chipping that might occur.
Luckily - with Nikki and Lupe's help, the recess was cut perfectly!
Here's how we did it.
Removing the tape, time to concentrate on the outside edge.

Here I'm making an adjustment to the compass, in order to cut the outside edge of the top.

More fun with routers...
And finally peeling off the tape, and celebrating the completion of a big job.

Of course - this post wouldn't have been possible without Eric's insistence about upping my game and making a segmented top. Or without Nikki's help negotiating the router. Or without Lupe's film-making skills. She edited and produced these videos, and I can't thank her enough! All three of you seriously rock!

It was going to take a few different passes with the router to create the perfectly sized recess, and after a few passes, I started to get close to my target dimension. I added some tape to reduce any chipping that might occur.
Luckily - with Nikki and Lupe's help, the recess was cut perfectly!
Here's how we did it.
Removing the tape, time to concentrate on the outside edge.


More fun with routers...
And finally peeling off the tape, and celebrating the completion of a big job.

Of course - this post wouldn't have been possible without Eric's insistence about upping my game and making a segmented top. Or without Nikki's help negotiating the router. Or without Lupe's film-making skills. She edited and produced these videos, and I can't thank her enough! All three of you seriously rock!
Tuesday, June 26, 2012
It Takes a Village
One of the best things about being a fine arts major in college was the critique process. For anyone that doesn't know what that means, I'll explain.

When you're in art school and you finish a project, you're often invited to discuss the piece with your instructor as well as your classmates. It's a no-holds barred dissection of your work - and while it can be brutal at times, the constructive criticism can often help you break through to create much better work the next time. You have to be able to handle frank opinions, and sure - sometimes it feels like people are picking on you.
Well, put on your big girl pants, suck it up, and do it better the next time. Art is not for sissies!
I was reminded of this while working on a recent order. Yes - it was another Air Force piece, and there were a lot of design consideration to be made. Sometimes a commission requires a formal sketch for the buyer - they want to see exactly what they're ordering.
But in this case, this table was sketched on a piece of cardboard, with just a few dimensions to go by. I love it when clients give me a wide berth with which to create!
Full disclosure here - I bought these table legs from one of my suppliers. They're very well made, and come ready for bolting onto a center column. When assembled to the column, they remind me of a rocket, which was a theme for this table. In short - they were perfect!

I designed the column as a hexagon; here are the parts - cut, drilled for the legs, and ready for assembly.

One thing you don't want to be is chintzy with the glue. And since it was hotHotHOT in my shop, I had to work really fast. I'm so anal - I timed myself. It took eleven minutes to glue and clamp this column. Of course, my glue had a ten-minute open time, so by the end - I was slapping it in place, who-gives-a damn about the mess I was making?

I look calm, but this was crunch time. By the end of this glue-up, there was a frantic air in the shop.

And - most people know I'm a pretty neat glue-er. Not this time!


Every woodworker knows it's better to clean the glue off while it's still gummy, than to let it completely harden. When it has the consistency of toothpaste, it slices away quite nicely with just a chisel. I love that little stubby chisel shown above, and keep it just for glue clean up. It's practically an extension of my hand.
Oh, you're probably wondering about the "it takes a village" comment, right? That'll make more sense in the next post, when I discuss building the top for this table. I was lucky to have some input from several people at my shop, and their opinions and assistance really made a difference in the progress of this piece.
Stay tuned!
Friday, June 22, 2012
My Planter Project Follow-up
My buddy Art at McKillican Lumber gave me a sheet of plywood to play with a while ago, and I blogged about the planter boxes that I'd made with the sheet. The guys at McKillican are great at making you not feel like a doofus when buying wood for the first time. It's easy to get intimidated when you're in a lumberyard - especially when they start throwing all their abbreviations around at you.
FAS?
Hit or Miss?
Common vs. Select?
WTF?

If you're looking for a good lumber buying experience, head over there and introduce yourself. You won't be sorry, and they don't tack on that additional board footage charge like some of the lumberyards here do.
I wanted to post a final picture of those planters, they really came out nice. If I had it to do over, I would make them slightly deeper. I allowed 11" inside each box, for the container, but I wish I'd gone deeper - like 12 or 13 inches.

Still - they look fabulous, and their color changes with the time of day. Late in the day, the sunlight changes and they glow.

It is National Take Your Dog to Work day, so you know where Stella and I will be.


Hope you were able to take your four-legged child to work, too!
Thursday, June 21, 2012
Random Shots from the Shop
Work has been flying out of my shop so quickly lately that I can barely keep up with shooting any photos of the pieces.
And even when I manage to take some photos, something's up with my camera. I'm not getting good color representation, or crisp photos. Hmmmm.....
For better or worse, here are the final images of that last Air Force box I made.


A couple of very nice guys signed up for a private session of the Basic Woodworking class. This is pretty much the first time they've ever touched wood, or any tools - and they created some amazing pieces!
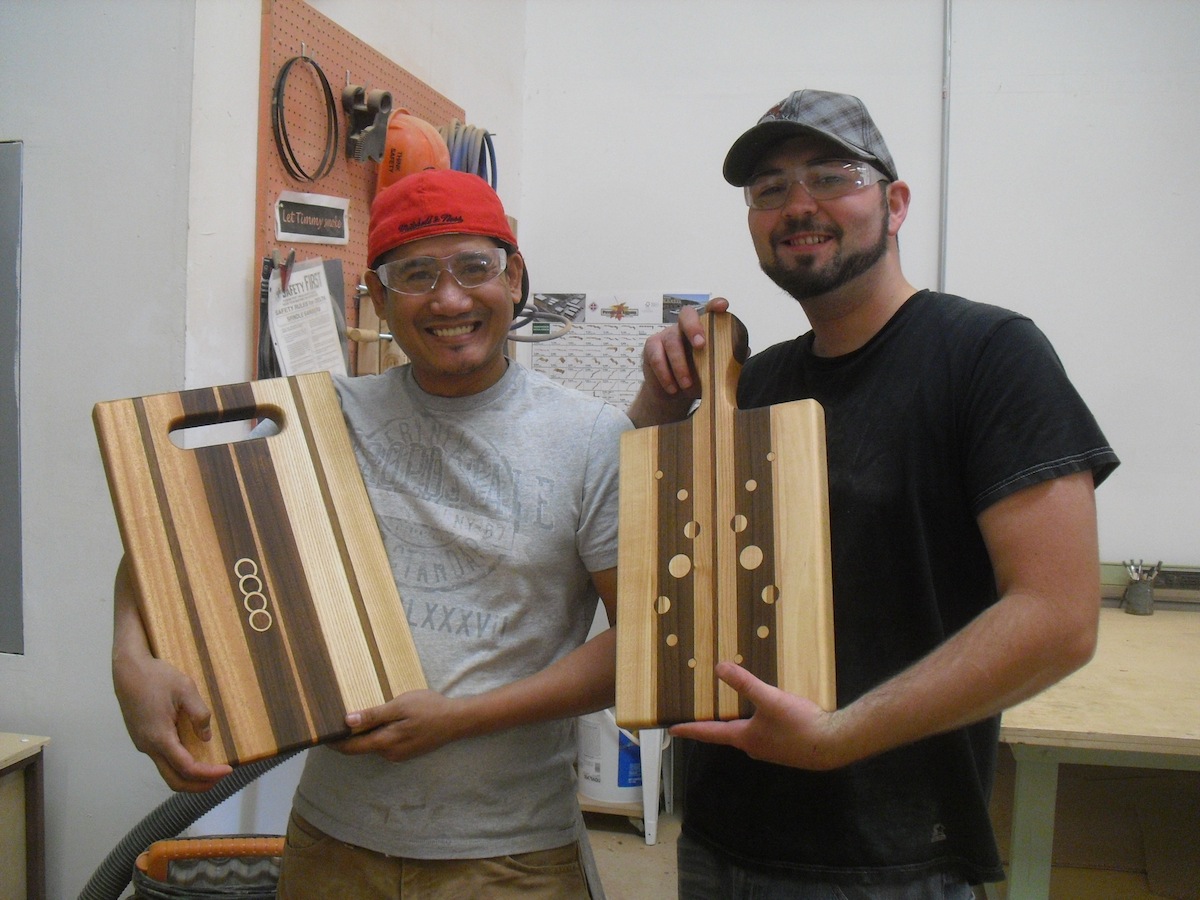

One of the projects we make in the class is a custom designed bread knife - and this is where everyone's creativity really kicks in. Lately, some of the most creative knives ever have been made - here are just a few.


Brass (er...wooden?) knuckles, anyone?

Life seems like it's about to get a little crazy again - with lots of pieces to build, classes to teach, house guests arriving - it's so easy to get caught up in a hectic day and stress out about everything. (It seems even worse when the weather is hot!)
But - if I had just one wish for you (and me!) - I would hope that you take the time to relax just a bit. Take a deep breath, step back from your busy day, and maybe have a banana split for dinner tonight. Check it out.
But - if I had just one wish for you (and me!) - I would hope that you take the time to relax just a bit. Take a deep breath, step back from your busy day, and maybe have a banana split for dinner tonight. Check it out.
Wednesday, June 20, 2012
Channeling McGuyver
Call me finicky, but I have yet to find a lid support that really like.
Most aren't what I'm looking for - they're either too big and clunky, or they're too labor intensive to install.
Simple, sleek, and easy to install are my criteria.
I've been on a box-building binge lately, and have been searching for something that I could use for my lid supports. You would think it would be easy, right?
There is just nothing out there! I've driven all over town, searching the obscure hardware stores, and scoured the internet, looking at most of my favorite hardware sites. Nada. Nothing. Bupkes.
Then I wandered into one of the Big Box stores, eyes glazed, not expecting to find anything that I could use. And spied this.

Seriously, you have to think outside the box for something like this. Do you see it?

Clip off the ring

and you're left with this.

Spray paint them whatever color you want - I love flat black hardware. Spray them, and hang 'em out of the way for a bit.

I also picked up a few aluminum spacers

and painted those, too.

These are the sole reason I went to all this trouble - you just can't find these ends anywhere.

And here is how I put then to use - attaching one end to the lid,

and the other end to the bottom. I don't completely tighten the screw, I want the chain ends to be able to pivot just a bit.

And there you have it - my $5 lid support solution.

By the way - if anyone knows where I can just buy just those chain ends without having to the whole drain plug, can you please let me know? My collection of plugs is starting to get out of hand!

Saturday, June 16, 2012
There - I fixed it
You know a blog post is boring when even your mother quits reading it!
In my last post, I mentioned in the beginning that if you weren't a tool geek, you would probably find the info about the tablesaw fence repair rather boring. My mom told me later that in the middle of reading the post, she thought to herself - why am I reading this? (Thanks, mom!)
I'll try to make this a little more colorful...
One of my favorite (time-wasting!) websites is There, I fixed it! It's full of redneck repairs, and sure to keep me hypnotized at my computer for two hours. Here's a perfect example - doesn't everyone need a gas powered flashlight?
So - on to my repair...
Once upon a time, my Lee Valley Journeyman's brass mallet looked like this.

I don't even remember how long I've owned it, but it's been a long time. The handle has been replaced a few times; the last one was made by a Mike, a student of mine, about two years ago.
Imagine your woodshop, but with 30 or 40 people using your tools, day in and day out. You have to accept that the tools will break from time to time. It's just the way things go.
Hell, I break tools all the time, no sense in getting all worked up about it!
So when my mallet head separated from the handle, I knew I had to perform a little magic to it. We use that mallet all the time, so it's couldn't stay broken.
I made a couple of dowels, using my tenon cutter. The grain had to run the length of the dowel, for strength, unlike the plugs we make for cutting boards, in which the grain runs in the other direction.

Hard to see here, but I drilled out the center of the broken handle.

Gorilla glue isn't my favorite adhesive - but for this repair, it would probably be the best choice. Since it's a moisture activated glue, I dampened both the inside of the mallet handle and the plug itself.

This stuff is wicked to your hands - it stains anything it touches.


So I carefully inserted it into the handle, and then put it into a vice, to press it all the way down into the hole.

The next day, I carefully cut off the excess and sanded it perfectly flat.

Of course, I had to pre-drill a new hole, so I measured the distance in between the threads to determine what bit to use.

You want the threads to bite, but you have to remove most of that wood, or you'll just end up splitting the handle.

Almost perfectly centered!

Again, I dampened the wood, squirted some glue inside, and then threaded the mallet head into handle.
The next morning, it needed just a bit of cleaning up.
The next morning, it needed just a bit of cleaning up.

And now - it should be good as new for another few years!

Another boring repair post, mom!

Subscribe to:
Posts (Atom)