There is a lot of focus on water conservation when you live in the desert. Just watering your yard on the wrong day of the week can earn you a hefty fine. And since I've been doing a ton of ceramic work lately, I've found my bill creeping up.
Sure, I usually have a rinse bucket in the sink outside, where I can rinse clay off on my hands without wasting gallons. But I decided I needed a sign near the sink to remind myself to conserve. I did a clip art search and found a design that I liked.

And added some text.

Here's there best part - combining technologies. I cut out a simple pattern in MDF of the artwork, using my laser engraver.

I even saved the small pieces that came out of the individual letters. (I'm sure those have a name.)

There are basically two types of ceramic pieces - pots that are thrown on the wheel, and pieces that are hand-built.
I decided to hand-build a sign, so I grabbed some clay and rolled out an even, compressed slab.

My slab roller is powered by a small motor, which saves a great deal of wear and tear on my back. So I rolled out a slab,

and then gave the pattern a quick coat of release, so that it wouldn't stick to the slab.
Everything that touches the clay needs some sort of release sprayed on it, or it will stick to the clay. The release could be something like WD-40, or Pam cooking spray - anything that is greasy and non-stick-y.
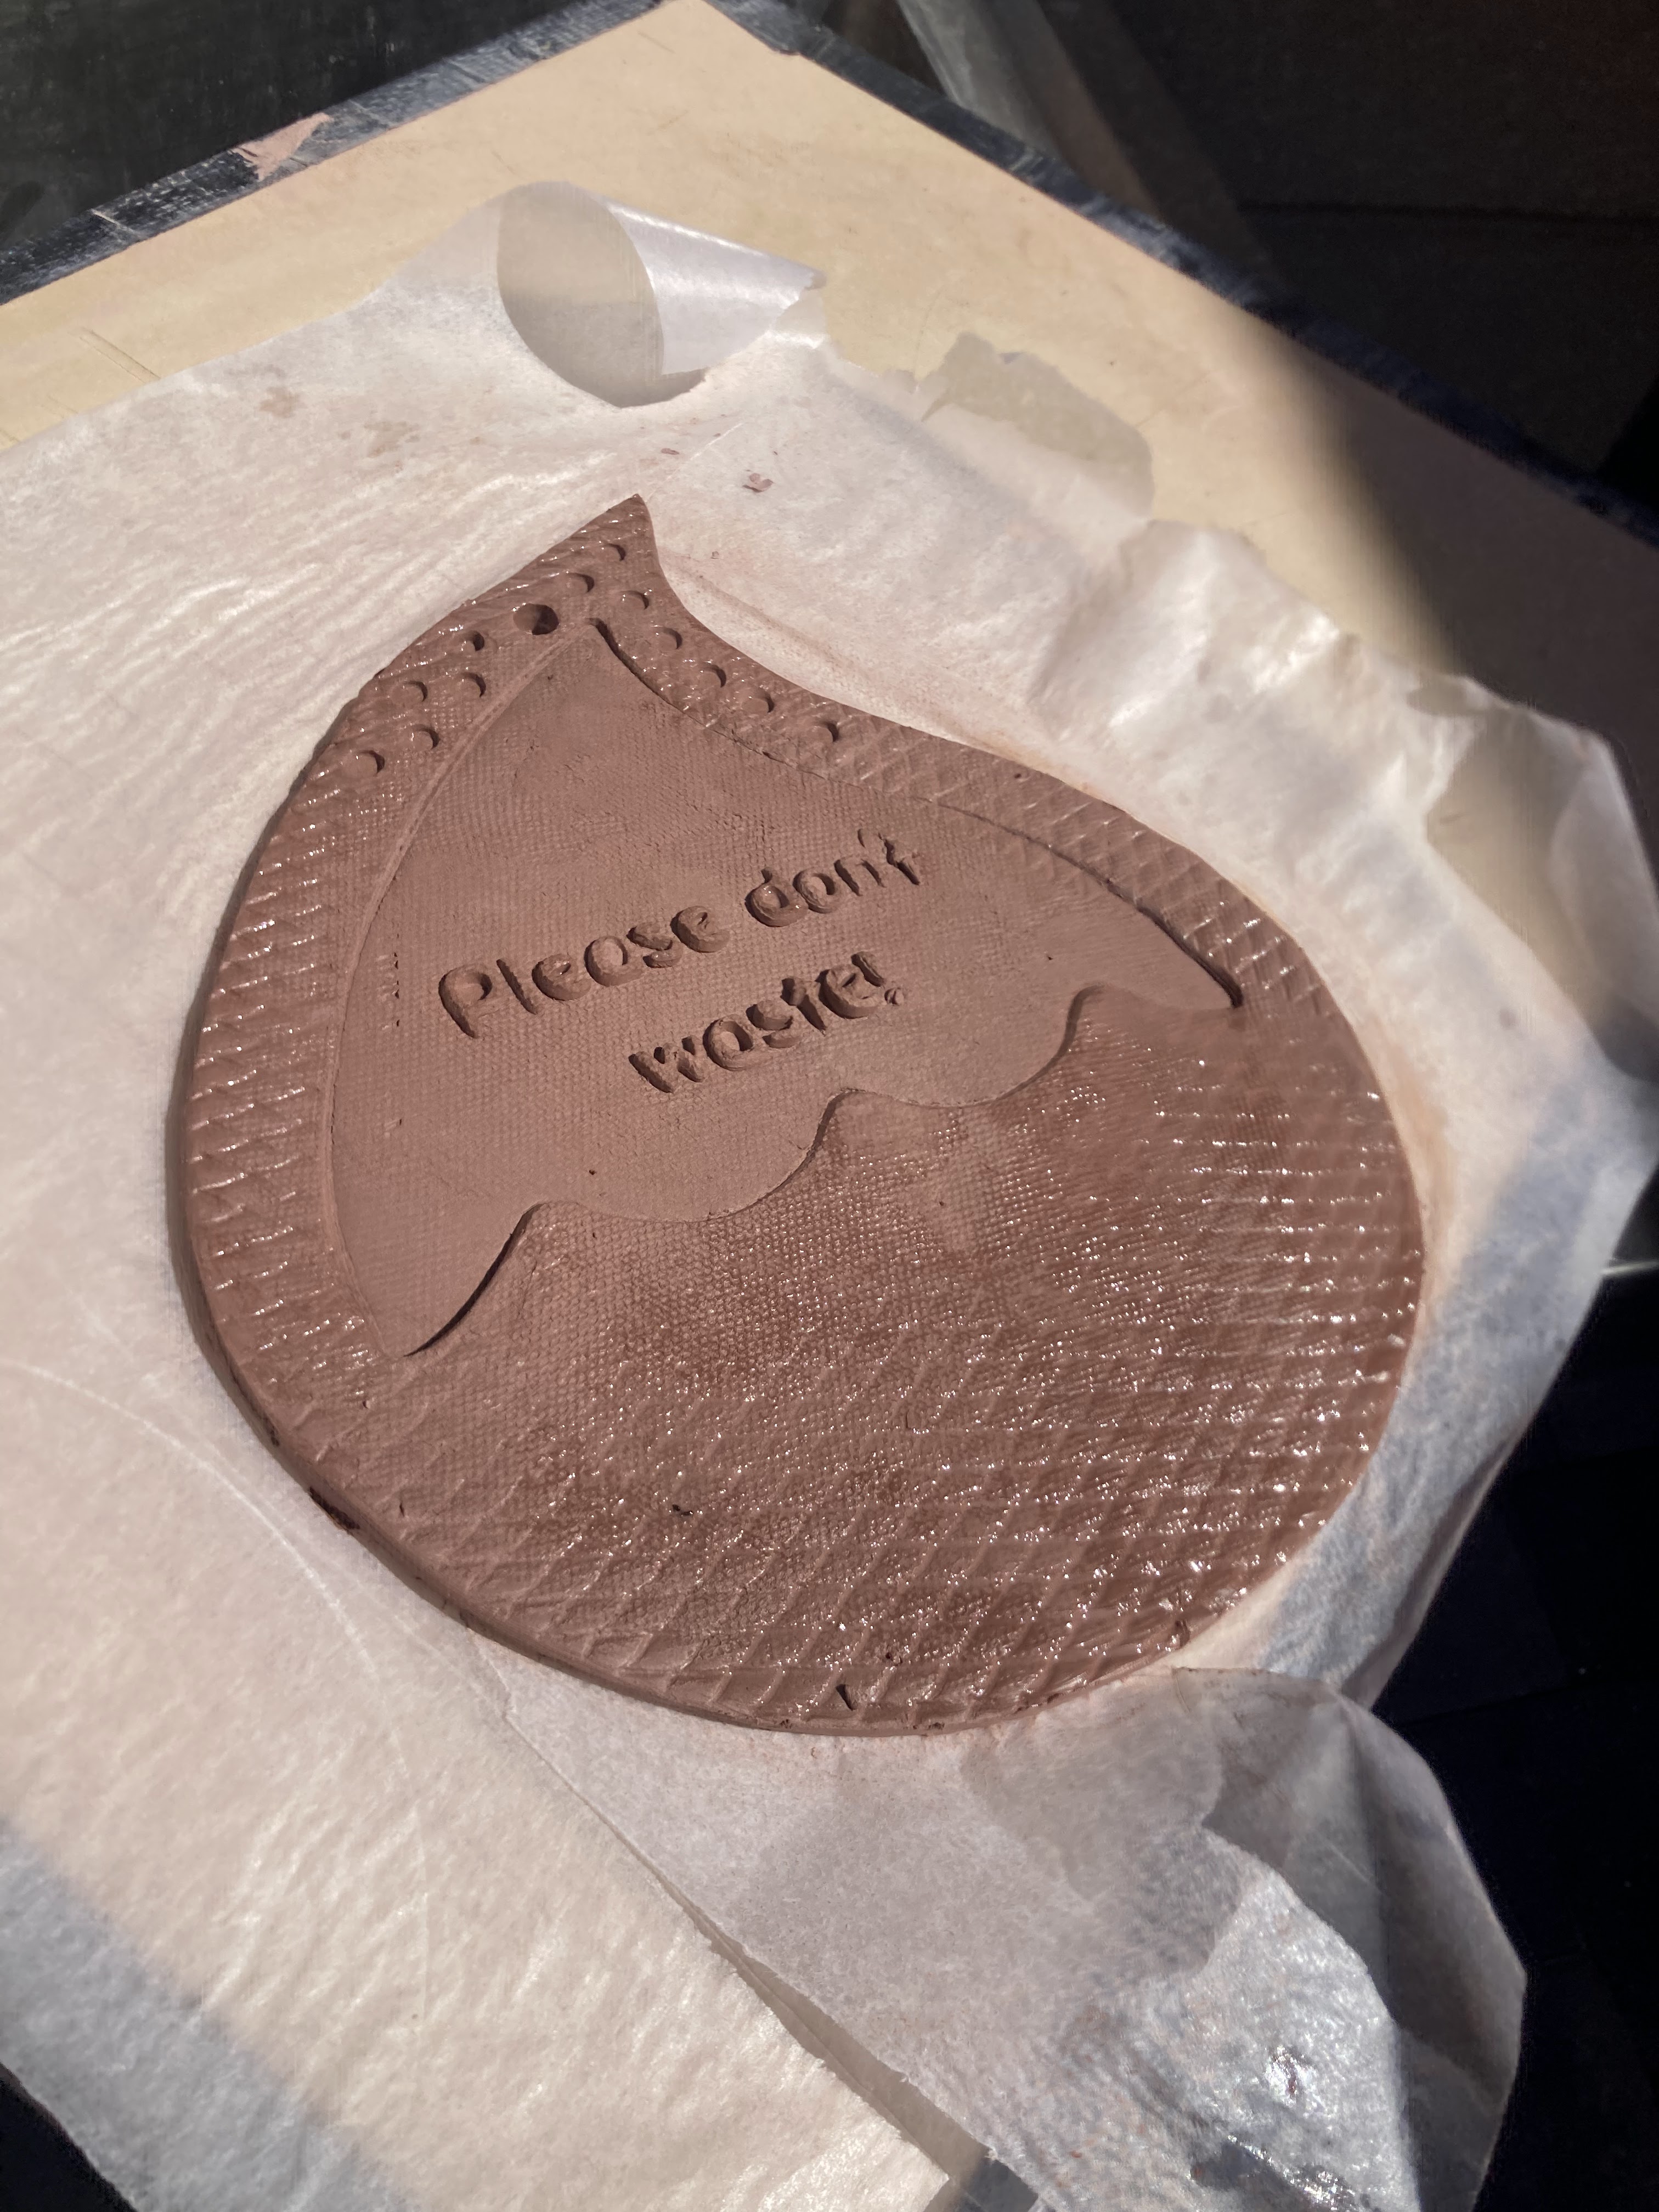
With the pattern on the clay, I traced the outline with a knife and cut the final shape.

Using a roller - it was easy to add a bit of fish scale texture using this texture mat. Again - this has to be sprayed or it will stick.

Then I took the tiny letter bits and added the final details to the letters.

Here's the final piece - with lettering, a little fish-scale texture, and a hole at the top for hanging.
Once this is bone dry, it'll be bisque fired to around 1900˚. If there's any moisture in the piece at all, the buildup of steam can cause the piece to explode in the kiln. Luckily - in the heat here, the clay drys out fairly evenly and quickly.
I'll experiment a bit with some appropriate colors, in greens or blues... you know - the colors of water. Glaze looks amazing when it pools around the textures on the clay, so this piece is going to be special.
With a little luck, it'll be glazed it and fired next week. Stay tuned!