You have to love an ad campaign with a sense of humor - this is just terrific!
Friday, November 25, 2016
Monday, November 21, 2016
Checking another commission off of my list...
The holidays have a way of sneaking up on me. It seems like- at this time of year, everyone wants their pieces finished before the holidays begin. I can't blame them. If you're going to be entertaining, you want your house in order.
Remember this coffee table I built a few years ago?

It was about 5 feet long, and weighed a ton! It was so heavy that I needed help working on it, and certainly needed help loading it in my clients car.

(Thanks Richard and Eric!)

Earlier this year, they approached me about making another set of tables, using slabs from that same piece of petrified wood. Honestly, this style of woodworking isn't what I normally do. But these clients are fabulous people, and I really enjoy building for them.
So this project started out much the same way – building the framework round that slab.

Since the slab was one inch thick, the frame work around it was built with one inch oak. Cutting the angles cut is tricky, but grinding the perimeter is far more difficult.

Here's my first casualty– I dropped an earbud in between two boards.

That was the worst thing that happened. The rest of the shaping and fitting went very smoothly. I'll be heading to the Apple store for a new set...

Once everything was shaped, it was it breeze to attach the framework together using Festool dominoes.

And just like that, the top of this table started shaping up nicely.

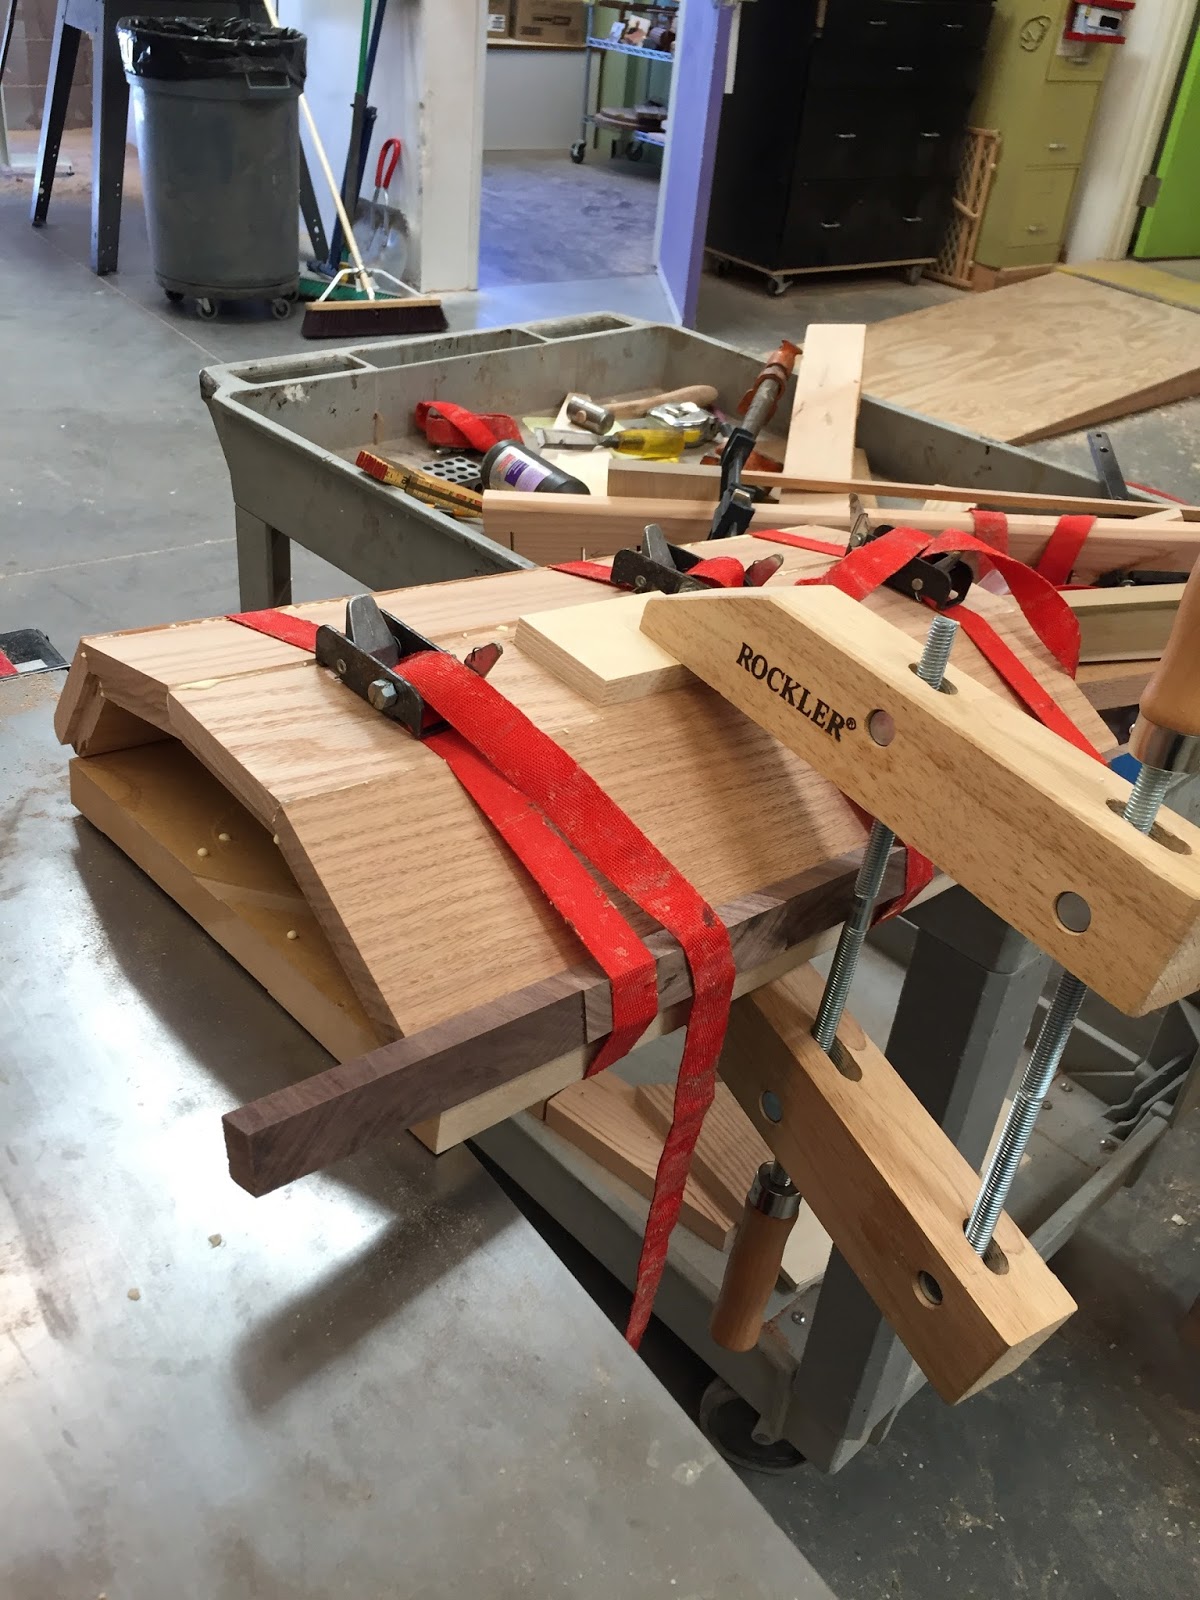
Clamping them is always tricky though, and as the saying goes– you can never have enough clamps. That's so true when building something like this.

All that was left after this was to round the corners, shape the top a bit, and then sand.

And sand.

And sand some more. That's one thing I never grasped as a younger woodworker - a piece might take 15 hours to build, but you might have another 15 hours in sanding. That's if you want to do it right!

It was time to start on the base; the last time I built the coffee table, the base really stumped me. But this time around, I had a few tricks up my sleeve. It was just a matter of figuring out some angles, and cutting them on the table saw.

The hardest part (again!) is clamping everything together, when working with irregular shapes. Honestly, when building something like this– I have to pull out every trick in the book.


That's okay, once they're done, they clean up easily and look fabulous. This plane works wonders on those mitered corners.


The end of the day – there was a mess on the bench....

but the bases were finished!


A little more work with the router and the sander, and I was finally getting close to the end of construction on these two pieces.
These tables needed shelves, and frankly, that was the most difficult part. Fitting the shelves into this angled base was tricky. Carpenters know a simple trick about scribing pieces that have to fit together, which is exactly how I fit this shelf.

It involved a lot of tracing that angle with the pencil, and then cutting to my line on the table saw. Not for the faint of heart, I'll tell you that.

But it makes for a perfect fit, and really makes a difference in a piece like this.

With all of the construction completed, it was time for staining and finishing.
When I built that original coffee table, I used a stain made by ZAR, and damn! - my local supplier quit carrying it. Luckily, I ran into a saleswoman at the hardware convention here in town, who was more than willing to help me out.

She mailed me a quart of this stain, thus bailing me out of a huge jam. (Thanks so much, to Michelle and to UGL!) That's what I call customer service!

And two coats later – these tables matched the original one perfectly.

I have to say (and not just because she sent me a free quart!) that I really like using this stain. It goes on easily, with no streaking, and builds up layers nicely. Not all stains apply this evenly, nor do they build up rich color so nicely. Staining is tricky business, as I've learned over the years.

If you've never tried ZAR stain, I highly recommend that you do.

It will make your project look amazing.
And finally on to the grouting..... when I used to do a lot of tile work, I could never find grouts in the color I wanted them. In fact, I remember one time I was building a piece that needed purple sanded grout, and just couldn't find anything close to the color I needed.
So I spray painted playground sand purple, and then mixed it with clear silicone caulk, in order to make a purple grout. It worked, but was a PITA - I don't recommend spray painting sand at all!
Luckily - I learned about this product - Color Rite sealant and adhesive caulk. This stuff is the bomb.

It comes in a huge array of colors, and it was easy to find the perfect color I needed for these tables... in this case – DM 03.

I glued the petrified slabs down in place using some marble/ stone adhesive, and waited a day for everything to dry.


I used to cringe when I had to caulk something, it was always really messy work and I was never satisfied with the result.

But I will tell you– this caulk is so easy to work with, all you need are some paper towels and a little bit of water to keep your finger lubricated.

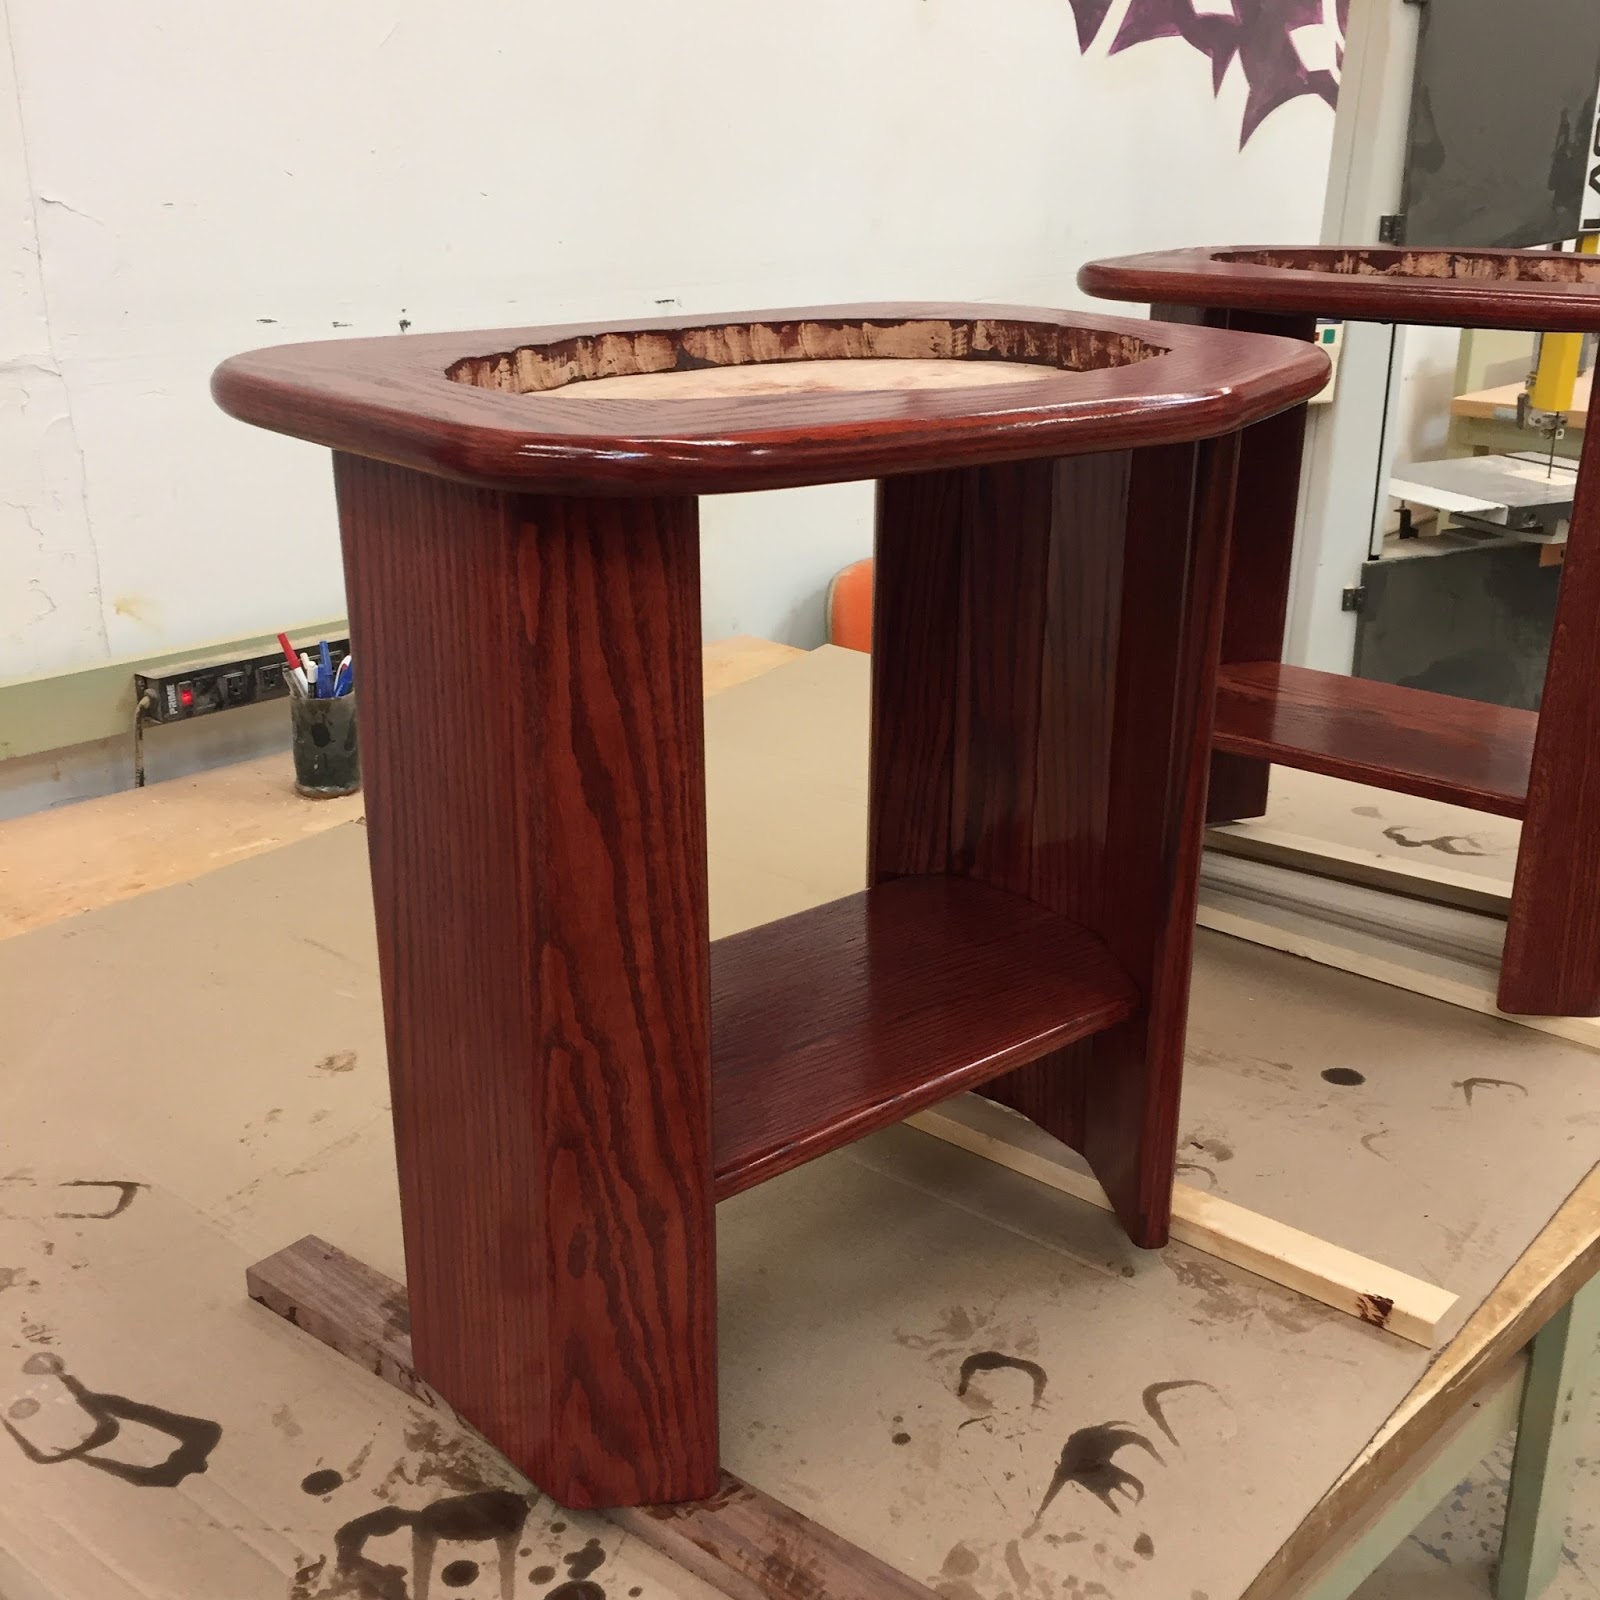
And just like that - these tables were done.

And although this style is far outside my comfort zone, I have to say that I really enjoy building pieces like this. They challenge me, and take me far from my normal skill set. That's a good thing.

The good news? ...the clients love them. That's all that matters!

Friday, November 11, 2016
Off the radar....on the air force base! Happy Veteran's Day!
Have you ever heard of the Red Horse Squadron?

I had no idea that Red Horse is an acronym for something - but you can read about it here.
Pretty impressive!
My boy-Friday (Denny) and I

were lucky enough to be invited to teach a couple of woodworking classes at the local Air Force base here - to none other than.....

the Red Horse squadron!

Anyone that puts a dozer on the front end of a tank gets my respect!
Now these guys already are already pros - they do it all, from building schools to fire stations, to cities. But their cabinet making skills needed a little TLC, and that's where we came into the picture.

We started off with some basic cutting skills on the table saws. By the way, their table saws were massive! Everyone took turns ripping and crosscutting - and we ended up with a ton of wood that was prepped for cutting boards.
You might think that a cutting board is a simple (i.e... too easy) project, but it actually teaches a ton of skills. Cutting, jointing, planing, routing, squaring up stock - it's a cleverly design project that gives you an awesome product in the end. BAM.

We gave them a few pointers about composing a cutting board, and then we stepped back and let the magic happen.

Everyone designed their boards then grabbed some clamps and glued them together.


After the glue was dry, we scraped the boards clean and prepared to plane them.

Their larger planer wasn't working as well as we'd hoped, but these guys had a back up plan - so we pulled out their mobile planer and Denny supervised all the guys.

After a routing demo, the fellas got their creative juices flowing.

We even fired the laser engraver up,

and one soldier's board was decorated with his mom's initials. (A great Christmas present, as he bragged to his buddies!)


Most of these guys said that they were giving their boards away as gifts, and you could feel their pride.

We upped the game on the next project– working with compound miters. This is a super easy technique, involving just two tweaks to the table saw.

We ended up making some great lamps, and even better– they had a secret compartment inside of them, to hold their weapon.

Well, it's not so much of a secret anymore, is it?
There's quite a bit of detail work involved in this project, and some of the guys chose to (again) up their game.

One Carolina Panther fan dug up some clipart, and lasered the front of his lamp.


They had some of their company logos already lasered on some coasters, and a few experimented with using those on their lamps.


At the end of our time together, their skills were exponentially better,

and we met some new buddies. (Thanks for the beer, guys!)

I'm putting this post up in honor of Veterans Day - thanks for your service, guys, (You too, Denny!) and....
be safe on those tools!

Subscribe to:
Comments (Atom)