Wednesday, January 31, 2024

Upright and ready to bolt!

This table is finally starting to take shape!

It took four strong buddies to get this table on a couple of carts. This thing is ridiculously heavy and I've already had a wheel fail on one of the carts. 

Once I bolted the legs in place, it was time to turn my attention to the aprons. Notice that there's no simple, yet sturdy way to attach the aprons except at the corners, where they can be bolted to each leg. 


Since there isn't any support behind the aprons....hmmm... plan B.  I clamped them in place, and considered my options. 


I decided to bolt some 2x bracing on each side, so each apron could be firmly bolted into solid wood.  

The two shorter ends were fairly easy - the carcase of the table was solid, square and plumb on each end.


But holyhell - the two longs sides were a different story. Most of the wood was rotten and/or missing in some areas. This side (shown below) was so punky rotten, you could scrape it away with your fingernail. It was so uneven that I had to pull a string to simply see where I needed to build out the underside. 

And each of the sides had to be done differently, since none of the side dimensions were the same. 


 But I managed to find some solid wood down there, and bolted the 2x material to it. 


 Luckily, none of this will show, and it sure added a lot of strength to the table's structure.  


The next challenge will be attaching the old aprons in place.  I'll need to cut a little off of them, as they need to be a little narrower. 

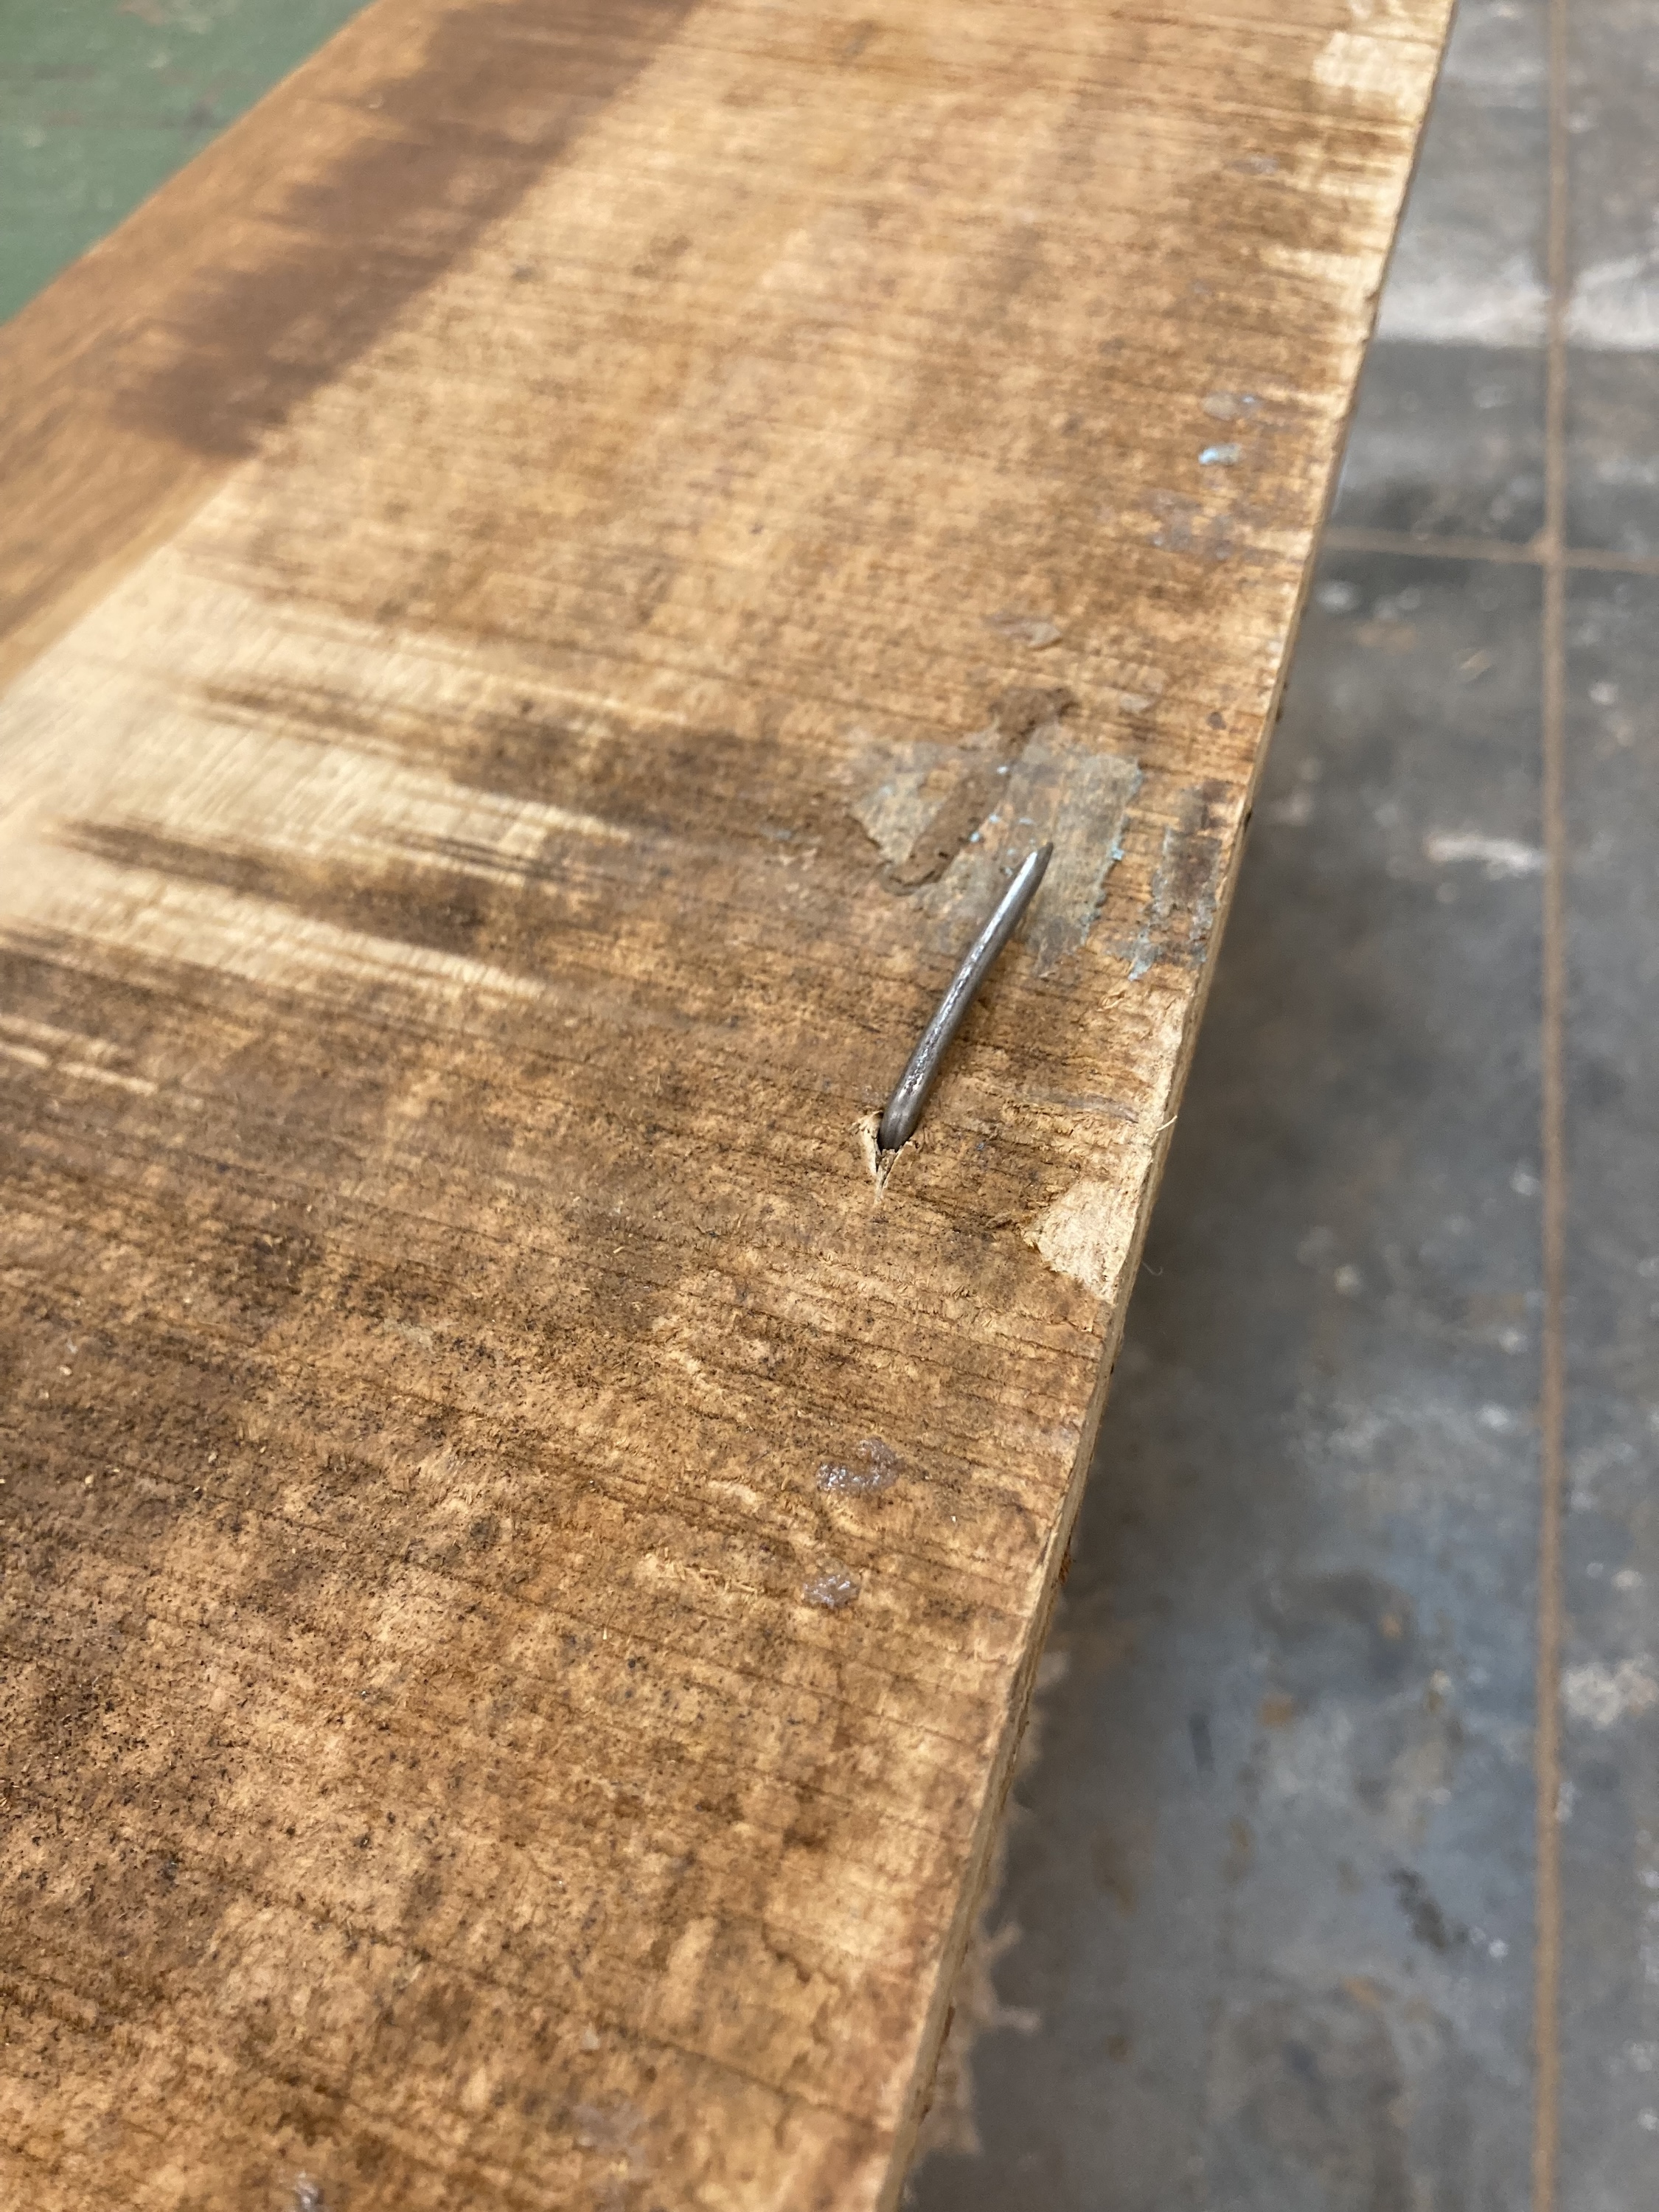
That's going to be a challenge, as there are a ton of old nails in each board. I will probably put an old blade in the saw, and just cut right through the nails, instead of trying to pull them out - there are just too many! Oh - and since I'm cutting on a SawStop - the nails are liable to trip the blade. So I plan on bypassing the safety feature.

Wish me luck, and stay tuned!


Friday, January 26, 2024

A beast of a project

It started when a customer brought this piece to my shop, asking me to turn it into a coffee table.


I'm not even sure what to call this – from this view, which is the bottom of it, it looks like an old farmhouse door. Maybe something from a cellar, with numerous coats of paint, and some odd handwriting on the panels. The wood surrounding the doors is massive and heavy, and mostly rotted.


They also gave me a set of legs, and upon further inspection, these legs appear to be made from solid blocks of wood.  I can't identify the species, but I know the wood is heavy. 


Really heavy.


The skirting around this piece was in horrible shape, with old hardware attached to it, and dozens of nails in it. 


Most of them were bent over, and I pulled out this cut off wheel


 to get rid of the nails.


Did I mention some large cracks in the skirting? 


Luckily, I had a syringe that made it easy to get glue in all of the cracks. After clamping all of the repairs, the cracks mostly disappeared. 


The corner of one of the skirting boards that was missing. These boards have such a nice patina and distressing to them, that I decided to repair this corner. So I trimmed off the ragged edge, 


 and dug out a piece of wood to match it.


 It had to be planed down to the same thickness as the skirting board, and glued in place.


Then I trimmed it. I'm pretty sure I can blend the color with stain to match the older patina. 


When I turned my attention to the legs, I realized that the top part of each leg was out of square, and at different lengths. I have no idea how they made those legs work for this piece, but maybe these legs were from another project. 


One by one, I attached each leg to the corners, attaching them in place with perpendicular bolts. Drilling through the top of these legs felt like drilling through concrete. 


In some cases, the wood was so rotten that I had to add metal plates to provide stability. 


And finally, all four legs were bolted in place. 


I'll have to ask a few strong friends to help me get this upright on a cart.


Next up? 

The skirting... the boards are warped and gnarly, and I'll need to enlist Hugo, my metal artist, to make some corner brackets to hide the ends of these boards. A few of them look like a dog has chewed them.

Stay tuned!


Wednesday, January 10, 2024

Not-so-much Fun with Angles

Did you wonder how my four-foot picture frame turned out? 

Well, not as expected... at first glance, this looks fine, right? 


 Sure, it's a little narrower than I planned - I was hoping for a 2" wide ring, but a little chipping necessitated trimming it a little narrower than I wanted. 

See, that's the thing about trying to use up scrap wood... it's SCRAP for a reason. Maybe it had a hairline crack in it, or it was the end of a board, straight from the mill, with some checking on it. Either way, these scrap pieces were trimmed off for a reason... mostly unusable. 

And as mush as I inspected them for defects, I still encountered some problems once I started cutting the ring. 

Here - the whole side of this segment blew off. 


Same here.


And then - when trimming the ring a little narrower - the Dominos revealed themselves.


 Oy vey.


 So for now, it's leaning up against the wall, until I decide if it needs to go in the dumpster.  Yes, I could probably patch it, and paint it - but it's hardly what I envisioned when I was making it. 

The good news? I have virtually no cost invested in this, and just 2-3 hours of my time, so... what would I do differently? Probably use better lumber, for one thing.  Use wider pieces, too.... which would result in a wider ring. And finally - I would place the Dominos a little more carefully, so that they wouldn't be revealed when the finally shape was cut. 


Live and learn!


Friday, January 05, 2024

Fun with angles

 It's that time of the year - time for cleaning, finishing up some projects, and planning for what needs to be built going forward. 

After finishing that huge Sapele linen cabinet that frankly, was a little overwhelming, 

I wound up with a stack of cut-offs from the lumber I was using. (Thanks for the major help with that, Ken!)  They weren't long - maybe ten inches or so, and it was either - use them, give them away, or burn them. 

I love this calculator for building with segments. It lets me design a frame like this, tweaking it until I have the specifications that I want. 

I started with 16 pieces, about 10" long and 3" wide. Of course I Domino'ed them! 

It starts with gluing together two pieces. 

And then gluing that set into a 4-piece set. And so on...

When you start getting larger segments, the clamping can be a little tricky. In this case - a clamp is needed end-to-end, but the force of that makes the miter want to come apart, so a perpendicular clamp is needed. Also - an extra set of hands is nice to have.

 These two "quarter segments" now get glued into a half. And so on... until I had two halves. 


Here's the best part - once you have two halves, you can check the joints on the two halves, to see if they mate correctly. If not - you can correct the angles slightly, to make you look like a woodworking rockstar. That sketch below shows that the two haves are slightly off, but easily corrected. 


Which is what I had to do, slicing a hair from each segment until they matched perfectly.  

Clamping that was a little tricky - the strap clamp needed to put this together has to be HOW LONG??

Well - if that circle has a four-foot diameter, what's the circumference? Well, I guess it's a good thing math is my friend. So here's how you calculate it:


Circumference of a circle who’s diameter is 4 ft

C = 

Let  = 3.1`416

C = 3.1416  4 ft

C = 12 and 354/625 or = 12.5664 ft

Answer is: 12.5664 ft


So the bigger question is - who has a strap clamp that is 13 feet long?

NO ONE! But in a pinch, a towing strap will work, along with a couple of long bar clamps. Of course, I forgot to shoot a picture, but trust me - it worked.

And here's the final piece, assembled and ready to be cut into a circle.

 I added a temporary center piece, to attach my router/compass.

 It was fairly easy to find the dead center, measuring from a few different sides, to find the center point.


 My router set-up for cutting circles isn't fancy - but I'm not spending hundreds of dollars on a compass jig that I use 5 times a year. Oh, and I need a new knob on my router base, but this wooden replacement works too. I'll replace it the next time I order tool parts, so this is a temporary fix.


Wonder how my round frame turned out? Stay tuned...