Wednesday, April 30, 2014

We Do Birthdays Right!

When Christine, a local woman who works with wedding event set-up and planning, called me a few weeks ago and asked if she could use my shop for her birthday party– I wasn't quite sure how it would work out. 

But I said yes. What the hell – if the shop is free, why not use it? 

We worked out a few logistics, and decided that everyone would make a small cheeseboard. I mean, who doesn't love a beautiful handmade wooden board in their home?

A few week before - I started prepping for the party - gluing together the cheeseboard blanks, and cleaning the shop. Eric's always a big help - brushing the walls clean in the bench room. 


The day before the event, my helpers and I rearranged everything, to make more room and to streamline the process. We were so prepared, there was little to do that morning. Except clown around a bit. Here is my "see no evil, hear no evil, speak no evil" crew  - we worked perfectly together.  (Thanks so much, Eric, Kris and Lupe!)


When everyone had arrived at the shop, I gave a small orientation speech, 


showing them how a cheese board is glued together, and how to plane it down and square it up. 


Then the magic began!!! 


Everyone chose a board, and scraped them clean. Seriously, the energy in the room was fabulous, even though a few of these new woodworkers were Strip performers and were tired from working the night before.  Some told me they'd actually gotten to bed about 5:30 in the morning the night before! 


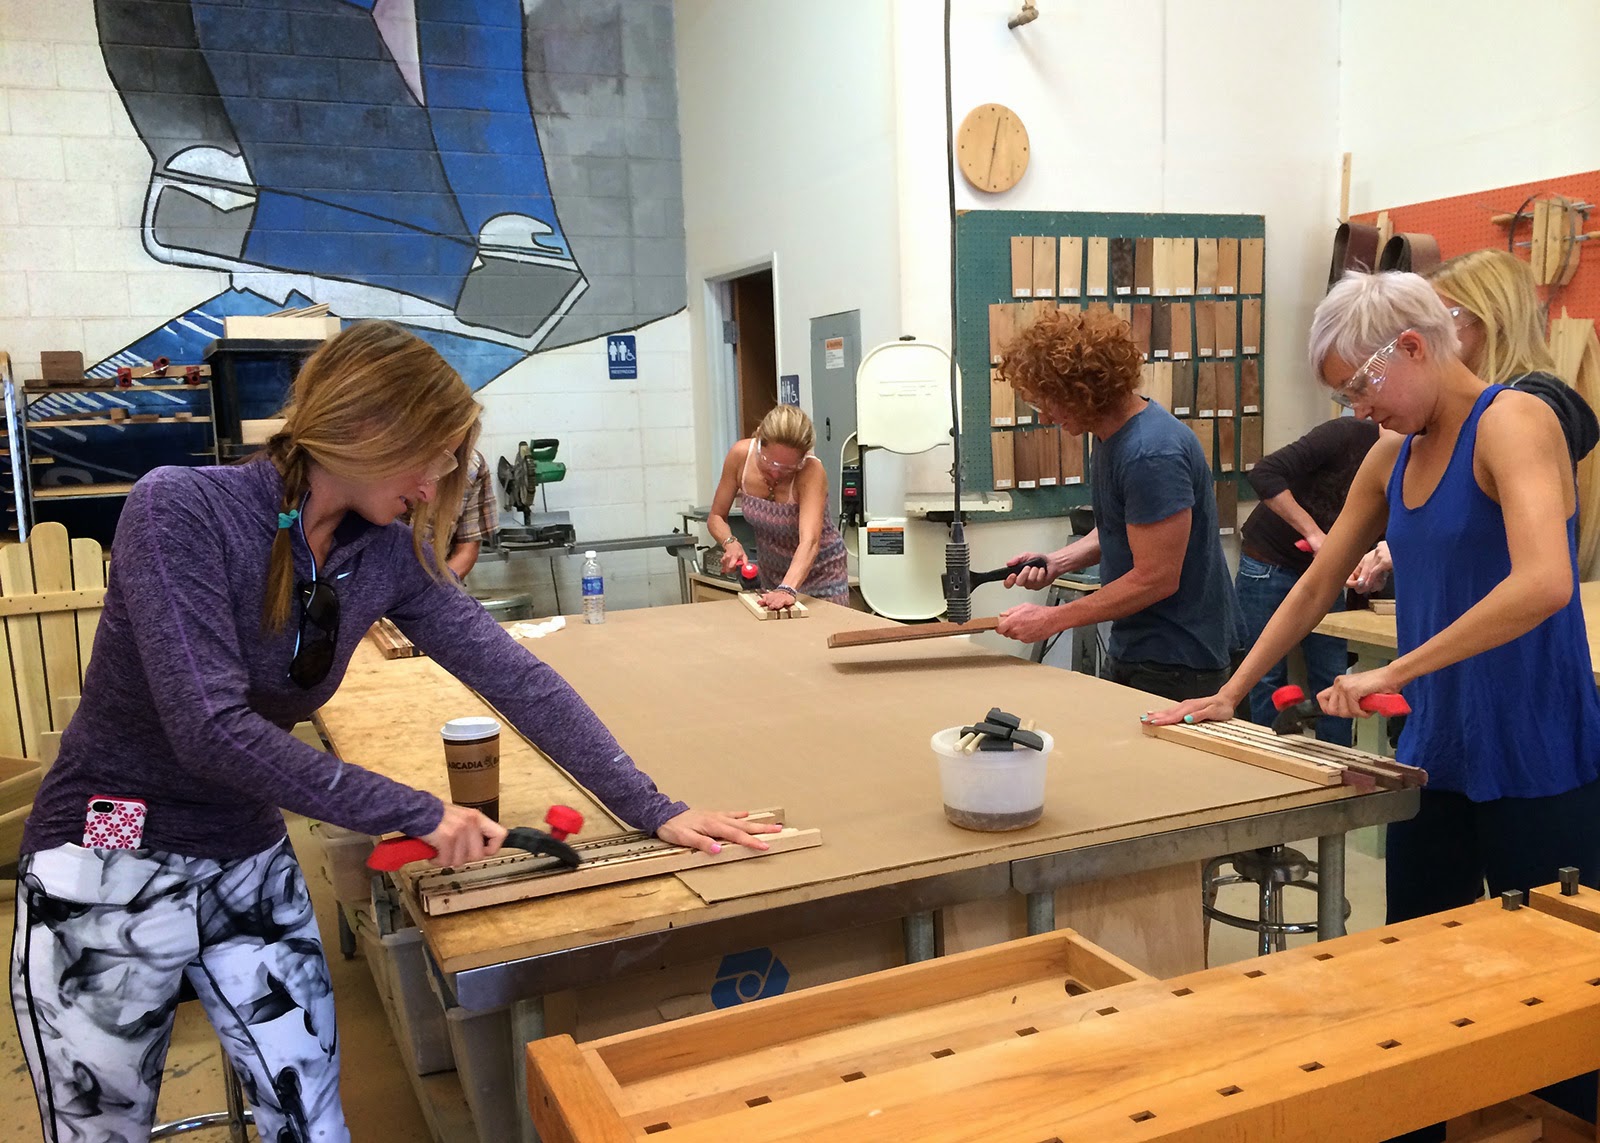
Still, they kicked ass prepping the boards for the planer.


 Eric worked with each one as they planed, 


and after I showed them how to use the chop saw,


  Lupe help them trim their boards square. I'm telling you, we were so organized - that this party went off without a hitch! In fact, I think we might've made a new wood worker or two out of this group. 


Look how carefully she's examining her routed edge! Kris was on router duty, and made sure everyone did a perfect job!


Once we got to the sanding and finishing stage, things started to loosen up.


 Well, I take that back - this was a really fun and loose group, and they had a blast the entire time!


As they sanded, they knew they were getting closer to seeing the finished product - the excitement in the air was palpable.


 Let the oiling begin! 


Here we are - just two hours later - with some kick-ass-fantastic boards. 


Love the hat! 


Anyone interested in a terrific birthday party?  This is like a "Build a Bear" party for adults  - but we make cooler things. 

Much cooler. 

Call me! 


Tuesday, April 29, 2014

WooDoo by Andre Maat


Someone posted this on a woodworking board that I belong to on Facebook - a short stop-motion study on wood. 

What a cool little video!


Saturday, April 26, 2014

Call me the "Clamp Master"


Even though I'm making good progress on putting this tabletop together, I feel like it's taking forever! In the shop, some weeks are just like that, I guess!

With all the frame pieces cut and mortised with the Domino, it was finally time to glue it together. And I knew that was probably going to be quite difficult! It's hard enough to glue things that are square and four-sided - this piece was going to be a challenge! It finally dawned on me to do it in sections - actually, I'd been leaning that way all along, but was worried that when I finally got to the end of the gluing, where the last few pieces went together, that my angles might not line up. So that was in the back of my mind - but I was more concerned about getting nice, tight joints. No gaps. 


So I started gluing them together individually, 


which was no small feat! I used some of the cut-off pieces, since they were at the angles I needed. To keep them from slipping off, I stuck some sticky sandpaper between the pieces - to help the block "grip" the wood. 


In other places, a Domino helped to keep the clamp in place. 


It took a variety of clamps, and I'll tell you - the best part about it was that the weather was warm, so the glue set up fairly quickly. 


I'd put a section together, and and hour later, I'd be able to join it to another section. 


In all, this top went together with about 30 minutes of actual working time. Not bad; I'd figured on triple that time! And even though I worried that my final assembly might result in some poor miters (of which I was fully prepared to correct on the saw!) - these miters were perfect. 

PERFECT. 

Not a single gap. 

When it was dry, I sanded the joints flush - they were nearly perfectly flush anyway, so it barely took any time to sand anything.


 And then I applied that back - a 1/4" piece of Baltic Birch plywood that was cut with a 2" overhang all the way around the opening. 


 The last little detail was trimming off the excess of the top - remember - I'd made it bigger than it needed to be, so that the scribing wouldn't reduce the wood down to toothpicks. I drew a few lines and trimmed everything on the Laguna bandsaw. It's the perfect tool for free handing some long, straight cuts - there would have been no way to make these cuts on the table saw. 


 All that is left is to round out those corners - I'm going to get a compass and draw a nice radius at every joint, and then cut off the points. This top is 95% complete, and that makes me very happy.  It's been a challenge and great learning experience - but I don't think I'll try another one any time soon! 


Wednesday, April 23, 2014

Sad day at the shop...


It really saddens me to say that Brandolyn lost her battle with cancer yesterday - she was bright and fun, and a good woodworker, to boot! 


Sending nothing but good thoughts and love to Scott and their adorable son Austin.