Using that same jig that I made for the side rails, I routed the bed posts to hold the hanger hardware. Had I planned it a little better, I wouldn't have nailed the jig together. I should have used screws, so that it would be easier to disassemble.
Here, I've clamped the template to one of the bed posts.

It was simple to rout out the area for the hanger bracket.

But the router bit leaves rounded corners. The bracket won't fit until I square off the corners with a chisel.

A couple of cuts and the hangers drop right in place.

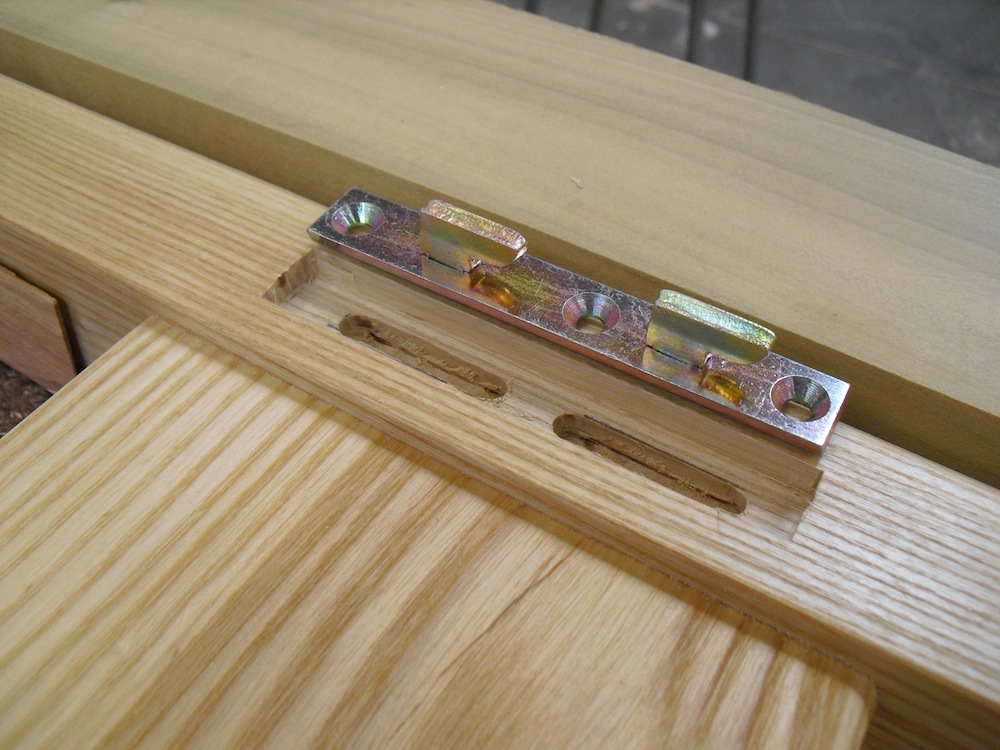
Since the side rails have a little bracket that clips into the post hardware, I have to rout a recess for those clips.
 Here, I marked the area that needs to be recessed.
 There was a guest in the shop, watching me work on this, and he mentioned that most woodworkers would probably just rout out that area straight across, not bothering to make two separate sections. He said it was the "purist" in me that separated the areas. I'm not sure that's it - I'm just too anal about things like this!
I clamped a scrap block of wood to the corner post, to give the router a larger surface on which to slide.

An edge guide on the router makes this cut a breeze.

Line up the bit with the pencil mark.
 Then set the depth of the cut.

One pass with the router gives you the perfect recess.

Double checking the recess, to make sure it's long enough.
Perfect!

I pre-drilled the holes, and double-checked the plate, to make sure I had it right side up!

Hardwoods like Ash are prone to splitting, so I pre-drilled and lubed the holes with a little paste wax. That makes the screws go in much easier.

So that's it - it took longer to write this post than it took to rout out the areas for installing this hardware.
We're almost finished. Let's assemble this bad boy!

Time to attach a ledger board around the perimeter, to hold the mattress deck.
 Add the deck - first piece

second one,

here is the third one...

and finally - the last one.
I plan on going back and drilling a couple of finger holes in the plywood, to make it easier to remove the panels. I'm also thinking of making a simple center post to add some support under the center of this bed. It will attach to the deck, and keep the bed from sagging in the middle.

Time to celebrate. All that's left is to apply a couple of coats of oil. (Thanks for the beers, Ned!)

3 comments:
You are one talented gal! Looks great--but looks low. I guess when you addd the 'mattress deck' it will be high enough to climb out of!
That is a well deserved beer. Great job, Jamie!
Regards, Lupe
Looks great. I hope mine turns out like yours.
Post a Comment