Since I returned from vacation, I've been working my tail off, catching up on some commissioned work. Here's a fun one - a client dropped off two slabs, unsure of the type of wood. They were fairly short - each one was about 30" in length. For whatever reason, they were cut apart, but the grain matched perfectly.

Since my planer is only 24" wide, and these were just a bit wider, I pulled out the Festool tracksaw and ripped off the splintered edge.

It probably would have been a better idea to hook up the Festool vacuum, but these two cuts would have practically filled up the vacuum bag, and those Festool bags aren't cheap!


As is the case with most live edge slabs, these weren't flat. The best way to test this is on a perfectly flat surface, so I used my tablesaw table to determine where the high spots were on the wood.

I like to mark the high spots with some chalk,

and then shave off the high spots with a scrub plane, which takes them off very quickly. This rounded plane iron was razor sharp,
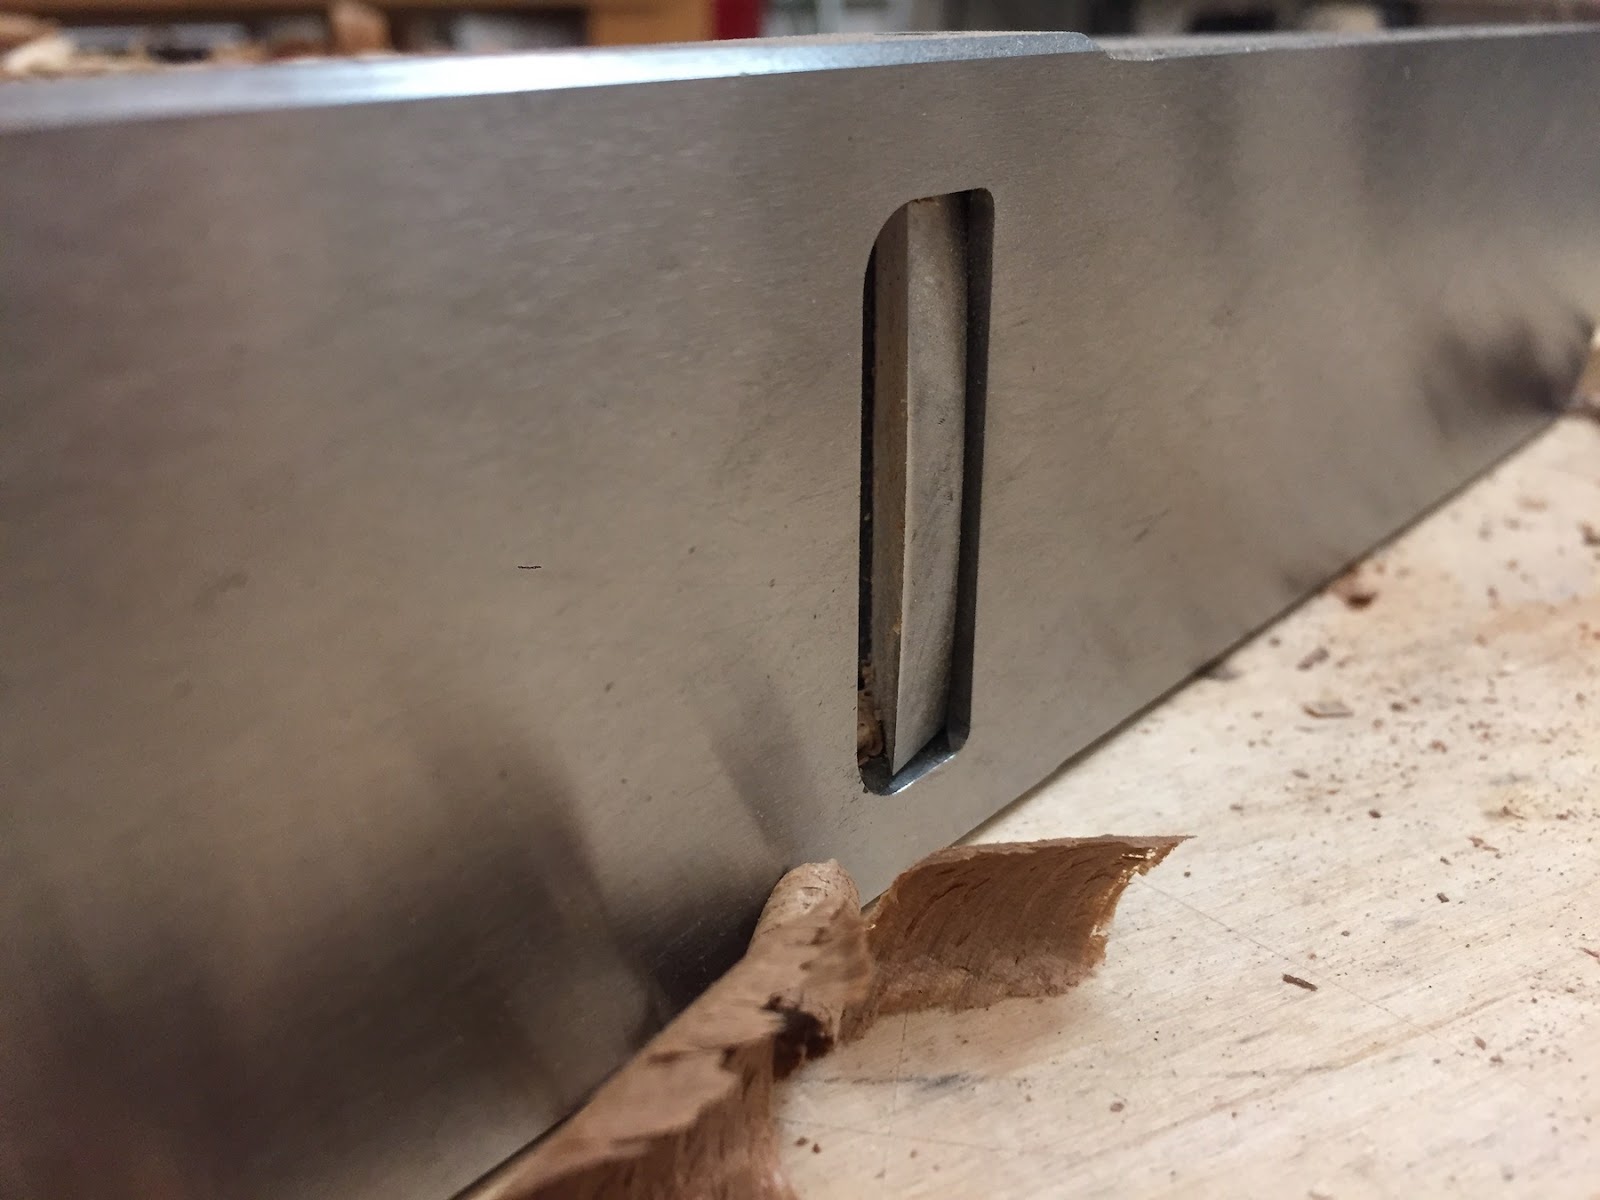

As every woodworker should know - the planer can't fix a warped board. The planer will only make a board a a uniform thickness, but if the board is warped, it will still be warped when it comes out of the machine. That's why it's so important to get one side of the slab flat, and not skip this step.
These boards had a very weird texture - it was soft and beautiful, but there were voids on one side of the slabs, which resulted in some pretty bad chipping.

Nothing the planer couldn't handle though! Again, the output of sawdust was so profound that it was easier to disconnect the dust collector and just let the dust fly.
With a respirator on.... let's not forget that!

After they were flattened and a uniform thickness, it was easy to cut the miters for the waterfall edge.

I clamped them together, ensuring that the grain lined up properly,

and marked out lines for the dominos that will hold the mitered joint together.

Four big dominos on the mitered edges hold this corner together.

A little sanding, and an easy glue-up followed - like I said - this was an easy project, and after a little sanding, I'll order a metal leg and finish this piece for my client.
Stay tuned!
1 comment:
"Really enjoyed reading this, thanks!"
Post a Comment