My most common repair? Dining room chairs, followed by bed repairs. Both take a beating!
I can't tell you how many times I've had to repair old beds, usually by making new side rails. The side rails often break, or get lost in moves across the country. So it seems like one of the most common bed repairs I perform - making new side rails. The rail itself isn't that hard - it's usually a 1x6, anywhere from 76 - 80 inches long.
But - installing the bed rail hangers in the ends has challenged me in the past. There are a few good tutorials, like here, and some really bad tutorials... that I won't mention!
By now, I've done so many of them, it's a quick job... cut the wood to size, slot the ends, and install the hangers with metal pins.

Like I said - I've read some ridiculous suggestions... like using a biscuit joiner to cut the slots (the slotting blade doesn't go deep enough), or drilling a series of holes to create the slot (too much work with the chance of your drill bit veering with the grain of the wood), using a hand saw to create the slot, and more ridiculousness.
The best way? Tablesaw, by far!
The slot only has to go into the end of the board about 1 1/4", and it doesn't matter if the slot shows on the bottom of the side rail - no one's going to see it.
Here's my technique...
You'll need to figure out where the hanger need to be in the new side rail - that's pretty easy. Put the hanger in place (in the headboard or footboard)

and place the new wooden rail next to it, where ever it needs to be located on the headboard. Trace the hanger onto the wood rail, and you have it's perfect location.
Here I traced it (on the back side of this board, where you can't see it!) but here's where the hanger needs to be located.
Here I traced it (on the back side of this board, where you can't see it!) but here's where the hanger needs to be located.

It helps to draw a pencil line on the plate, showing how deep it needs to be embedded into the wood. In this case, I needed to cut a slot about 1 1/4" deep, which was a little deeper than needed, but gave me a little fudge room.
Once I've figured out the depth of the groove, I can clamp the board above the saw blade and raise the blade into it, to the correct height.
Then - here's the easy part - lower your blade below the surface of the table, COUNTING THE NUMBER OF REVOLUTIONS that you are making on your elevation wheel. In my case, it was eight revolutions.
Adjust your fence so that your saw kerf is perfectly centered on your board.

I usually cut a small slot in a scrap of wood, and then flip the piece around and cut the wood again... do that until your two cuts match perfectly. Here, I'm off about 1/64"... so a very slight tap on the fence makes the cut perfectly centered.
Now - clamp the board in place, positioned over the blade right where you want the slot to cut into your board.

In this case, the wood was clamped a little closer to the front of the saw, so that the blade wouldn't cut into the top edge of the rail.
To be extra safe, you can clamp a scrap of wood in front of the board, so that it can't kick back on you when raising/plunging the blade into the wood. Like this...


Then - turn the saw and raise the blade the exact number of revolutions it takes so that your slot is the perfect depth that you need. Like I said - I needed eight revolutions to create a slot about 1 1/4" deep.
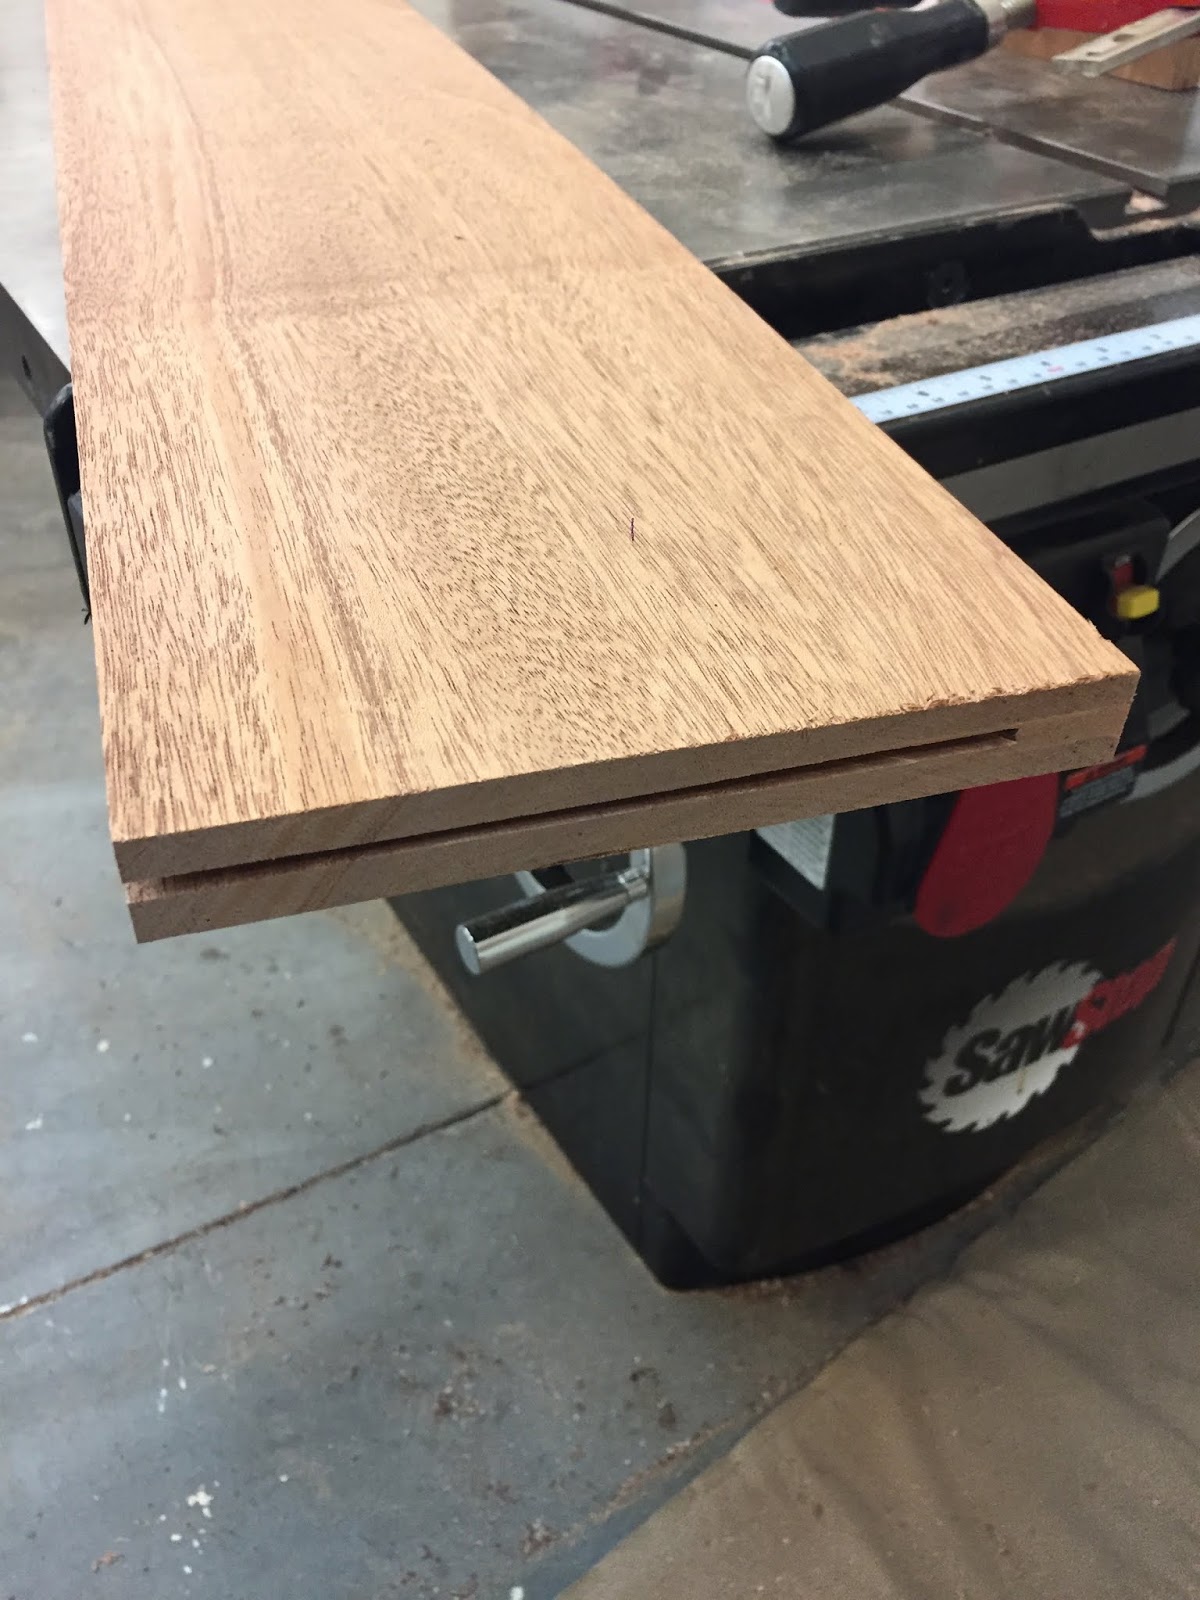
A perfect slot... deep enough, and not popping out through the top of the rail.
Seriously - that's the hardest part of this repair, and it's pretty damn simple. Lay the hanger back in place and mark the location of the two pin holes.

It helps to lay out the pin holes with set-up blocks,

so everything is accurate. Marked...

and drilled. Make sure you don't go all the way through the side rail!

Tap the pins in gently - if you tap them too hard, you run the risk of bulging out the wood on the other side... I know this from experience. It sucks!
Once they're installed - sand and finish to match the headboard and footboard. In this case, I tested four stains to get a good match.

It's always the ZAR that works best!

An excellent match... I stained the rail, let it dry, and then sprayed a bit of satin lacquer on it, so it matched this bedroom set perfectly.

Last thing? Add a cleat on the inside edge to hold the box spring slats in place - that's the easy stuff!
The bed assembled perfectly... in this case, I made four rails, for two beds. The box spring slats aren't shown here, but I cut seven slats in poplar, and left them unfinished.

Another happy customer! And a pretty easy repair, once you know the tricks!
5 comments:
You really know all the tricks! Timely post... I need to make bix spring slats. How do you know what width and thickness of wood to use so that it won’t bow? Mine is for a queen size matress.
Thank you for your clear instructions on the bed repair, Jamie. This is one of the best posts you have published. The instructions are clear, and the reader learns how to precisely do a proper repair on a bed rail. The “safety block” in front of the piece is an excellent tip! I like to read material and learn something new from it.
Alas! You never answered my comment / question regarding your June 18 post. I was really keen of knowing how you managed to cut a taper – on the tablesaw – on a piece that had a double bevel. Given the fact that the main piece had a tapered bevel, how were you able to have a straight surface against the fence in order to cut the other edge (with a tapered bevel), preventing kick back? That procedure was not very clear on that post.
Julie - I generally use 3/4" wood for slats, and the width can vary - 3" or 4" is fine. If they're narrower, you need more... wider? You need less.
Thanks Jamie, love all your work and macine repair blogging!
That is just to cool. I love the little tips you share with us.
Post a Comment