Sometimes the hardest pieces to build are the ones that are close to your heart. It's even harder to write about them after the fact, to have to go back and revisit what I was thinking about while I was making the piece. Which is what this post will be about.
My friend's mother passed away during the summer, and just thinking about her makes me a little weepy.
Is there any greater (woodworking) honor than being asked to build a container that will hold someone's cremains? Think about it, and get back to me with an answer.
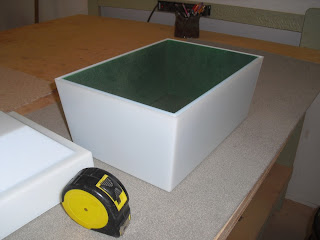
The only constraint I had was that the box had to fit within this vault liner.
I actually learned quite a bit about funerary boxes while building this one. There are single boxes, and companion boxes. This one needed to hold three sets of cremains, so it was a bit larger than normal.
This board has been with me for a while, I've been saving it for something special. It's funny how you put a piece of wood aside with the hope that you'll find that "special" project to use it in - and then that special project presents itself.
My friend's mother who passed away was an amazing woman, very salt of the earth; she lived a long productive life. Somehow, when I tried to translate her life into a choice for wood, I kept thinking about Oak. To me, Oak seems rock solid. Not flashy, but a reliable, sensible, durable wood.
Oak it would be.
Using the same template, I routed a groove to hold the lid panel.
Notice I left this piece a little longer, so I could screw the template directly into it?
When I cut the mitered corners, the screw holes are cut away.
Because of the curve, I had to flip my miter gauge around to cut the other miter.
I'm a big fan of tambours - and wanted to make this lid to mimic a tambour. That required making about a dozen slats that would nestle together inside that groove. It's always wise to cut a few extra, as they tend to twist a little bit when they're cut away from their block of wood.
Here the box is glued together,
and then cleaned up, once the glue dried.
Everyone always asks why I glue a box up as a solid cube - but most woodworkers know the reason why. Do you?
The box was cut apart, and the two sawn surfaces flattened with a hand plane.
Yes, hand tool work. Don't faint.
Yes, hand tool work. Don't faint.
Many of the guys in the Sin City Woodworkers group tease me about being a power tool addict, but they probably don't realize I have an arsenal of hand tools, and use them liberally. But only when necessary. Why would I want to plane a board by hand, when I have a perfectly good planer to do that for me? I pick my battles carefully.
You can't even see the seam when it is planed correctly.
Technically, this was one of the best boxes I've ever made. Perfect miters, perfect hardware installation, perfect grain management. It doesn't happen like this very often, so when it does - I'll take it.
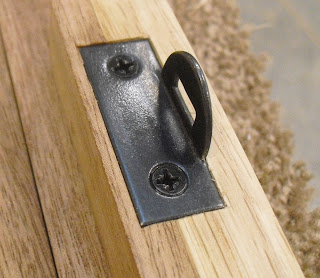
The hardware came from Rockler, and featured a casket lid locking device. It's a little labor intensive, but adds a very nice touch to a box like this. The latch had to be installed with a couple of mortises,
which can be done with a plunge router or a mortising bit.
The plate that fits down into that mortise has to be recessed, as well. I like to screw the plate down into place, and then outline it with a knife. Remove the plate and you can clearly see where you need to remove the wood.
I will say this - installing hardware can be difficult. And it only gets easier with practice. I might make it look easy here, but I struggled with it for years. So if you have problems with it - grab some scrap wood and a chisel and practice installing it until you get better. It's the only way.
Here's the box, everything installed and awaiting oil.
I'm pleased to say that this box was very well received; the family was quite pleased and touched by it. The sad part is that I had to make another one about a month later, for a family member of mine who passed away.
Like I said, making boxes like this one is difficult and emotional, so I hope to not have to build one again for a long time.


1 comment:
That is beautiful in it's simplicity (I don't mean simple to make, just not overly "showy") I really like the tambour top and would appreciate a more detailed explanation with photos some day on how you did that.
Sorry to hear of your loss, Jamie.
Post a Comment