In my last blogpost about Alphonse Mattia's passing, I mentioned how influential his work has been on some of my designs. I didn't realize it at the time, but this mailbox project has some of his design thumbprints on it... funny how things work out that way.
___________
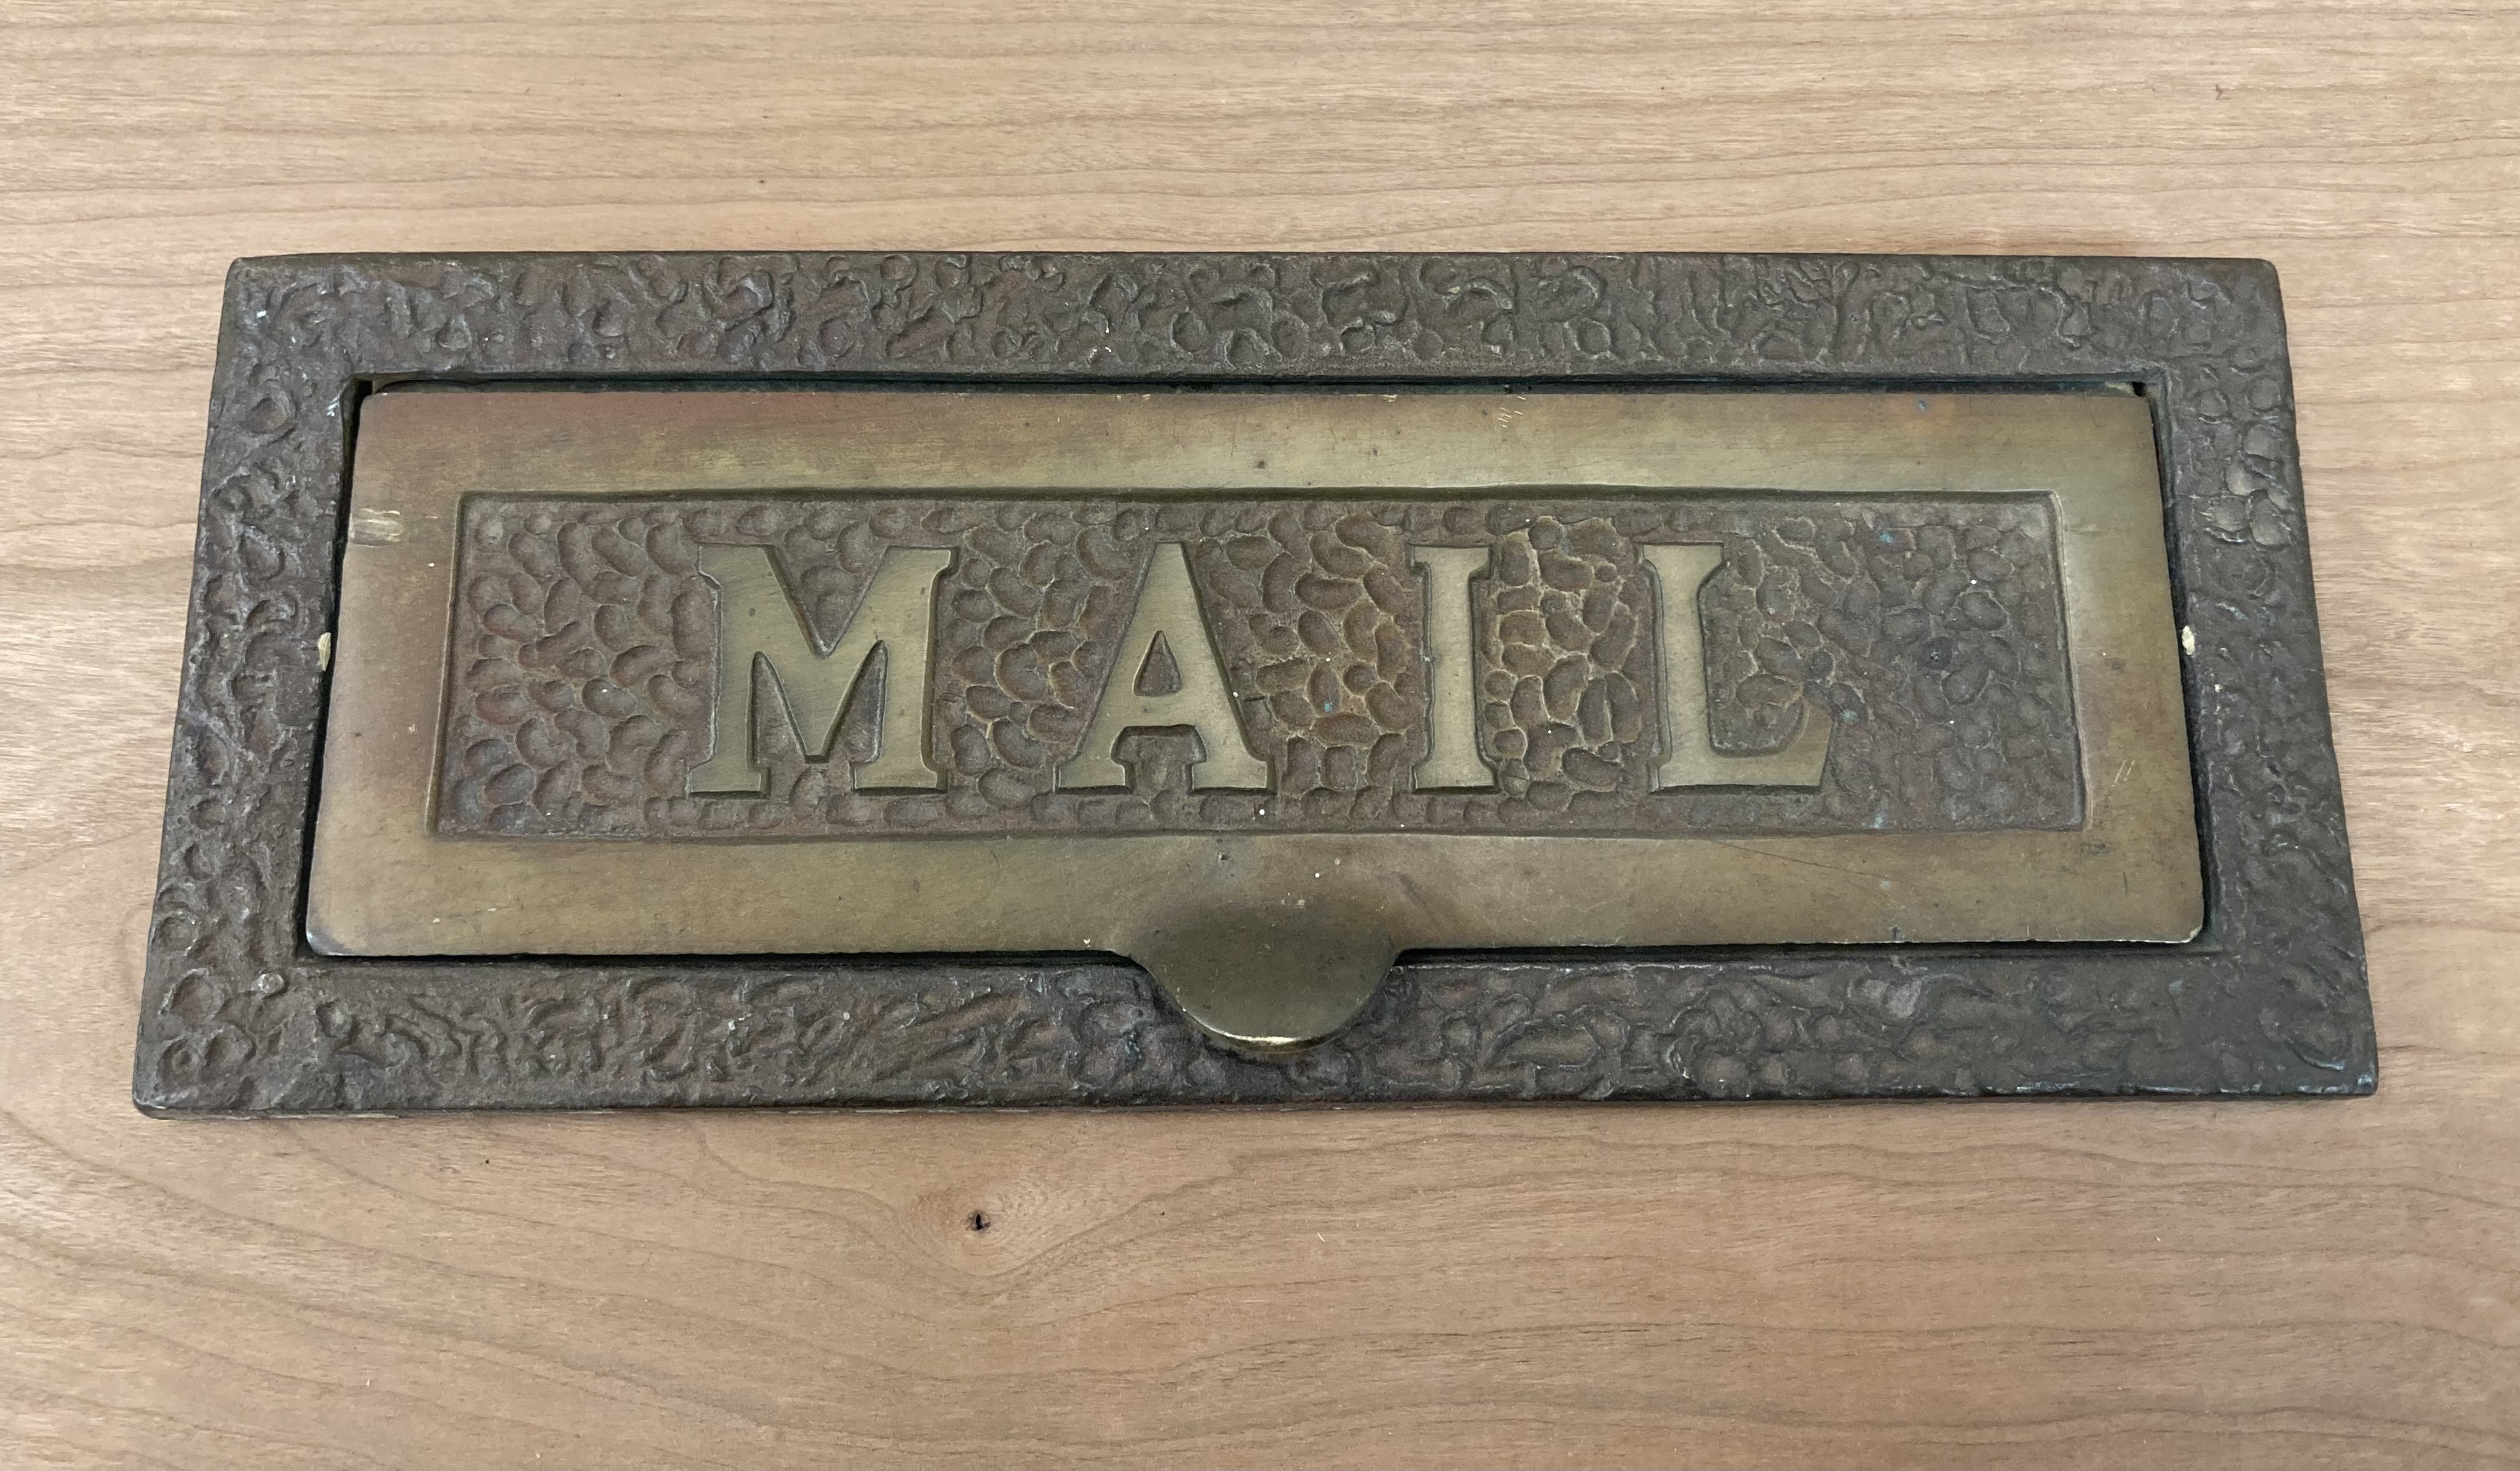
There's nothing like a good old design challenge to keep me on my toes. So when a favorite client of mine visited my shop and showed me her mail slot collection... well... game on!
She explained that she wanted a unique way to display these.
These four slots were roughly the same size - I'm assuming that back in the day when they were routinely installed, the rectangular slot was a uniform size.

These were similar in size, but the threaded mounting holes were in different locations,

with different center-to-center spacing.
My first thought - and only thought, frankly, was to mount them on a miniature mailbox - one I would need to construct.

My drafting program allows me come up with a scaled drawing, and it was easier to cut the parts using a CNC, so headed to a buddy's shop, armed with a thumb drive with the artwork on it.

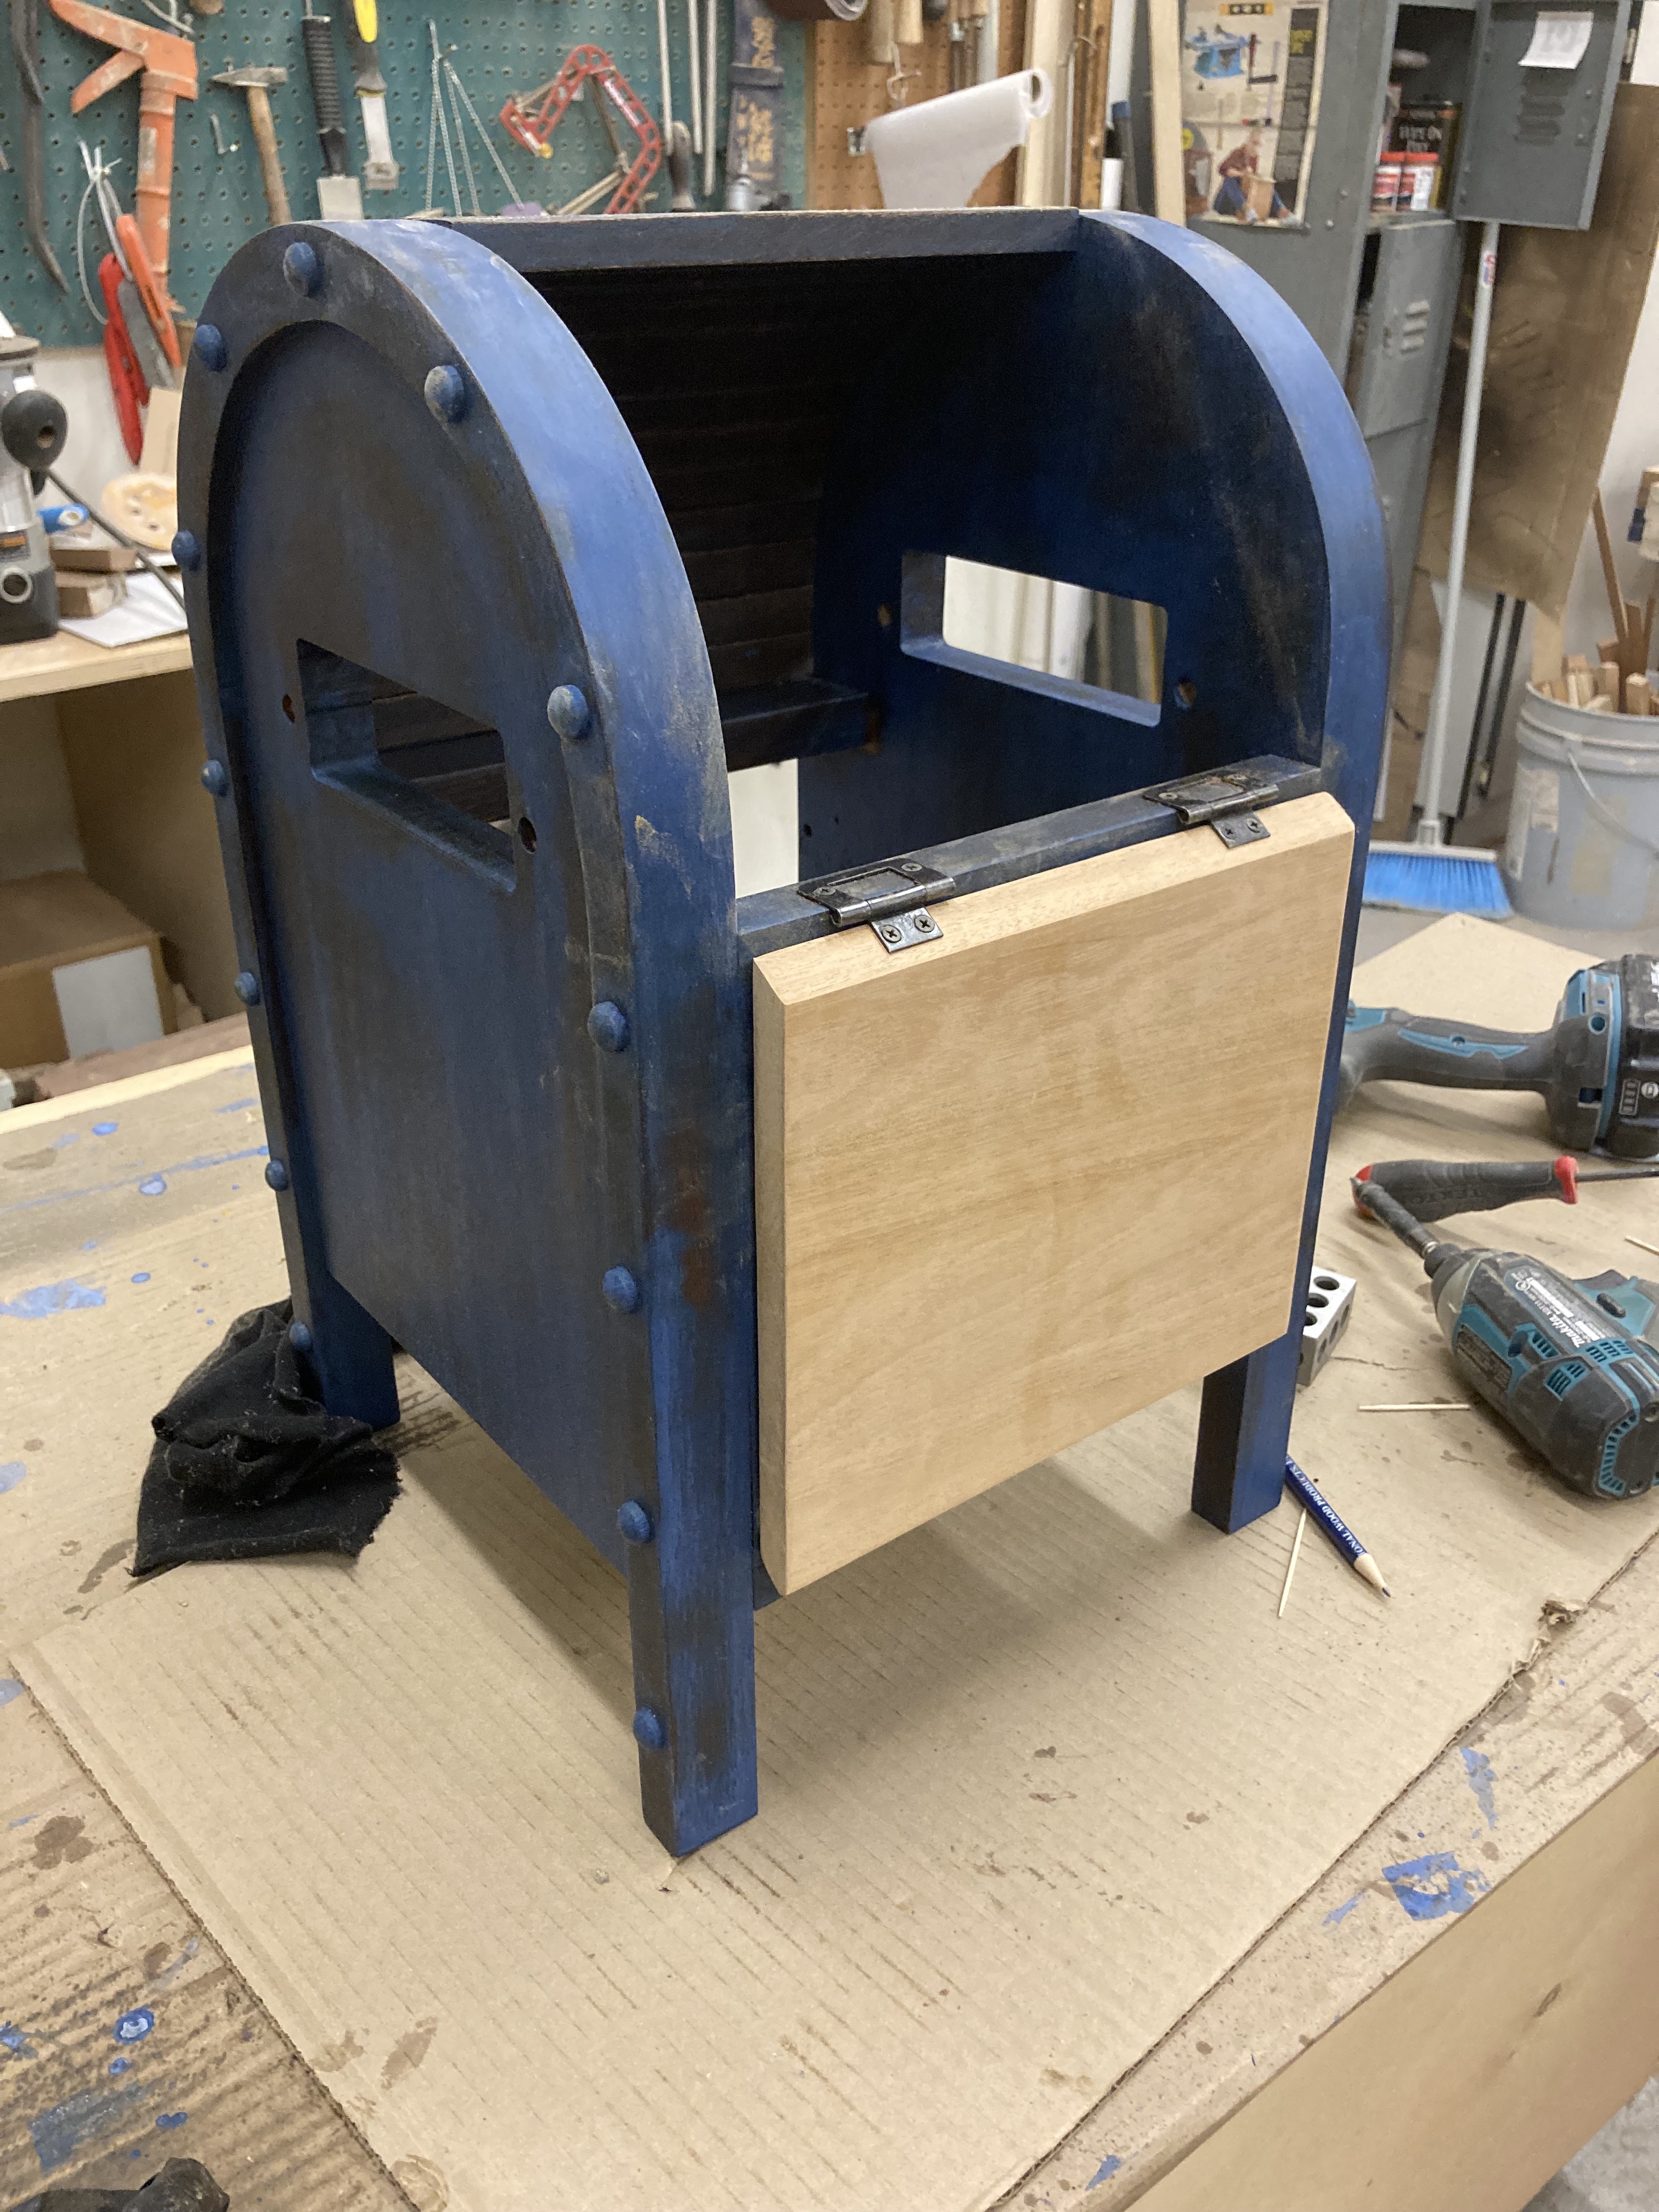
The left and right sides of the mailbox were perfectly machined.

My next decision was whether I would bend the curved area with layers of thin plywood, or create a tambour (like a roll top desk employs) - and I chose to make a tambour.
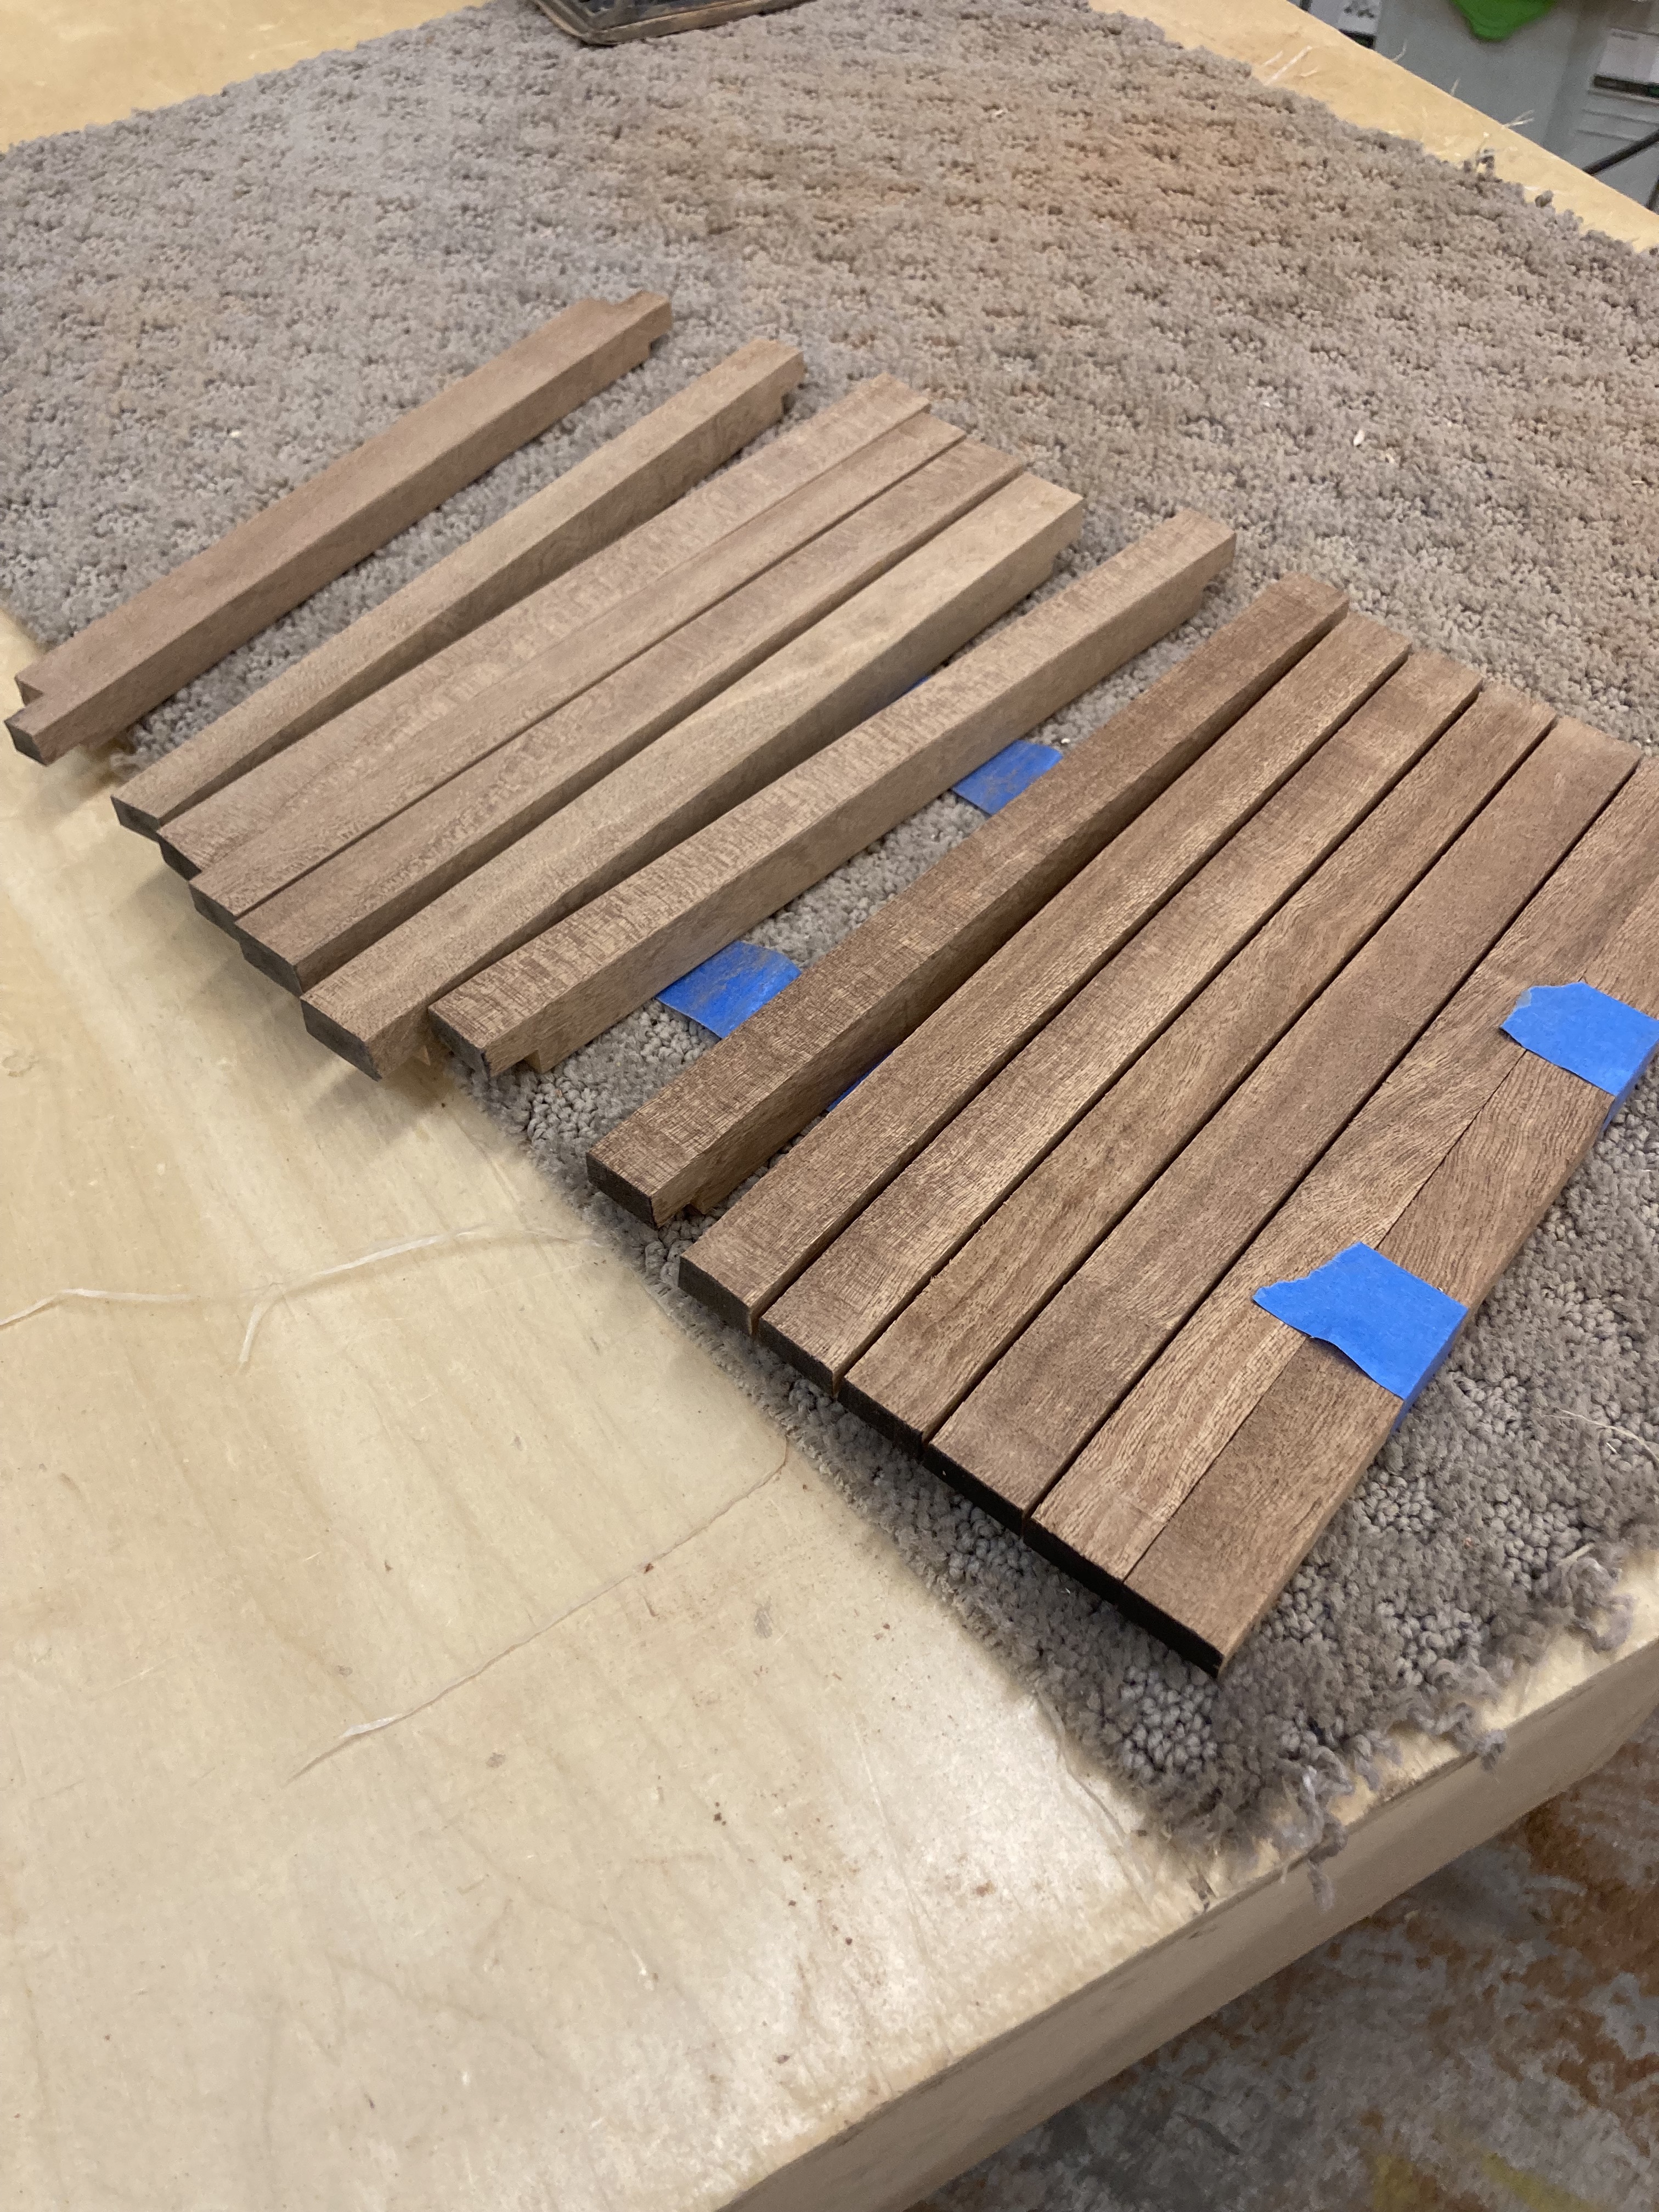
I've made dozens of those! When I dry fit the piece together, the tambour was a little proud of the surface, so a hand plane and a random orbit sander brought them down to their correct thickness.

Since I didn't want gaps between each slat, I beveled each one of them to tighten them up.

The slots for each brass insert were a bit of a challenge, since they were all slightly different in size.

Those slots were cut with a router, and I made a template for.each one, so that the cuts were smooth and perfect.

It was starting to come together nicely, and finishing the parts before assembly was my plan.


I envisioned a mailbox that looked aged and worn, and MilkPaint is my go-to finish when I need to add color to wood. This color - Federal Blue - was a perfect match for the USPS blue box we're all familiar with.

My last component to make was the door, and spent some time considering how I wanted it to work. I even called my sister - who is an amazing artist - to get her opinion.

I finally decided on a hinged door with a slot for letters, and some lasered artwork on the door.
And here's the finished piece!
No comments:
Post a Comment