If you remember your Tablemaking 101 class, then you know there are three different types of table bases that you can make. I've chosen a four legged design, with connecting aprons for this table.

Luckily, I have enough Ash to sort through and choose some lovely pieces for the aprons.

As if my hands aren't rough enough,

I start the staining process a little early.

A very simple way to add a little more strength, visual interest, and leg room to your aprons is by adding a cutaway on them. The diagram below shows what I mean.

And one of my little tricks for making cutaways is to glue them up, rather than cut them from a solid block. I think it's just easier that way. I'll start with a solid block, rip off the strip, shape it, and then glue it back in place.

The grain matches perfectly, but I don't have to mess around with any tough cuts.

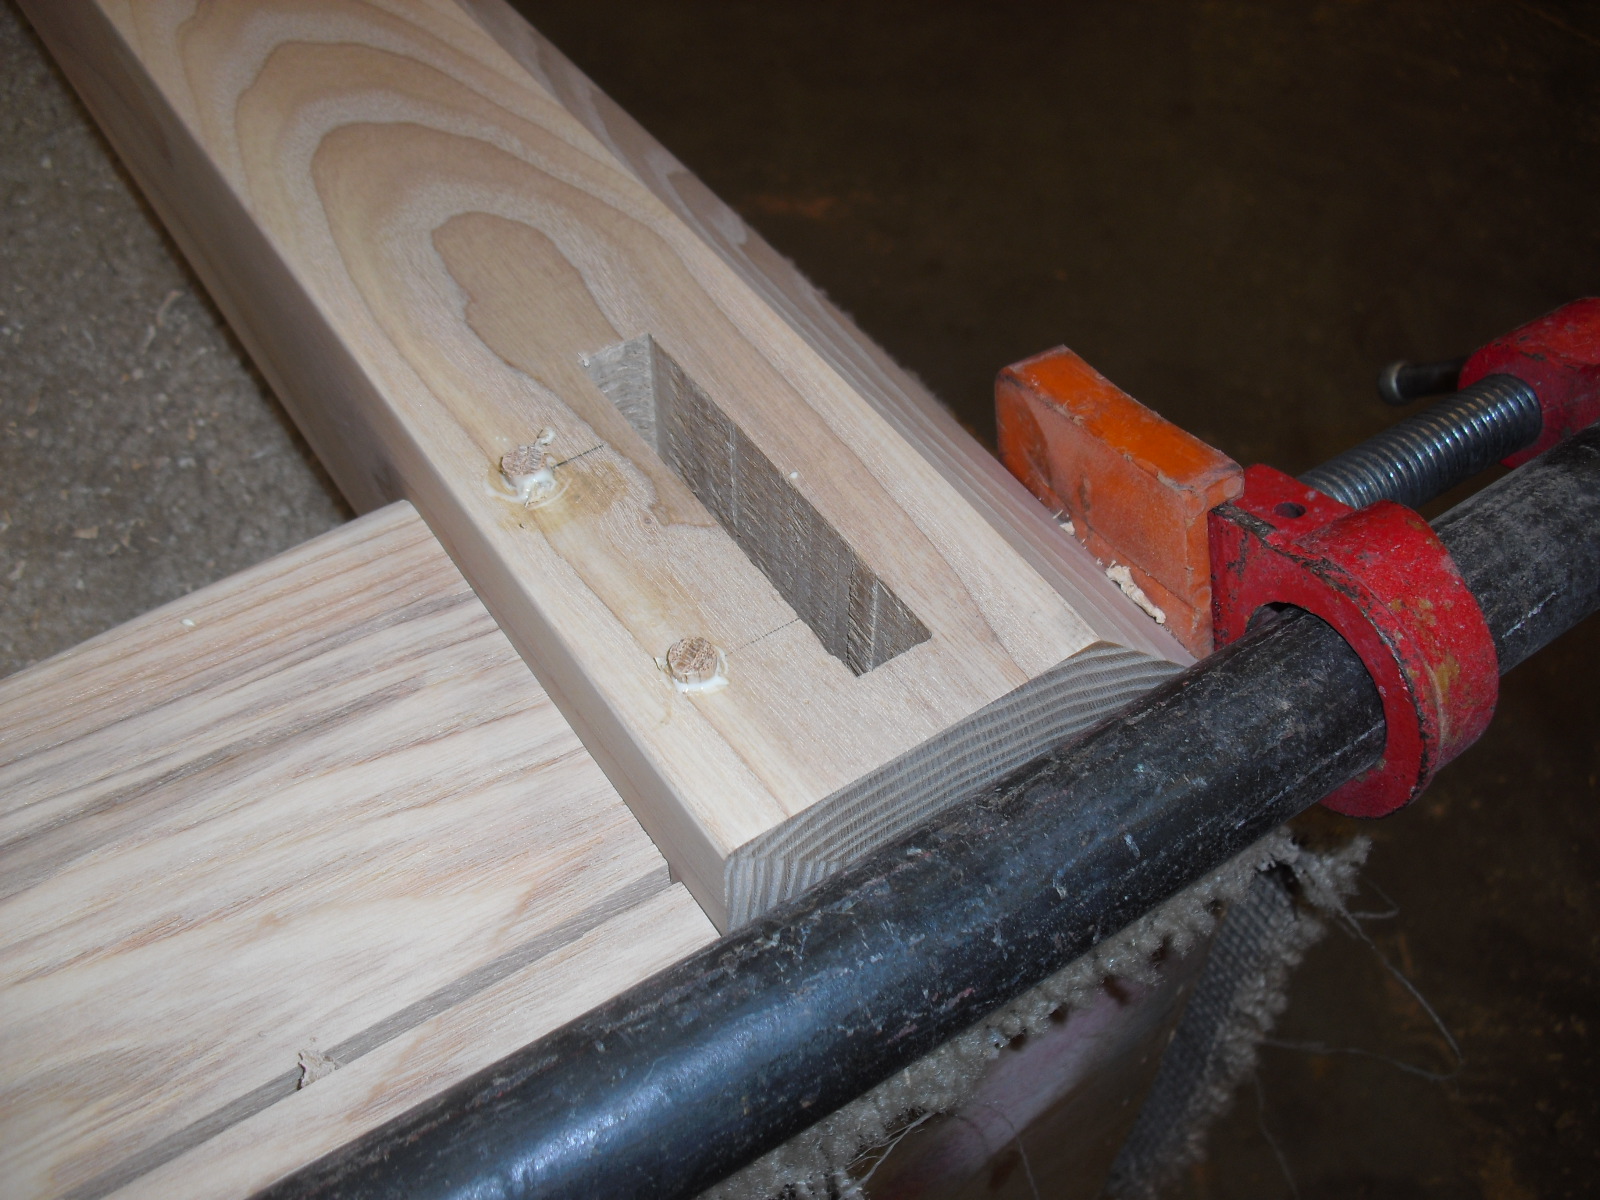
Here they are, re-glued back together. You want to be careful when you glue them, that you don't infiltrate that end grain with glue, which is tough to remove. Let the glue set up a bit, then cut it away with a sharp chisel.


After they're dry, plane them down and they're ready for tenons on each end.

I start by making my shoulder cuts all the way around the tenon. Then I remove most of the wood on my radial arm saw, using a dado blade.

There is just a bit of cleaning up to do with a hand saw, trimming this top area.

This tenon just needs a little TLC with a chisel and it's ready to test.

A nice fit, I can live with that!

Remember, there are two short aprons, and two long ones.

After all that fitting, I am pooped!

But - no rest for the weary. There is a stack of pieces that needs me. Time to assemble!

There are a couple of things to do before I glue this up - like adding dados to the long aprons, so that I can add some center stretchers that will run just under the table top. This top is pretty long, and it needs a little extra support underneath it.


Finally, I just want to see what it looks like, before I glue it. I'm checking my overhangs, to make sure I haven't made an apron too long. So I cut a couple of pieces of plywood to the exact size of my top. And then position the parts over it.
Since everything looked good, I start gluing the sides. With a big piece like this, sub assemblies are the way to go. I plan on assembling the two short sides first, by gluing and pegging the joints. Dry fitting the pieces before you actually spread any glue is smart. Here is a lovely connection from leg to apron, no gaps, everything square.

The flattest surface in my shop is the tablesaw, so I glue up the sides there.

After the glue is set, I drill some holes for pegging the joint.

It pains the purist in me that I'm not using Ash pegs; these are Oak. Only you and I will know. Put a little glue on the pegs, tap them in until they're just a tad proud of the surface, and then use a small block plane to flush them up.
A completed side!

I clamp the whole thing together to measure the lengths of the three stretchers that I need to cut.

and once I cut them, it's time to glue the whole apron assembly together.

My next step will be assembling the whole base together. I'll borrow some long Bessey clamps from my neighbor for this. These clamps are pricey, so I've never invested in any for my shop. Considering I only need them once or twice a year, I'll borrow instead of buy!
1 comment:
jamie, as always, the work looks great! really like the notched detail to the aprons, i think it looks way more appealing then the curved version of the sketch!! great looking table!
Post a Comment