Someone ran a board with a few brads in it through the jointer, which of course, chipped the blades. I was dreading switching the nicked blades for my spare (and very sharp!) set, because it just seems like such a hassle. But - like anything else, once you've done it a few times, it's really pretty simple. This time, I accomplished the switch in about a half hour.
First, remove the guard by loosening the allen head bolt that secures it in place.

I usually just flip the guard over and store all of the loose parts in it.

Once the guard is removed, the cutterhead is exposed.
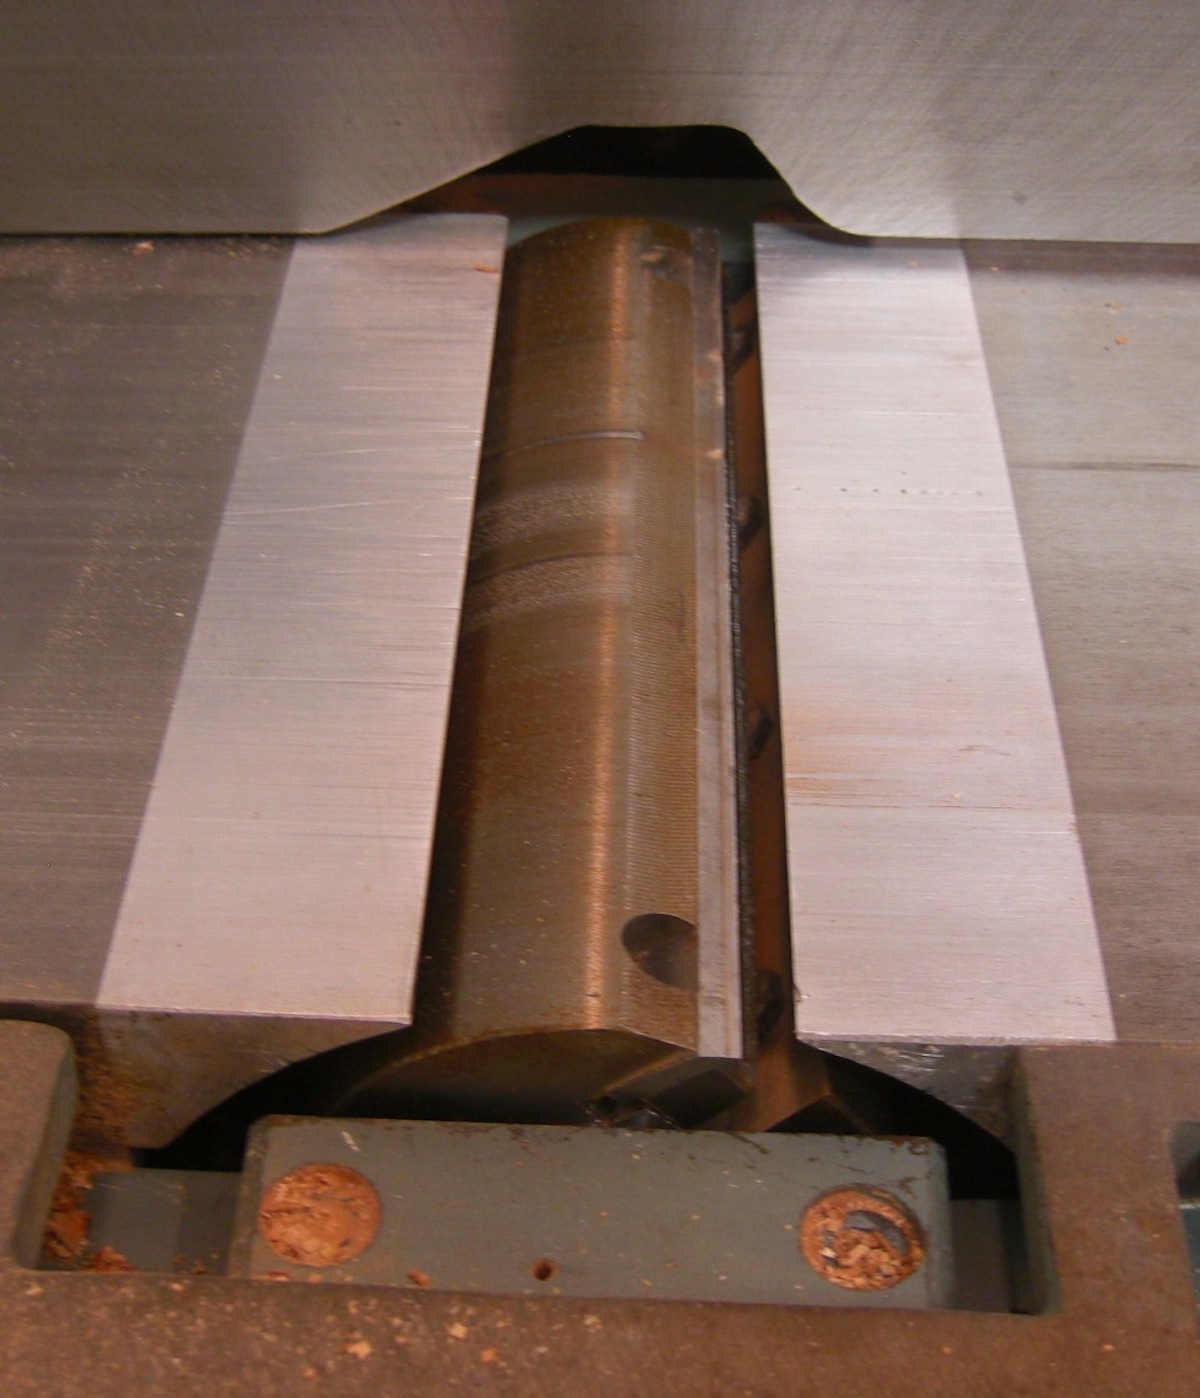
See the chips on the blade?

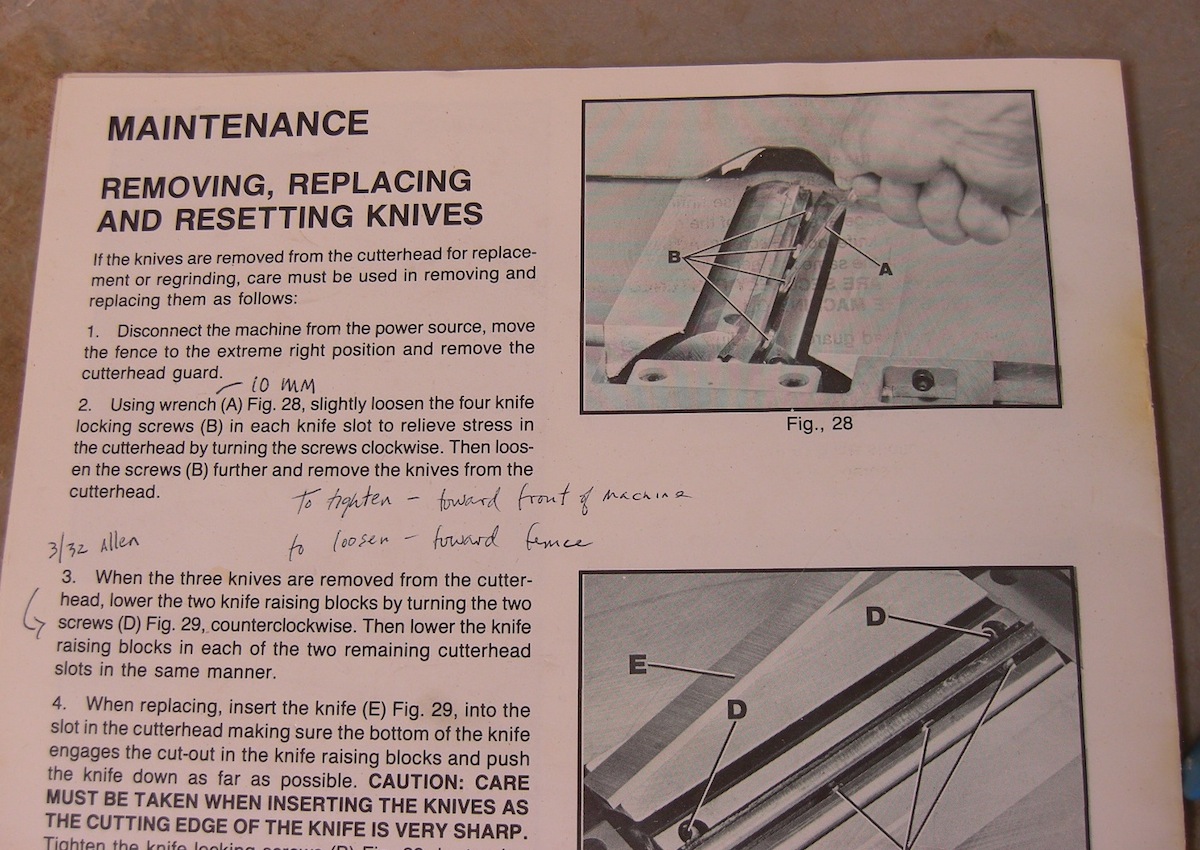
The last time I changed the blades, I made a few notes in my manual about the tools I needed, and about which way loosens the blade bolts.
Here are the sharp blades, straight from the sharpener's shop.

Each blade is held in place by a lock bar, which is secured in place with four bolts. You loosen them by turning the wrench away from you, toward the fence

Here are the three lock bars and blades.

And the fresh set of blades.
 Once the blades are removed, I usually blow out all the dust with an air hose, and wipe everything clean.
Be careful you don't blow these little circular nuts and set screws away. You need those to set the height of the blades. The rabbet on the nut must be aligned parallel with the slot. The one below is positioned wrong.

This is the right way.

Before you go much further, you need to check the height of the cutterhead itself.
Rotate the cutterhead until the round portion of the cutterhead is on top. The correct setting is for the cutterhead to be .015” under the height of the outfeed table.
So place a .015” feeler gauge on the cutterhead and using a straight edge on the rear table, adjust the height of the rear table until it is .015” above the cutterhead diameter, as shown in the picture below.

I check this on both the far and near side of the cutterhead, just to make sure everything is aligned properly.

Once you know the cutterhead is in the right position in relation to the outfeed table, you can install the knives.
The knives are adjusted correctly when the cutting edge of the knife extends out .015” from the cutterhead diameter Or - in other words, they're perfectly level with the outfeed table.
Put of the knives in place, and then slip the lock bar against it. BARELY tighten the bolts. If you tighten them too much, you won't be able to adjust the height of the blade.
Then, using that straight edge on the back table, adjust the height of the blade to be the exact height of the table. You do that with an allen wrench, in those circular bolts that you saw above. The blade will move up quite easily, so just barely turn the wrench to make your adjustments. If you do this too quickly, you are liable to nick your blade on the straight edge, so be patient.
Rotate the cutterhead so that the knife is just even with the straight edge. Do that on both nuts for each blade. That way, you can be certain that your blade is parallel with the table height.

Here is one set finished and tightened down.
If you accidentally raise the blade too high and need to press it down, make sure you put a rag over the blade while you're pushing it down, or you're liable to cut yourself. Trust me on this.

Now you can replace the cutterhead guard. Make sure that you adjust the spring so that it pulls the guard firmly against the fence. You'll need some pliers for this.

Flip it up onto the fence and check the readout - a purrrrfect 90˚.

1 comment:
“rear table”, “outfeed table” confusing as all get out to a rookie! 🤪🤪🤪
So, is the outfeed table the fixed portion? The cutter head is fixed and there is no adjustment relative to the fixed table. The “rear” table is height adjustable. I assume I have a jointer that just not meet the criteria here. 🤪🤪😂😂
Post a Comment