A forum for discussing woodworking, specifically furniture making. Feel free to post comments and questions about your current projects, tools, studio set-up, or whatever is on your mind.
This blog is moderated by Jamie Yocono, owner of Wood It Is! Custom Cabinetry in Las Vegas, NV. Her website is wooditis.com. If you need to speak to an actual human... call 702-672-8981!
Now...let's talk wood!
There are always cool things to do when you live in a town like Las Vegas. I'd forgotten all about my behind-the-scenes tour of La Reve, but I just came across these photos I'd taken.
Le Reve is a Cirque du Soleil show currently playing at the Wynn Resort.
Like the other Cirque du Soleil shows, it's filled with dancing, gymnastics, synchronized swimming and much more. The show is performed in an intimate theater-in-the-round that words can barely describe. I've seen the show twice, and was blown away both times.
But the real treat was when a buddy of mine (who is a crew member) invited me to take a tour backstage. Just walking into the empty theater was amazing.
I stitched this panoramic shot together using my Mac's photo software. It looks small, but click on it and you should see the full shot. Here's a production booth hidden among the seats.
It's hard to judge the scale of everything, but this will give you an idea of the size of the stage.
This production takes place on many different levels - like in the "basement" below, where much of the work takes place. If you look carefully, you will see some of the platforms that raise and lower, so that it makes the dancers look as if they're walking on water.
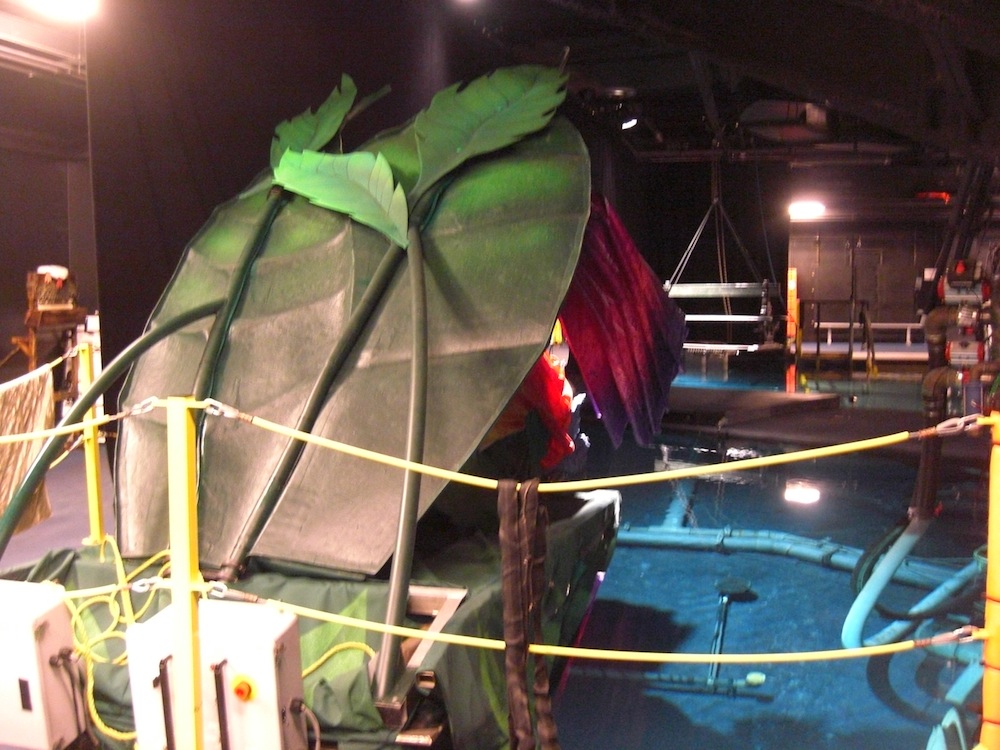
And up in the rafters, (I think) three stories high. Here is one of the floating sets "parked" backstage.
If you ever get a chance to get a behind the scenes tour of one of these shows, I highly recommend it.
I had a chance to see the show after this tour, and it really made me appreciate all the technical support that the crew provides. They should be the ones coming out for a bow after the show!
As I was digging around in the shop, I came across these boards. A while back, when my buddy Dusty put the lumber up on this shelving, he mentioned (OK, complained about) how heavy they were. I thought he was being a wimp, but damn!
These boards are HEAVY.
And I'm not 100% sure what they are. If I had to venture a guess, I would lean toward toward this being Purpleheart, or as it is sometimes called - Amaranth. (Botanical Name:Peltogyne)
So I cut a small piece from the end of one of the boards, and am sending it to the Center for Wood Anatomy Research, a department within the USDA Forest Service. I did this a few months ago and was pretty shocked at what they told me.
The last time, it took about six months to get an answer from them. If these boards turn out to be Purpleheart, it will be worth the wait. The bigger question is - what will I build with them?
Many years ago, I was interviewed for a local morning TV show, and the host asked where I came up with my designs. Without really thinking about how it was going to sound, I told him I frequently had visions. I sounded a little crazy, and was teased about that answer for quite a while.
But - it's true. Sometimes an idea just pops into my head, and I can actually visualize the piece entirely completed, without having actually made it. It tends to save me a lot of time, because "seeing" a piece before building it allows me to decide if it's really worth the effort. Weird, but it works for me.
The other day I was working in my shop and one of my students stopped by. He watched me work for a while, building a small platform bed, and asked where I got the plans to build it. I pointed to my head. It's all up there, I explained. After you build for a while, you can visualize it, figuring out the joinery, spacing, details, scale, and measurements before you even pick up a board.
Recently, I was throwing some very small pots on the wheel, and started experimenting with making very small bowls, with wide lips. The design started as a vision, and well... follow my design process....
I've been wanting to combine wood and clay, to make some small sushi serving dishes. Not for the sushi itself, but for the wasabi and pickled ginger. Here are a couple of the small bowls I made, with a nice piece of walnut, which I felt would compliment the glaze on the bowls.
Here I've cleaned up the edges and squared the ends.
And using a plunge router and a Router Buddy, I've cut the first recess.
What's a Router Buddy? How did I do that?
It's a very simple circle cutting attachment that mounts on the bottom of my router. It is easily adjusted, and by varying the depth of cut, I can make a tapered hole that perfectly fits the bowls. There is a limit to how small of a circle you can rout with the Router Buddy, so I rout as much as it will let me, and then finish off the center with a forstner bit in the drill press.
These bowls are two different sizes, so each hole requires a different set-up. I usually cut a circle in a piece of scrap wood first, to make sure I don't rout the hole too big for the ceramic piece. I think wide grout lines are a crime.
Here is the second recess routed into the board. Notice that the hole has to get deeper toward the center.
The bowls fit quite nicely,
so I figured out my margins and trimmed one end on a 30˚ angle.
And then cut the other end, too.
After the ends were cut, I ripped both sides at that same angle. I had originally planned on making this base tapered, to accentuate the different sizes of the bowls. But the board wasn't wide enough to accommodate the angles I wanted, so I left them parallel.
Here is an example of a tapered version, this one is Maple with my (very purple) Eura-Pansy glaze.
Pun intended.
Sanding with the Festool Rotek made this board very smooth in minutes. Using the Rotek is a like an upper body workout, without the boredom of lifting weights.
I usually adhere the ceramic piece with silicone, so that it can move a little, as the wood changes with seasonal movement.
A few more coats of oil, and these are ready to be listed on Etsy.
This piece turned out exactly how I saw it in my mind. Call me quirky, but I think instead of feeling embarrassed about having visions, we should celebrate the fact that we can.
Someone ran a board with a few brads in it through the jointer, which of course, chipped the blades. I was dreading switching the nicked blades for my spare (and very sharp!) set, because it just seems like such a hassle. But - like anything else, once you've done it a few times, it's really pretty simple. This time, I accomplished the switch in about a half hour.
First, remove the guard by loosening the allen head bolt that secures it in place.
I usually just flip the guard over and store all of the loose parts in it.
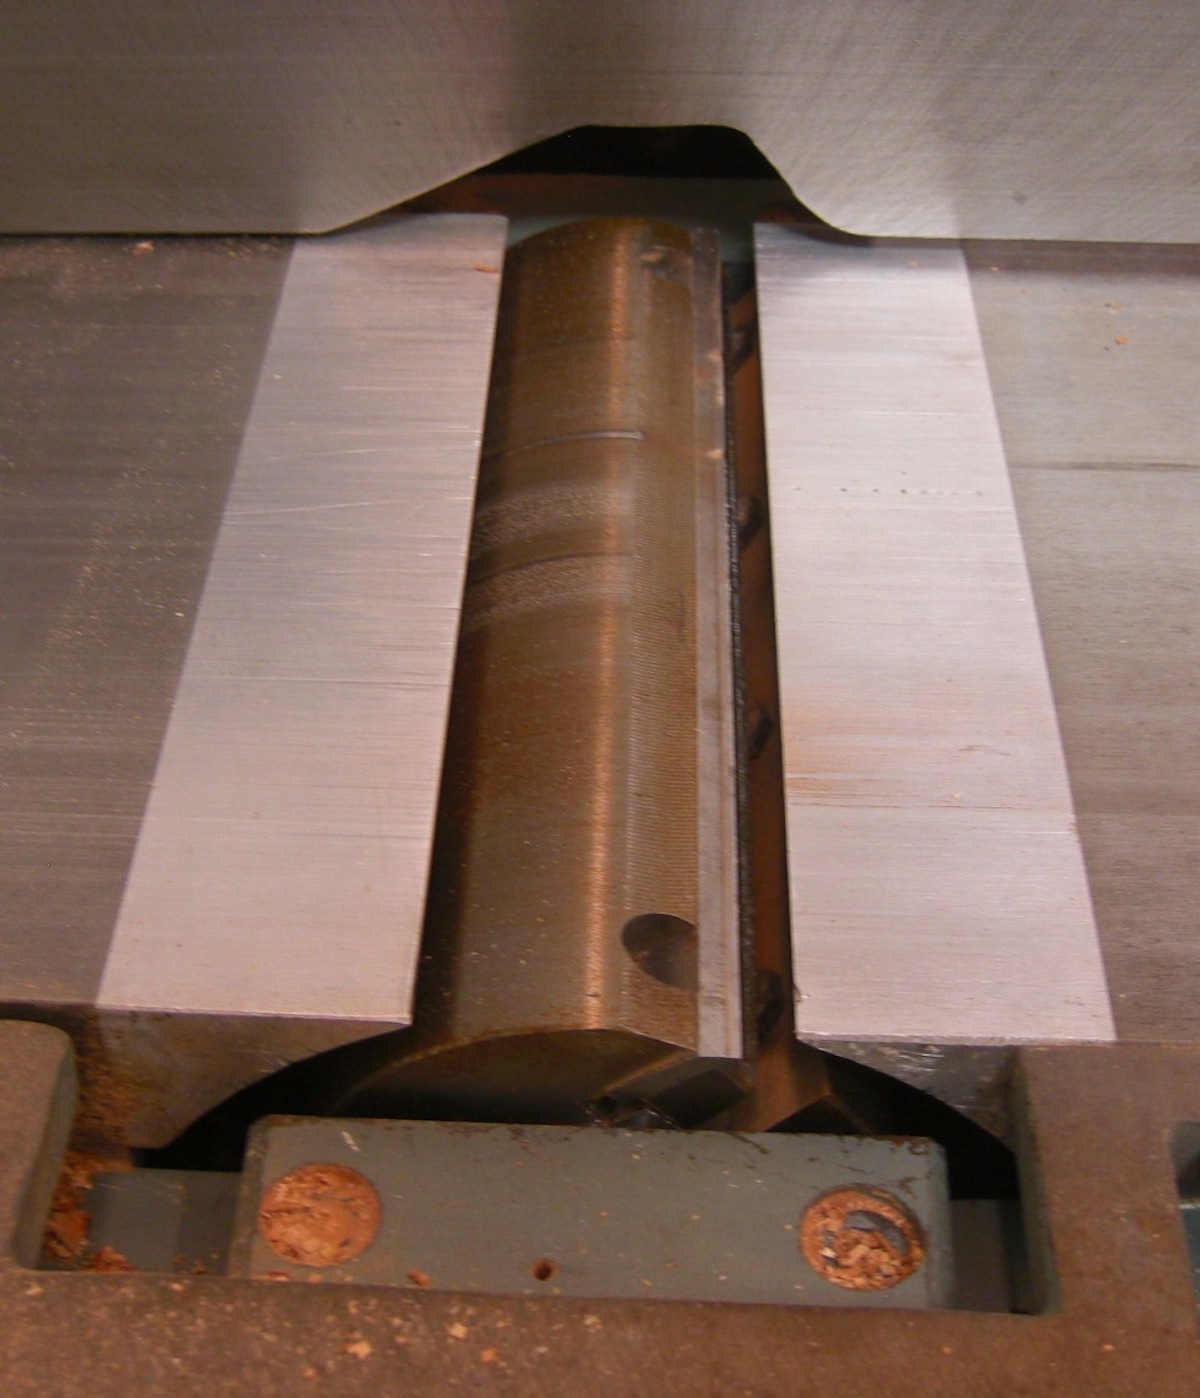
Once the guard is removed, the cutterhead is exposed.
See the chips on the blade?
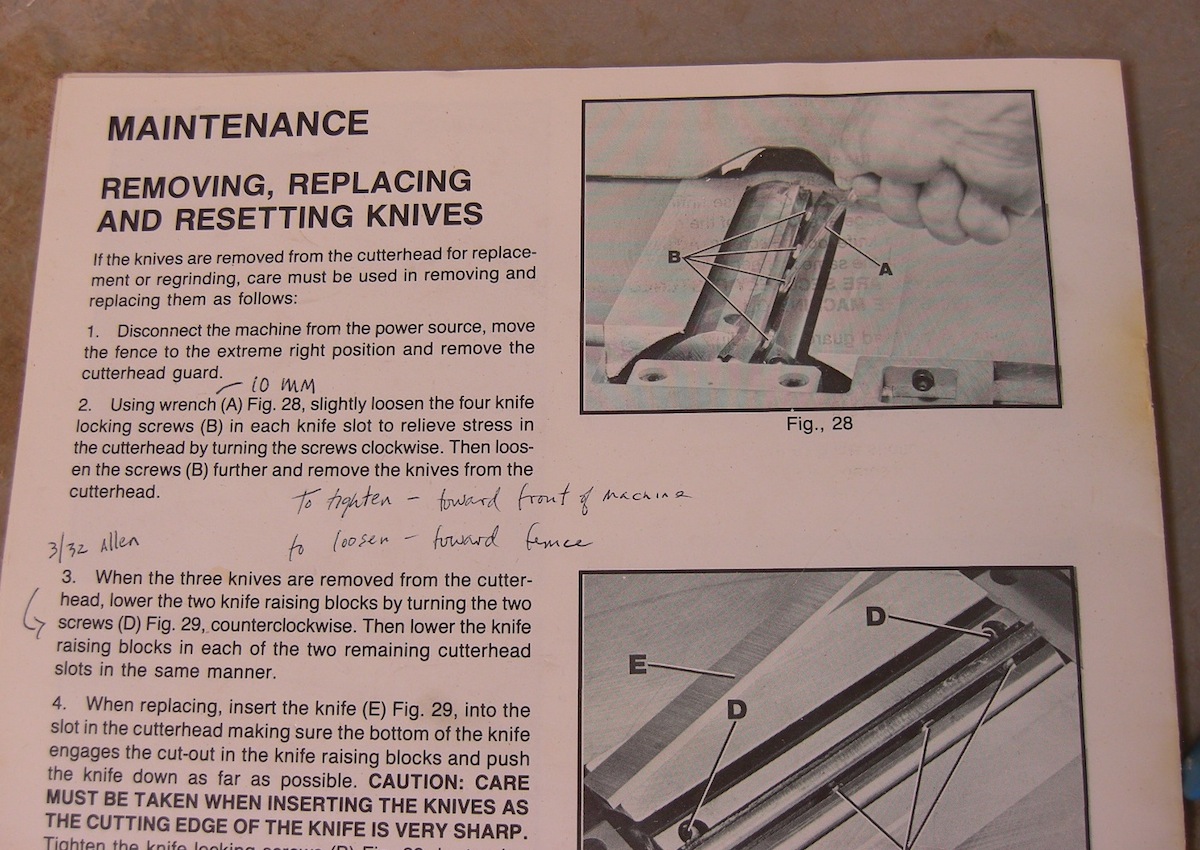
The last time I changed the blades, I made a few notes in my manual about the tools I needed, and about which way loosens the blade bolts. Here are the sharp blades, straight from the sharpener's shop. Each blade is held in place by a lock bar, which is secured in place with four bolts. You loosen them by turning the wrench away from you, toward the fence Here are the three lock bars and blades. And the fresh set of blades. Once the blades are removed, I usually blow out all the dust with an air hose, and wipe everything clean.
Be careful you don't blow these little circular nuts and set screws away. You need those to set the height of the blades. The rabbet on the nut must be aligned parallel with the slot. The one below is positioned wrong. This is the right way. Before you go much further, you need to check the height of the cutterhead itself. Rotate the cutterhead until the round portion of the cutterhead is on top. The correct setting is for the cutterhead to be .015” under the height of the outfeed table. So place a .015” feeler gauge on the cutterhead and using a straight edge on the rear table, adjust the height of the rear table until it is .015” above the cutterhead diameter, as shown in the picture below. I check this on both the far and near side of the cutterhead, just to make sure everything is aligned properly. Once you know the cutterhead is in the right position in relation to the outfeed table, you can install the knives.
The knives are adjusted correctly when the cutting edge of the knife extends out .015” from the cutterhead diameter Or - in other words, they're perfectly level with the outfeed table.
Put of the knives in place, and then slip the lock bar against it. BARELY tighten the bolts. If you tighten them too much, you won't be able to adjust the height of the blade.
Then, using that straight edge on the back table, adjust the height of the blade to be the exact height of the table. You do that with an allen wrench, in those circular bolts that you saw above. The blade will move up quite easily, so just barely turn the wrench to make your adjustments. If you do this too quickly, you are liable to nick your blade on the straight edge, so be patient.
Rotate the cutterhead so that the knife is just even with the straight edge. Do that on both nuts for each blade. That way, you can be certain that your blade is parallel with the table height.
Here is one set finished and tightened down.
If you accidentally raise the blade too high and need to press it down, make sure you put a rag over the blade while you're pushing it down, or you're liable to cut yourself. Trust me on this. Now you can replace the cutterhead guard. Make sure that you adjust the spring so that it pulls the guard firmly against the fence. You'll need some pliers for this.
Finally, check your fence for squareness. Throw away your square and buy a Wixey digital cube. Here it is - zero-ed out on the table. Flip it up onto the fence and check the readout - a purrrrfect 90˚.
Remember that project that I mentioned a few weeks ago, the one for the VIP? Turns out if I tell you about it, I'll have to kill you.
No, I'm just kidding, but I did sign a confidentiality agreement about it, so I guess I won't be able to post anything here. But I thought I'd share a couple of (vague) pictures of my buddy Dan and me working on this project.
We make a hell of a mess when we work.
Every single workbench in the shop was covered with tools, parts, food, scrap material and more crap than I ever thought possible.
We basically worked nonstop for three days, building,
testing finishes,
cutting french cleats for the cabinet backs,
installing hardware,
and then sanding. And more sanding. Not to mention staining, finishing and waxing. I thought my arms were going to fall off. That isn't a smile, it's a grimace.
Our friend Thomas stopped by to check out our progress and bring us some energy drinks. He was sworn to secrecy, too.
All in all, this was a great experience, it's just a shame that it's one of those projects we don't get to brag about. Still, I think we look pretty proud of our work, don't you?
 Like the other Cirque du Soleil shows, it's filled with dancing, gymnastics, synchronized swimming and much more. The show is performed in an intimate theater-in-the-round that words can barely describe. I've seen the show twice, and was blown away both times.


 And up in the rafters, (I think) three stories high.

 Like the other Cirque du Soleil shows, it's filled with dancing, gymnastics, synchronized swimming and much more. The show is performed in an intimate theater-in-the-round that words can barely describe. I've seen the show twice, and was blown away both times.


 And up in the rafters, (I think) three stories high.