When you're new to woodworking, it's so tempting to buy all the gadgets you see in the stores.
Trust me, I fell into the trap.
I've owned everything from wood threaders (basically, tap and die sets for wood) to saw blade height gauges, to fancy-schmancy push sticks.
After a while - you realize that most of those things are gimmicks - and that you can either make your own (much better!) or that you just don't need them.
In my last post, I completed a solid walnut stool, made with 24 staves. I ended up cutting a rabbet in the bottom, so a plywood disc could recess into the bottom. I will end up covering it in leather, so it can't scratch the floor. Sweet.
On to the top....
I laminated a solid blank of walnut - again, all this material was given to me and it's gorgeous. I decided to make the top out of solid wood, instead of upholstering one.
Hmmm... how to cut it into a perfect circle?....
Also - I wanted it to sit on top of the stool, so I needed to rout a lip along the bottom edge of the top, so it would fit in the recess.
Which takes me back to my opening comments - buying gadgets.
There are tons of circle cutting jigs for routers. Like this,
and this,
and this,
and this.
If you listen to one piece of advice - don't fall prey to buying stuff you don't need!
In almost every instance - you can make your own, for much less $$, and often - what you make will be better.
And here's the best part - making your own jigs is good practice for building furniture.
So here's my circle jig - made in about 5 minutes out of scrap plywood. This one is about 14" long. Pretty handy!
I actually made three - the largest one is about four feet long, so I can cut out round table tops.
And I also made this small one, because I needed to put a six-inch lazy susan in the bottom of a sculpture base I'm making.
All in all - these three took about 20 minutes to make, and I saved a ton.
Here's the wooden top - I forgot to take pictures in the beginning, but I routed the rabbet first, testing the fit in the stool base. I made it a little loose, as I didn't want it to get stuck, should the wood shrink a bit.
Then I cut the outside shape, dropping the bit for each of the revolutions, until it was cut completely through. Notice that I put some scrap plywood under it, so I didn't damage the bit or my tabletop.
Finally - I wanted a special profile on the edge of this top. It's called a thumbnail profile, which is a nice, gradual curve.
Of course, I didn't have the right router bit in my shop!
It's different from a simple round-over bit.
Well you know me... I wasn't about to buy an $87 bit, so I ended up putting a 40 grit disc on my sander and sanded the top, rotating it so that my curve was uniform all the way around the top.
Sweet!
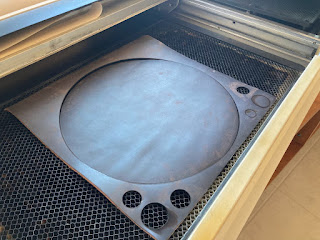
Finally - I thought it would be nice to put some leather on the bottom, to protect the tiled floor. I bought a square foot of a gorgeous brown leather, and cut the perfect circle in my Glowforge. Notice I did a few small test circles, to ensure that I had the proper settings for the laser.
Once I figured that out, I cut the perfect circle - it took less than two minutes.
I used some spray-on adhesive to fix it in place.
All in all, this piece was so enjoyable to build.
So I'll let you in on a secret - my neighbors have peacocks, and lately, they've been coming over to visit. The peacocks, not the neighbors.
They love to hang out on my patio, often peering in the window at me. Their eyesight is amazing.
This stool will hold their bag of bird seed.
OK, it's a little extravagant, but there's no way I can leave the bag outside. They're nosey AF
and a little pesky when they know food is involved!


