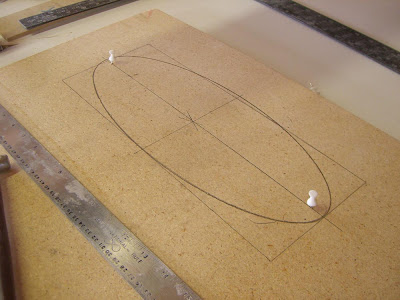
If you remember anything from high school geometry, you probably remember losing your mind when trying to lay out an ellipse, better known as an oval. I was great at geometry, but I still had difficulties with ovals.
But I'm working on a small job right now - making a oval base for a sculpture, and I had to brush up on my geometry for this one. Luckily, it all made sense this time!
Start with drawing a box the overall size of your oval.

Then - find the center point. To do this quickly and without measuring, I usually just draw two diagonal lines, from corner to corner. Where they cross is the center of the box.
In this case, it's about 6 15/16".

Now, place your ruler at the top pin, and measure down to that horizontal line, marking where 6 15/16" crosses that line. (I was going to say "draw a 6 15/16" hypotenuse" but I didn't want to freak anyone out.)

Make a little mark where that point is located. In this case, it's nearly at the end point.

Do the same thing on the other side.
 Once you have those two outer points marked, tap in another two push pins to mark their spot.
I thought I'd add another view, just to show my little hammer again.
 Now tie a string around all three pins. Try to make it fairly tight. If it's loose, your ellipse will be drawn slightly larger than the size you want it to be.
Now take out the top pin.

You're left with the string wrapped around just the two outer pins, which will allow you to draw a perfect ellipse. Use the string to guide your pencil; watch the video to see how easy it is.
As I mentioned above, if your string is a little loose when you tie it (like mine was!) your ellipse will be slightly larger than the box you've drawn.


