OK, I've been threatening to do this for a while, but this is my first attempt at posting a woodworking video here on this blog. I've been practicing making videos, it's not at easy as it looks!
Just know this - splashing Watco on the lens of a digital camera isn't a good thing.
I received a question from someone inquiring about cutting dowels. If you've ever attempted this, you know that it's easy to get a lot of chipping and splintering. So here's a quick and easy way to cut dowels.
First you need something to hold the dowel steady. In the video, I use two small blocks of wood with a V-groove cut into them. I realize that there are some people that don't have V-blocks laying around, so as an alternative, you could use a book. A well-worn book that stays open on it's own would work just fine. Even your local phone book would work.
Lay the dowel into the V-groove, overhanging it the dimension of the piece you want to create. So if you want a 3" dowel, overhang it by 3 inches.
Then, using a fine toothed handsaw, hold it on the dowel and rotate the dowel. You want to score the wood fibers all the way around the dowel, to reduce the chance for chipping and splintering. You'll want to score it fairly deeply, not just on the very surface.
Once it's scored, you can saw through it. A fine tooth saw is best here, not an old, rusty saw left over from World War II. The better the saw, the nicer the cut.
Hope this helps! Any other suggestions for the next video?
Friday, April 25, 2008


Wednesday, April 09, 2008
A goof proof finish - exactly what I need for my work!
 I'm lucky that someone that I met early in my woodworking studies told me about Watco Danish Oil. It was roughly 1978, and I was in the woodshop of Ohio University, taking a class with sculptor Mike Cunningham. His specialty was bronze casting, but while we worked together, he was teaching advanced wood techniques. When it came time to apply a finish on something I'd built, he suggested using Watco and named off a few things about it that seemed useful.
The first was that Watco didn't need a completely dust free environment to be applied. Since the woodshop where I worked was about as dusty and dirty as any place I'd ever used, this was a huge advantage. Another very nice feature of Watco was that it was quite forgiving to the average woodworker. If you missed sanding a spot on your wood, or overlooked a smear of glue on your piece - not to worry. These problems were easily solved while applying Watco. Every woodworker I know has missed a drip of glue from time to time, or as some woodbutchers like to say - "glue happens."
 And finally, another reason that Watco was quite interesting was that it allowed woodworkers to do something that previously took a couple of additional steps, and required some additional finishing supplies. See, if you wet sand Watco into your wood, you create a slurry, or fine paste, of oil and sawdust. Should there be a small worm hole, or a joint in your piece that is less that tight, this slurry acts as a wood filler of sorts. Sweet.
 A finish that actually makes finishing easier? I'll take it.
Plus - wet sanding the oil into the wood gives you an ultra smooth feel and sheen to the wood that makes most customers swoon when they touch your work. It's like buttah!
In short, you've got a product that makes you a better woodworker. If you've missed a small area while you were sanding, you can touch it up. Glue line? No problemo, a quick scrape with a sharp chisel and it's gone. Worm holes? Filled!
So back in that dusty, dirty woodshop in the late 70's, I started using Watco Danish Oil, and I've never stopped. In fact, it's the only wood finish I use, and if my customers request something different, I try to either show them the merits of Watco, or ask them to possibly find someone else to finish their piece that I've built. Of course, I discount my price accordingly, so if someone it really set on a lacquer finish, they can get it. Elsewhere.
 Besides being a really "goof proof" finish, Watco also allows you to do a few things at once, most of all - staining your wood at the same time as protecting it. See, Watco comes in colors, or tints. The clear version of Watco is called Natural, and it obviously doesn't tint the wood much. But some of their other colors, especially the Walnut colors (Medium Walnut, Dark Walnut and Black Walnut) all darken your wood considerably. So instead of first applying a separate stain to color your wood, and then applying a clear top coat, you can do both steps at the same time using a tinted Watco product. Personally, I don't like stain. If I want something a darker color, my tendency is to simply use a darker wood. Or if I'm looking for a more reddish wood, I'll use a Cherry or Mahogany. For this reason, my Watco product of choice is the Natural version, which allows the woods natural colors to shine through.
Now that's not to say I never stain anything. I recently make a piece and there was no way to avoid a streak of sapwood in a gorgeous board. I simply wiped on some tinted Watco on the sapwood area, thus blending it in with the rest of the piece. In this case, it was a Walnut chest, so I used both Natural Watco for most of the chest, and small amounts of Dark Walnut to stain the sapwood to match.

In the next few weeks, I'm going to attempt to make a short video on Watco application. I'll show you how I apply it, how much wet sanding I do, how long I leave it on the wood, and I'll also give some important information about disposing of your oil soaked rags. Back in 1988, my house (under construction) nearly burnt to the ground because some of the workers didn't dispose of the rags properly when applyong Watco to my wood floors. I'll save that story for another time... until then, remember - those rags can spontaneously combust, so dispose of them properly.
Thursday, March 27, 2008
Acid Test results

As promised...
Here's the same tile (from the post below) after a 3 day soak in vinegar.
Not sure if you can tell by the picture, but there is a distinct difference between the lower area, which was the part that was submerged.
My first thoughts about this include a realization that if I want to use this glaze for dinnerware, it's probably not suitable. But if I want to use it for tile, it's probably fine.
Sunday, March 23, 2008
The elusive Waterfall Green Glaze
 Call me persistent.
I've been working on and off for over a year trying to develop a green version of the Waterfall Brown glaze. It's a glaze developed by John Hesselberth and Ron Roy, and featured in their book - Mastering Cone 6 Glazes.
If you mix your own glazes and need help, or if you want to start doing so, I can't imagine a better book to get you started.
About my green tests, I've come up with so many versions of green, my studio is full of samples. I have a small piece of pegboard hanging right above my glaze mixing area, where all the samples are stored.
It's full.
Since I'm mostly trying to develop a green for use in my hand made tiles, I'll tell you a little about the test tiles I make.
I made a small jig that allows me to cut a half dozen rectangular tiles at once. This allows me to roll out a slab and cut six tiles in seconds. I also use a small circular cookie cutter for making small circular tiles. Sometimes, I even make small "tubes" of tile, similar to the cardboard center on a roll of paper towels, only much smaller. I make them roughly the size of a finger, which allows me to test dips in the glaze sample. This is really helpful for learning if a glaze drips during it's final glaze fire. See, I figure if I'm going to the trouble of mixing a 100 gram batch of a glaze, I might as well dip it on a few tiles, rather than just one. So I generally test a glaze on 3 different bisqued clay.
I tend to not add a lot of texture tiles I make for furniture, but still, I want to see how the glaze behaves over texture. So I'll occasionally stamp something in the clay, just to experiment a bit.
The tiles above show a green that's way too light, but the crystal pattern is strong and well formed, which is, besides the color, something I'm trying to achieve.
In the next two tests, I tweaked the colorants slightly, and while there are still some great patterns within these tiles, the color is off. It's much too light for what I'm hoping to achieve.
 I'm getting closer to what I want with these two, but I still have to play with the colorants. I envision a hunter green glaze, and these are still a bit too bright. They're very nice, if you like teal versions.
 Instead of using chrome to achieve green, I am using copper carbonate. It's beginning to make the green really pop out on these test tiles. I tested extensively with chrome, but nothing I did met my approval.
Switching to copper carbonate made the tiles much more pleasing, and put me on a better path for getting the color I want.
The tile below is still a little light, I'm hoping for DEEP green.

Now this is what I'm talking about!

I've now tested this version of the glaze three times, and each sample has given me consistent results. I like this color so much, I will probably use it on some of the sushi dinnerware sets that I make. But before that, I need to test it for it's resistance to acids.
It's a simple test, but it takes 3 days.
It's a simple test, but it takes 3 days.
 Basically, to test a glaze for it's resistance to acid, you soak it in something acidic for three days. In this case, I'll be using ordinary household white vinegar. Here's a "before" of the glaze I want to test. Check back in a few days and you'll see the "after" result. Keep your fingers crossed!
Saturday, March 15, 2008
Woodworking 101
A few blog posts ago, I wrote about one of my favorite woodworking authors, Tage Frid. His books were instrumental in filling in all holes I had in my Furniture Design degree. When I graduated, I realized exactly how much more I needed to learn. Frid's books were invaluable.
Basic Woodworking: recommended reading
A visit to any bookstore will confirm that Woodworking is one of the more popular hobbies. There are specific books available on just about any area you might be interested, from jig-saw cut-out patterns to lathe turning to Shaker Furniture and on and on and on! Below are some recommended books, with a short description of each. The books in red are highly recommended.
Woodworking Basics

The Complete Manual of Woodworking
by Albert Jackson, David Day and Simon Jennings
I think this book is one of the best overall texts that you'll find on this subject. It's similar to an encyclopedia; the illustrations are really good, as is the photography. It contains more information that any other book I've seen- about wood and identification, hand and power tools, joinery, finishing and even chapters on carving, veneering and bending wood. This is a great book. (My top recommendation for someone wanting an overall guide to this subject.)
Tage Frid Teaches Woodworking: Joinery, Tools and Techniques
Tage Frid Teaches Woodworking: Shaping, Veneering, Finishing
Tage Frid Teaches Woodworking: Book 3 Furniture making

I could retire on a desert island with a woodshop and these three texts and never want for another reference book. His set of books contain pictures explaining every sequence, and charts for various calculations. He writes the book as if he’s standing next to you explaining everything, and all the information is very well organized.
Working With Wood by Peter Korn
Someone told me that this book is out of print, though I think you can find this on eBay or Half.com. It may be hard to locate, but it's worth it. This book is a good basic guide for woodworking, although Korn has this romantic notion that it’s better to perform certain operations by hand than to use power equipment. I say that’s crazy....if I can machine-plane a board in 30 seconds that it would take me a half hour to do with a hand plane, what’s the advantage? Some purists say the enjoyment is in “the dance of doing” but I would rather sit back and enjoy my creations with fewer sore muscles and scraped knuckles.
Fine Woodworking Presents...by the Publishers of Fine Woodworking Magazine
Fine Woodworking Magazine reprints some valuable articles from it’s magazine into small books, which are very helpful and specific. Their books range in topics from Joinery to Setting up a Small Woodshop, from Sharpening to Helpful Tips. If you have access to all their back issues, then you already have this information.
For Inspiration and Appreciation
A Cabinetmaker’s Notebook by James Krenov
The Impractical Cabinetmaker by James Krenov
The Fine Art of Cabinetmaking by James Krenov

This is not an understatement: My work and outlook has never been the same since I first read Krenov’s books. He is the ultimate woodworker, teaching us about “seeing” wood as opposed to working with it. He writes about specific skills, shows simple ways to perform complex operations and most of all, teaches us an awareness of working wood that has never since been discussed as eloquently.
For Ideas
Fine Woodworking Design Books 1-7
Every few years or so, Fine Woodworking Magazine publishes a book featuring some of the best woodworking projects from around the world. The books are broken down into different categories, from Architectural Designs to Chairs, Tables to Casework, even Musical Instruments and Toys. These books have hundreds of top quality photographs, and offer a vast array of ideas when you need some inspiration.
Advanced Studies
Designing Furniture by Seth Stem
Working at Woodworking by Jim Tolpin
Both these books offer more specific information about working with wood.
Stem’s book contains many design formula’s, such as the golden triangle, for designing pieces with properties that have held up throughout the ages. This book goes into detail about designing a piece, which is helpful to those who follow their own designs, instead of using someone else’s plans.
Tolpin’s book is more suited to someone who is starting into a woodworking business. It discusses more business related topics, such as marketing, pricing and business structure. There is some very good information about setting up a shop, including tool and jig information and shop lay-out.
Night time Reading
Tools of the Trade by Jeff Taylor
An interesting collection of essays about various tools that we use everyday, but of which we know little. I love this book! It's a great gift for someone who enjoys tools and working with their hands. Even long time woodworkers will enjoy reading about the trivia contained here, and everyone can learn something. Very easy to read- I guarantee you won't be able to put this book down.
So it was only natural when I started teaching, that I would put together a list of woodworking books that I felt were helpful. Sure, I'm overlooking many books, because I'm not particularly interested in certain niche areas like pen making or decoy carving, or antique reproductions, for example.
What follows is a hand-out that I used to give to students, listing some of the great woodworking books that I have in my library. I hope it's helpful to you.
What follows is a hand-out that I used to give to students, listing some of the great woodworking books that I have in my library. I hope it's helpful to you.
A visit to any bookstore will confirm that Woodworking is one of the more popular hobbies. There are specific books available on just about any area you might be interested, from jig-saw cut-out patterns to lathe turning to Shaker Furniture and on and on and on! Below are some recommended books, with a short description of each. The books in red are highly recommended.
Woodworking Basics

The Complete Manual of Woodworking
by Albert Jackson, David Day and Simon Jennings
I think this book is one of the best overall texts that you'll find on this subject. It's similar to an encyclopedia; the illustrations are really good, as is the photography. It contains more information that any other book I've seen- about wood and identification, hand and power tools, joinery, finishing and even chapters on carving, veneering and bending wood. This is a great book. (My top recommendation for someone wanting an overall guide to this subject.)
Tage Frid Teaches Woodworking: Joinery, Tools and Techniques
Tage Frid Teaches Woodworking: Shaping, Veneering, Finishing
Tage Frid Teaches Woodworking: Book 3 Furniture making

I could retire on a desert island with a woodshop and these three texts and never want for another reference book. His set of books contain pictures explaining every sequence, and charts for various calculations. He writes the book as if he’s standing next to you explaining everything, and all the information is very well organized.
Working With Wood by Peter Korn
Someone told me that this book is out of print, though I think you can find this on eBay or Half.com. It may be hard to locate, but it's worth it. This book is a good basic guide for woodworking, although Korn has this romantic notion that it’s better to perform certain operations by hand than to use power equipment. I say that’s crazy....if I can machine-plane a board in 30 seconds that it would take me a half hour to do with a hand plane, what’s the advantage? Some purists say the enjoyment is in “the dance of doing” but I would rather sit back and enjoy my creations with fewer sore muscles and scraped knuckles.
Fine Woodworking Presents...by the Publishers of Fine Woodworking Magazine
Fine Woodworking Magazine reprints some valuable articles from it’s magazine into small books, which are very helpful and specific. Their books range in topics from Joinery to Setting up a Small Woodshop, from Sharpening to Helpful Tips. If you have access to all their back issues, then you already have this information.
For Inspiration and Appreciation
A Cabinetmaker’s Notebook by James Krenov
The Impractical Cabinetmaker by James Krenov
The Fine Art of Cabinetmaking by James Krenov

This is not an understatement: My work and outlook has never been the same since I first read Krenov’s books. He is the ultimate woodworker, teaching us about “seeing” wood as opposed to working with it. He writes about specific skills, shows simple ways to perform complex operations and most of all, teaches us an awareness of working wood that has never since been discussed as eloquently.
For Ideas
Fine Woodworking Design Books 1-7
Every few years or so, Fine Woodworking Magazine publishes a book featuring some of the best woodworking projects from around the world. The books are broken down into different categories, from Architectural Designs to Chairs, Tables to Casework, even Musical Instruments and Toys. These books have hundreds of top quality photographs, and offer a vast array of ideas when you need some inspiration.
Advanced Studies
Designing Furniture by Seth Stem
Working at Woodworking by Jim Tolpin
Both these books offer more specific information about working with wood.
Stem’s book contains many design formula’s, such as the golden triangle, for designing pieces with properties that have held up throughout the ages. This book goes into detail about designing a piece, which is helpful to those who follow their own designs, instead of using someone else’s plans.
Tolpin’s book is more suited to someone who is starting into a woodworking business. It discusses more business related topics, such as marketing, pricing and business structure. There is some very good information about setting up a shop, including tool and jig information and shop lay-out.
Night time Reading
Tools of the Trade by Jeff Taylor
An interesting collection of essays about various tools that we use everyday, but of which we know little. I love this book! It's a great gift for someone who enjoys tools and working with their hands. Even long time woodworkers will enjoy reading about the trivia contained here, and everyone can learn something. Very easy to read- I guarantee you won't be able to put this book down.
Tuesday, March 11, 2008
Confessions of a tool junkie
Back when I taught woodworking classes at my local college, I always made it a point to give handouts during each class.

See, I've taken adult ed classes before, and the only ones I've ever really benefited from were the ones that included handouts. The paperwork was invaluable for future use, and frankly, the classes I've taken that didn't include hand outs... well, I barely remember anything about those classes. I knew when I started teaching, I would become the hand out queen.
Most of the time, my handouts were focused on whatever I was teaching during that particular class. Router handouts were always popular, as was my recommended reading list.
Even on days when I didn't have anything pertinent to share, I'd simply print up a favorite recipe or maybe a woodworking cartoon. But one of my favorite handouts was the "Ten tools I can't live without" sheet, which featured obscure but entirely useful tools that I've come to rely upon in my studio. The list has changed slightly over the years, some tools have dropped off, and I've added some new things. But there are a few essential tools that I want to discuss today.
I'd like to preface this by saying that I have no financial stake in recommending any of these tools. I wish I did! Most of the tools come from Lee Valley, a Canadian company that manufactures it's own line of tools under the name Veritas. Their tools are extremely well designed and made. As a tool junkie, I get my fix with them a couple of times a year. Visa must love me.
Today in my studio, I was working on a chest/bench.

It's a popular piece that appears to be a simple blanket chest, but the real charm of it is that it's sized to fit hanging file rails, so that this chest can double as a filing cabinet.

The bottom is made of solid aromatic Cedar, so the chest can also be used for fabric storage, like linens, sweaters, towels, or bedding. But the most common use for this chest is as a filing cabinet bench.
Over the years, this bench has been one of the most popular pieces that I build. Versions of it are scattered throughout the country, and from time to time, I hear from the people who have purchased them, still professing their love for them. I've tried to keep this piece fresh, by varying the style, materials, and features that I offer. In fact, some of my recent versions include tiled front panels, thus introducing color and texture into the mix. While working on a bench today, it dawned on me that this was a perfect time to shoot some images of the building process.
I couldn't do without my box of set up blocks. The particular set I own is contained in a simple box, and holds 6 different "blocks" of metal, all sizes to nearly perfect dimensions.


Instead of using a tape measure, which can be inaccurate at times, I can use these blocks for marking things, like screw locations, or adjusting a fence on any given tool. The largest block is a 1-2-3 block, which measures 1" x 2" x 3," perfect for measuring and marking.

The other smaller pieces are all useful dimensions -- everything from 3/4" down to 1/16" - used in combination, you can come up with just about any dimension you need. While using the setup blocks for locating where I'm going to drill some screw holes, there are many times I need to transfer a dimension around a corner. Yes, a simple square might work, but I've gotten fairly dependent on using a saddle square.

This ingenious device is simple, yet dead-on accurate. Here, I'm using it to transfer the location of the center of the side board to the face of my bench panel.

Speaking of accurate locations, I'd like to talk about measuring.

I've gotten accustomed to using a cabinetmakers tape specifically made for a right hander like me. My buddy, Dave, bought me one of these tapes a few years ago, and since then, I've bought a few more, placing them at various locations around my shop. See, the tapes you buy in your local hardware store read left to right, which means that if you're right handed, you're reading the numbers upside down. It's hard enough to be accurate in the first place!

I'd like to share a tip for measuring and marking, one that virtually eliminates errors when trying to locate the center of a board. It's a simple, effective way of finding the center, without doing a lot of math. This method is pretty goof proof, which is what I need from time to time. First, measure the piece of wood on which you want to find the center. In this case, the board is 13" and some odd fraction.

It doesn't matter, you just need a rough dimension. I always round up to the next whole number, in this case, it's 14" To find the center, measure 7" from the right edge of the board, as shown below.

Then measure 7" from the left edge of the board.

In between those two lines is the center.

In this case, the lines are only about a half inch apart. It's much easier to look at a half inch space and mark the center, than to measure and do the math to find the center. Finally, once I've located the center and marked the location for the screw, the next step is to predrill the screw hole.

Wherever I install a screw, I fill the hole with a solid plug of similar wood, so that the screw virtually disappears. There is a great device for drilling screw holes, it's called a tapered countersink bit, and my favorite one is made by Fuller Tools.

The box set includes a variety of sizes, lengths and even comes with some plug cutters, so that you can cut some wooden plugs to fill the holes.

A couple of things about cutting solid wood plugs for filling screw holes - it's best to save a piece of wood from whatever you're building, so that the wood color matches perfectly. Sometimes, I'll even label the scrap wood, so that I know where it's mate is located in the piece. And forget about cutting a bunch of short plugs; they're too hard to hold when they're short.
I use tenon cutters to cut plugs, which allows me to cut "tubes" of wood up to 3" long. Take a short scrap of wood, roughly a 1 x 2, and turn it on edge. Drill into the edge, so that you're cutting 2" long plugs. Holding a 2" plug is much easier to hold than short plugs, and one long piece can often yield a half dozen plugs or more. I apply a little glue on the plug, tap it in, and chisel it off just a hair above flush. Apply a little more glue and do it again to the next hole.
As Napoleon Dynamite would say....sweet.

See, I've taken adult ed classes before, and the only ones I've ever really benefited from were the ones that included handouts. The paperwork was invaluable for future use, and frankly, the classes I've taken that didn't include hand outs... well, I barely remember anything about those classes. I knew when I started teaching, I would become the hand out queen.
Most of the time, my handouts were focused on whatever I was teaching during that particular class. Router handouts were always popular, as was my recommended reading list.
Even on days when I didn't have anything pertinent to share, I'd simply print up a favorite recipe or maybe a woodworking cartoon. But one of my favorite handouts was the "Ten tools I can't live without" sheet, which featured obscure but entirely useful tools that I've come to rely upon in my studio. The list has changed slightly over the years, some tools have dropped off, and I've added some new things. But there are a few essential tools that I want to discuss today.
I'd like to preface this by saying that I have no financial stake in recommending any of these tools. I wish I did! Most of the tools come from Lee Valley, a Canadian company that manufactures it's own line of tools under the name Veritas. Their tools are extremely well designed and made. As a tool junkie, I get my fix with them a couple of times a year. Visa must love me.
Today in my studio, I was working on a chest/bench.

It's a popular piece that appears to be a simple blanket chest, but the real charm of it is that it's sized to fit hanging file rails, so that this chest can double as a filing cabinet.

The bottom is made of solid aromatic Cedar, so the chest can also be used for fabric storage, like linens, sweaters, towels, or bedding. But the most common use for this chest is as a filing cabinet bench.
Over the years, this bench has been one of the most popular pieces that I build. Versions of it are scattered throughout the country, and from time to time, I hear from the people who have purchased them, still professing their love for them. I've tried to keep this piece fresh, by varying the style, materials, and features that I offer. In fact, some of my recent versions include tiled front panels, thus introducing color and texture into the mix. While working on a bench today, it dawned on me that this was a perfect time to shoot some images of the building process.
I couldn't do without my box of set up blocks. The particular set I own is contained in a simple box, and holds 6 different "blocks" of metal, all sizes to nearly perfect dimensions.


Instead of using a tape measure, which can be inaccurate at times, I can use these blocks for marking things, like screw locations, or adjusting a fence on any given tool. The largest block is a 1-2-3 block, which measures 1" x 2" x 3," perfect for measuring and marking.

The other smaller pieces are all useful dimensions -- everything from 3/4" down to 1/16" - used in combination, you can come up with just about any dimension you need. While using the setup blocks for locating where I'm going to drill some screw holes, there are many times I need to transfer a dimension around a corner. Yes, a simple square might work, but I've gotten fairly dependent on using a saddle square.

This ingenious device is simple, yet dead-on accurate. Here, I'm using it to transfer the location of the center of the side board to the face of my bench panel.

Speaking of accurate locations, I'd like to talk about measuring.

I've gotten accustomed to using a cabinetmakers tape specifically made for a right hander like me. My buddy, Dave, bought me one of these tapes a few years ago, and since then, I've bought a few more, placing them at various locations around my shop. See, the tapes you buy in your local hardware store read left to right, which means that if you're right handed, you're reading the numbers upside down. It's hard enough to be accurate in the first place!

I'd like to share a tip for measuring and marking, one that virtually eliminates errors when trying to locate the center of a board. It's a simple, effective way of finding the center, without doing a lot of math. This method is pretty goof proof, which is what I need from time to time. First, measure the piece of wood on which you want to find the center. In this case, the board is 13" and some odd fraction.
It doesn't matter, you just need a rough dimension. I always round up to the next whole number, in this case, it's 14" To find the center, measure 7" from the right edge of the board, as shown below.
Then measure 7" from the left edge of the board.
In between those two lines is the center.

In this case, the lines are only about a half inch apart. It's much easier to look at a half inch space and mark the center, than to measure and do the math to find the center. Finally, once I've located the center and marked the location for the screw, the next step is to predrill the screw hole.

Wherever I install a screw, I fill the hole with a solid plug of similar wood, so that the screw virtually disappears. There is a great device for drilling screw holes, it's called a tapered countersink bit, and my favorite one is made by Fuller Tools.

The box set includes a variety of sizes, lengths and even comes with some plug cutters, so that you can cut some wooden plugs to fill the holes.

A couple of things about cutting solid wood plugs for filling screw holes - it's best to save a piece of wood from whatever you're building, so that the wood color matches perfectly. Sometimes, I'll even label the scrap wood, so that I know where it's mate is located in the piece. And forget about cutting a bunch of short plugs; they're too hard to hold when they're short.
I use tenon cutters to cut plugs, which allows me to cut "tubes" of wood up to 3" long. Take a short scrap of wood, roughly a 1 x 2, and turn it on edge. Drill into the edge, so that you're cutting 2" long plugs. Holding a 2" plug is much easier to hold than short plugs, and one long piece can often yield a half dozen plugs or more. I apply a little glue on the plug, tap it in, and chisel it off just a hair above flush. Apply a little more glue and do it again to the next hole.
As Napoleon Dynamite would say....sweet.
Tuesday, February 26, 2008
A Purple Waterfall Glaze?
About a year ago, I took a glaze making class with my local ceramic supplier, in hopes of learning some basic theory. It was helpful, no doubt, but there is SO MUCH seat of the pants knowledge that this requires. It's not something you can simply learn in one class, but rather, you need a lifetime of experience with glaze chemicals in order to know what you're doing.
How will a Red Iron Oxide wash behave under a white glaze? What will the addition of Chrome do to a recipe? Can I mix a white and a black glaze to achieve a gray color? The only way to know is to TEST, TEST, TEST, and even then, different clay bodies will give you different answers. Even different kilns will give you different results. Even different cooling rates can change everything.
To a beginner, it's a daunting challenge to absorb all this.
There is a certain elegance to the art of glaze making . There's no guessing, no "oh, let's add a dash of this" sort of experimentation. It's sort of like cooking, but not. Precision is perfecrtion. Pull out your triple beam scale and take notes. Take GOOD notes.
So imagine my surprise when I opened the kiln a couple of days ago and got a purple version of John Hesselberth and Ron Roy's Waterfall Brown. Gorgeous violet purple. Completely unplanned purple. Purple without notes purple. WTF?

It started by having a little extra shelf space in the top of my kiln load. I didn't have much, but there was a spot I wanted to fill, so I picked up a small medallion tile that I had fired a few months ago. I didn't like the way it turned out, and had stuck it on a shelf, trying to decide what to do with it.
Fast forward to this week, when I mixed up a batch of Nutmeg and White Satin glaze, my newest project. These glazes can be combined to mimic a wood fired look, and I had already thrown a few test tiles into this kiln, just for a little extra research.
I took that medallion, painted it with the Nutmeg, and sure enough.... purple. WTF Purple, which is what I may name it, if I ever figure out what the hell I did.
Which brings me back to my glaze making class. I remember one employee at the ceramic store told me a story of a glaze test he did - he could never reproduce the exact color of it ever again. EVER. He wasn't sure if his notes were bad, or his chemicals had changed, or whatever. All he knew was that he was on a quest to reproduce that, and after MANY, MANY attempts, he still wasn't any closer.
So even though I managed to achieve a lovely Purple Waterfall Glaze, Who knows if I'm going to be able to repeat it. Oy.
______________
One more thing... here are a couple of small soy bowls with some interesting results of the WF glaze:


How will a Red Iron Oxide wash behave under a white glaze? What will the addition of Chrome do to a recipe? Can I mix a white and a black glaze to achieve a gray color? The only way to know is to TEST, TEST, TEST, and even then, different clay bodies will give you different answers. Even different kilns will give you different results. Even different cooling rates can change everything.
To a beginner, it's a daunting challenge to absorb all this.
There is a certain elegance to the art of glaze making . There's no guessing, no "oh, let's add a dash of this" sort of experimentation. It's sort of like cooking, but not. Precision is perfecrtion. Pull out your triple beam scale and take notes. Take GOOD notes.
So imagine my surprise when I opened the kiln a couple of days ago and got a purple version of John Hesselberth and Ron Roy's Waterfall Brown. Gorgeous violet purple. Completely unplanned purple. Purple without notes purple. WTF?

It started by having a little extra shelf space in the top of my kiln load. I didn't have much, but there was a spot I wanted to fill, so I picked up a small medallion tile that I had fired a few months ago. I didn't like the way it turned out, and had stuck it on a shelf, trying to decide what to do with it.
Fast forward to this week, when I mixed up a batch of Nutmeg and White Satin glaze, my newest project. These glazes can be combined to mimic a wood fired look, and I had already thrown a few test tiles into this kiln, just for a little extra research.
I took that medallion, painted it with the Nutmeg, and sure enough.... purple. WTF Purple, which is what I may name it, if I ever figure out what the hell I did.
Which brings me back to my glaze making class. I remember one employee at the ceramic store told me a story of a glaze test he did - he could never reproduce the exact color of it ever again. EVER. He wasn't sure if his notes were bad, or his chemicals had changed, or whatever. All he knew was that he was on a quest to reproduce that, and after MANY, MANY attempts, he still wasn't any closer.
So even though I managed to achieve a lovely Purple Waterfall Glaze, Who knows if I'm going to be able to repeat it. Oy.
______________
One more thing... here are a couple of small soy bowls with some interesting results of the WF glaze:


Wednesday, February 20, 2008
Wood Fired effects in an electric kiln
A couple of blog posts ago, I wrote about a glaze developed by Richard Busch of Glenfiddich Farm Pottery. It's a fabulous glaze- in fact, it's two glazes- a white and a nutmeg that can be mixed together or layered to create colors in electric kilns that are usually only achieved in wood fired kilns. Busch also developed a black stain (for highlights or brushwork) to be used with these two glazes.
Being the glaze test junkie that I am, I decided to play a bit with these two glazes, by experimenting with not only the proportions of these glazes, but also with different clay bodies. These test results came out of my kiln yesterday.


These glazes over the light color of the porcelain clay body doesn't quite achieve that rich deep golden toasty color that I like. But they do illustrate that higher percentages of nutmeg will give you darker and richer colors.
Next, I tested these same glaze ratios on a medium buff stoneware called Long Beach.


This body is darker than porcelain, but still fires to a light beige color. It's still not quite what I want, but the cup (below) is promising.

Coming up next... these glazes on my clay of choice, Black Mountain.
Being the glaze test junkie that I am, I decided to play a bit with these two glazes, by experimenting with not only the proportions of these glazes, but also with different clay bodies. These test results came out of my kiln yesterday.


These glazes over the light color of the porcelain clay body doesn't quite achieve that rich deep golden toasty color that I like. But they do illustrate that higher percentages of nutmeg will give you darker and richer colors.
Next, I tested these same glaze ratios on a medium buff stoneware called Long Beach.


This body is darker than porcelain, but still fires to a light beige color. It's still not quite what I want, but the cup (below) is promising.

Coming up next... these glazes on my clay of choice, Black Mountain.
Monday, February 18, 2008
Tan, rested and ready to jump back into the studio...
Went to Hawaii for a much needed dose of inspiration, good food, and good company. Did some hiking, which is about as foreign to me as astrophysics. Here's a short video of me crossing a raging stream. Don't believe the smile on my face; the bridge was terrifying and the stream below had swelled, due to record amounts of rain. Normally, this stream is small and you can cross it by hopping on a few rocks.
This is the first time I've played around with putting a video on this blog- it's a humbling experience, trust me. The sound is hard to control, the editing is even more difficult, and on top of all that, this clip makes my legs look like sausages! They say that film adds 15 pounds to everyone, but no one mentioned the height compression factor. Oy!
I suspect much of my upcoming work is going to reflect some Hawaiian influence. The islands are filled with tribal art, ancient petroglyphs, and some incredible artists.
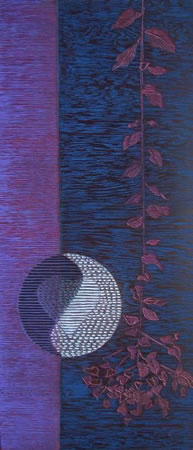
One of my all time favorites is Joelle Chicheportiche-Perz, who has been living in Hawaii since 1982. This piece is simply incredible, this picture doesn't do it justice. It's a solid block of Purpleheart wood, carved and painted in the most exquisite detail imaginable. Her work never fails to inspire and surprise me. If you visit her website and click on the"new work" tab, you'll see some fascinating information about her new work that explores her unique combination of oil paint on carved wood.
Viewpoints Gallery is a must see for me during every visit. And just a few steps from the lovely glass studio - Hot Island Glass.
Is it too early in the day to make a mai-tai?
This is the first time I've played around with putting a video on this blog- it's a humbling experience, trust me. The sound is hard to control, the editing is even more difficult, and on top of all that, this clip makes my legs look like sausages! They say that film adds 15 pounds to everyone, but no one mentioned the height compression factor. Oy!
I suspect much of my upcoming work is going to reflect some Hawaiian influence. The islands are filled with tribal art, ancient petroglyphs, and some incredible artists.
One of my all time favorites is Joelle Chicheportiche-Perz, who has been living in Hawaii since 1982. This piece is simply incredible, this picture doesn't do it justice. It's a solid block of Purpleheart wood, carved and painted in the most exquisite detail imaginable. Her work never fails to inspire and surprise me. If you visit her website and click on the"new work" tab, you'll see some fascinating information about her new work that explores her unique combination of oil paint on carved wood.
Viewpoints Gallery is a must see for me during every visit. And just a few steps from the lovely glass studio - Hot Island Glass.
Is it too early in the day to make a mai-tai?
Wednesday, January 30, 2008
Wood Fired?
It's important to know your materials, whether you're working with wood or clay. As many readers here might know, I've done extensive testing with the WaterFall glazes from the book "Mastering Cone Six Glazes" by John Hesselberth and Ron Roy. You may have to scroll back a bit through the archives, but you'll be able to see many of the colors I've developed.

And while that particular glaze continues to fascinate, challenge and surprise me, I must admit after 200+ tests, I needed a break! It had gotten to the point where I knew the base recipe by heart, much like I know my favorite cookie recipe.
When you can mix something up in your sleep, you know you've had too much exposure.
I was scouring through some old Ceramics Monthly magazines and something caught my eye in the February 2003 issue. Richard Busch wrote a fascinating article about his work developing a glaze that would makes pots look like they'd been wood fired. I remember standing there in my studio, mouth wide open at the lovely photos of his work. I was hooked.

There might be someone out there wondering why anyone would want to try this when... well, why not just fire a kiln with wood? Here in the desert, the drought has scorched our land. That's not even taking into account the restrictions on kiln firing within city limits. It's simply not a practical option for me.
Of course, anyone who pots knows that you can't just mix up some glaze and hope for the same results. Variables in clay bodies and glaze materials will produce different results for different people. Back to the drawing board for me.
In his article, Richard Busch gives three recipes, and a variety of tips for achieving what many people will have a hard time distinguishing isn't actually a wood fired piece. Only when the bottom of a pot is examined can someone discover that the unglazed clay body hasn't been reduced.
His White Satin Matt Glaze and his Nutmeg glaze can be mixed together and applied in various ratios, depending on the "toastiness" you desire. Also, these glazes can be layered on top of one another for different effects. Finally, he gives a recipe entitled "Sybil's black stain, for adding some brushwork and/or simulating the errant floating specs that occur in wood fired work.
Below are my experiments.

Above tiles are test #1, and are a 50/50 mixture of the White and Nutmeg glazes.

Pictured above is sample #2, which contains 1/3 White and 2/3 Nutmeg. The golden colors are rich and black stain pops out nicely.

I'm not sure if the above samples are that helpful, but these are glazes #1 and 2 dipped. The application was probably too thin; I will probably retest these using thicker glazes next time. Both tests are on the glossy side.

The above tiles (#3) are are glazed with a mixture of 2/3 White Satin and 1/3 Nutmeg. The color is a little too light for my taste, and because the white is predominant, it is more matte.

Test #4 (above) finally starts approaching what I wanted - a deep golden, toasty color. This glaze consists of 25% White Satin and 75% Nutmeg. This version seems to work best when applied heavy.

Dipped versions of #3 and 4. Once again, the glaze was probably applied too thin on these samples. I will retest all the dipped pieces.
There are so many possibilities with these glazes, and as time permits, I'll be testing and working out the fit on my clay body.
PS... I'm editing this post because I've located Richard Busch. He runs Glenfiddich Farm Pottery, outside Leesburg, Virginia, and his site has some lovely examples of his work.

And while that particular glaze continues to fascinate, challenge and surprise me, I must admit after 200+ tests, I needed a break! It had gotten to the point where I knew the base recipe by heart, much like I know my favorite cookie recipe.
When you can mix something up in your sleep, you know you've had too much exposure.
I was scouring through some old Ceramics Monthly magazines and something caught my eye in the February 2003 issue. Richard Busch wrote a fascinating article about his work developing a glaze that would makes pots look like they'd been wood fired. I remember standing there in my studio, mouth wide open at the lovely photos of his work. I was hooked.

There might be someone out there wondering why anyone would want to try this when... well, why not just fire a kiln with wood? Here in the desert, the drought has scorched our land. That's not even taking into account the restrictions on kiln firing within city limits. It's simply not a practical option for me.
Of course, anyone who pots knows that you can't just mix up some glaze and hope for the same results. Variables in clay bodies and glaze materials will produce different results for different people. Back to the drawing board for me.
In his article, Richard Busch gives three recipes, and a variety of tips for achieving what many people will have a hard time distinguishing isn't actually a wood fired piece. Only when the bottom of a pot is examined can someone discover that the unglazed clay body hasn't been reduced.
His White Satin Matt Glaze and his Nutmeg glaze can be mixed together and applied in various ratios, depending on the "toastiness" you desire. Also, these glazes can be layered on top of one another for different effects. Finally, he gives a recipe entitled "Sybil's black stain, for adding some brushwork and/or simulating the errant floating specs that occur in wood fired work.
Below are my experiments.

Above tiles are test #1, and are a 50/50 mixture of the White and Nutmeg glazes.

Pictured above is sample #2, which contains 1/3 White and 2/3 Nutmeg. The golden colors are rich and black stain pops out nicely.

I'm not sure if the above samples are that helpful, but these are glazes #1 and 2 dipped. The application was probably too thin; I will probably retest these using thicker glazes next time. Both tests are on the glossy side.

The above tiles (#3) are are glazed with a mixture of 2/3 White Satin and 1/3 Nutmeg. The color is a little too light for my taste, and because the white is predominant, it is more matte.

Test #4 (above) finally starts approaching what I wanted - a deep golden, toasty color. This glaze consists of 25% White Satin and 75% Nutmeg. This version seems to work best when applied heavy.

Dipped versions of #3 and 4. Once again, the glaze was probably applied too thin on these samples. I will retest all the dipped pieces.
There are so many possibilities with these glazes, and as time permits, I'll be testing and working out the fit on my clay body.
PS... I'm editing this post because I've located Richard Busch. He runs Glenfiddich Farm Pottery, outside Leesburg, Virginia, and his site has some lovely examples of his work.
Tuesday, January 29, 2008
Muscle memory

This is completely unrelated to woodworking, but then again... well, maybe it's not.
My New Year's resolution last year was to learn something new, and among the choices I gave myself, learning to solve the Rubik's cube seemed the most "doable" to me.
So I bought a cube and taught myself how do it. It took about a week of playing with it, on and off. Once you get it, you "get it."
And even though I'm somewhat of a math geek, the algorithms baffled me. There's a whiz online- Tyson Mao , who "taught" me how to do it. Check out this video of him, speedcubing.
My best time was about 15 minutes, which is a joke compared to Tyson.
Once I learned how to do it - and believe me, it was a bit of a struggle at first - I promptly put the cube on a shelf and forgot about it.
Fast forward one year, I saw something that reminded me of the cube, so I picked it up again. The biggest surprise? I solved the cube in about 4 minutes.
 Which brings me back to muscle memory.
As a woodworker, there are certain things I do over and over. Laying out mortise and tenons. Screwing pieces together, then plugging the holes with solid wood plugs. Cleaning up the edges of boards in preparation for gluing them together. Chamfering with a hand plane. You get the picture.
There's a certain fluidity of motion that comes from doing the same tasks over and over. In fact, I know I'm a better woodworker now that I was ten years ago, or even five years ago. I just do things better. It's all about the dance of motion, and that only comes from muscle memory.
Any you though this blog post was about a Rubik's cube!
Any woodworkers out there want to challenge me to a Rubik's duel?
Thursday, January 24, 2008
Art-to-Art Palette
An artist never argues with a little press. Well... unless it's bad press...
Recently, a midwest regional art based online journal featured a few artists, and I was fortunate to be one of them. Here's a link to the article on Art-to-Art Palette.
It's only up through February 4, 2008.
Recently, a midwest regional art based online journal featured a few artists, and I was fortunate to be one of them. Here's a link to the article on Art-to-Art Palette.
It's only up through February 4, 2008.
Thursday, January 17, 2008
Furniture on Craigslist

I love CraigsList, I've found some of the coolest things there, and met some outstanding people, too. Some have even become great friends of mine. This, however, might take the prize for the coolest/most bizarre thing I've seen on CraigsList in a long time:
For Sale - beautiful pink “vagina couch” that I made in art school and no longer have space for. The couch is large: measures 5'3" long, 3'3" wide at the middle, and stands 2'3" tall (and is heavy like a couch). The pics are from my portfolio and are several years old; as a result, the couch has some scuffmarks and stains around the bottom from being moved, but otherwise is in excellent shape. A professional upholsterer helped me build the couch, so it is also functional and durable as a piece of furniture. The couch must be picked up in Mendocino, a 3-hour drive north of SF. I am asking for $600 and a loving home!
Jeez, I thought the couch I made in college, out of a bathtub, was cool.......
Subscribe to:
Posts (Atom)