We just finished a terrific class on building Adirondack chairs - and I couldn't be more proud of the chairs that everyone built. I used to offer this class every summer in Ohio, and it was quite popular. But - here in the desert? Most locals don't know what an Adirondack chair is, let alone how to pronounce it!
The plans are based on this book, which I think is one of the best on the subject.
The plans are based on this book, which I think is one of the best on the subject.
Most of the people in this class had a few classes under their belt, so they felt pretty comfortable with the building process. Still, there were a few new techniques that challenged them.
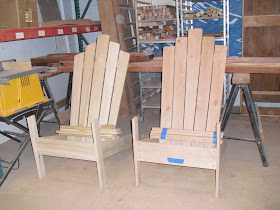
We started with the chair base; here they are, lined up after class.
We started with the chair base; here they are, lined up after class.
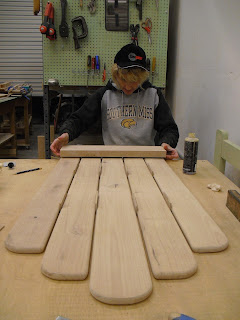
Next came the backs; everyone had an opportunity to put their own spin on their chairs.
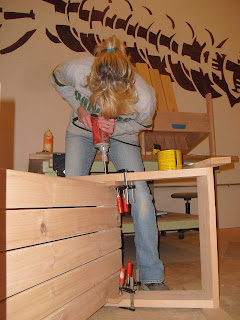
Once the back and base were finished, things started progressing pretty quickly.
One of the bigger challenges in this class was plugging all the screw holes. Everyone in the class became quite skilled with a mallet and chisel. Or not.
I built my chair out of lyptus - remind me to think twice about it, if I decide to use lyptus again! It's heavy and I'm allergic to it. A nasty splinter I got on the first day of class still hasn't healed.
But it sure is pretty!
Stella and I had to try it out, even though I hadn't attached the arms yet.
Stella and I had to try it out, even though I hadn't attached the arms yet.
It was a joy to watch everyone's chair parts turn into a complete chair. This chair was modeled on a photo that one student brought in. Her back was dramatic and - simply gorgeous!
Smiling while plugging holes is a good sign!
The most rewarding thing is to see the look of accomplishment on everyone's face.
Last minute plugging before the class presented their chairs at the monthly Sin City Woodworkers meeting.
Having this much fun in a class ought to be illegal! This group effort was an amazing thing to experience. Not only did they go home with some gorgeous chairs, but they really proved something to themselves about their woodworking skills.
Congrats to everyone on their amazing accomplishment! You should all be quite proud. I know I am!
Congrats to everyone on their amazing accomplishment! You should all be quite proud. I know I am!


They all look great, Jamie. Seeing that makes me want to give a class on building one! What type of wood was mostly used? Here often it's cedar because it lasts much longer than any other wood available.
ReplyDeleteJamie, the class was a lot of fun and definitely a learning experience. I've wanted to make one of these chairs ever since the first day of my basic class with you when I spotted your small scale models. Thank you so much for offering it and being a fabulous teacher who truly cares about your students success! I would definitely reccomend your classes to everyone. I can't wait to have my daughters start your basic class so they can learn and hopefully love woodworking like I have.
ReplyDeleteCongratulations on building such beautiful chairs! They are very much in the traditional and minimalist style. For your readers who may not have the time or resources to build an Adirondack Chair it might be worth investigating the purchase of a chair. Polywood Adirondack chairs are long-lasting, colorful and come in a variety of styles.
ReplyDeleteThank you for sharing your ADK Chair experience!