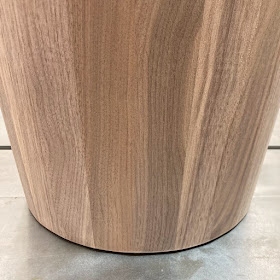
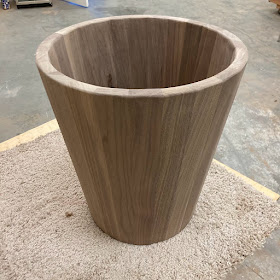
A few weeks ago, I got a phone call from someone, asking if I could make some stools with storage in them. I was a little hesitant to commit to this project, so I told them I'd do a little research on it and get back to them.
And then I jumped down the rabbit hole known as woodworking.

There are so many great examples out there, and I found a few that I really liked. These would be good starting points for this project. And luckily, I was given some design freedom to come up with whatever I wanted.
Finally - I decided to build one for myself, to see if making 8 of them was something I wanted to undertake. I really liked this simple design, except for the slotted handle.

My buddy Andrew had given me a huge stack of walnut, so the material choice was an easy one to make. I prepped some pieces, and started my research.

Since this will be used this as a seat, the height needed to be around 18”.

I haven’t decided if I’ll upholster the seat, or make a wooden top for it. Either way - the total height for this glue-up needed to be around 17” tall.
I started off by using an online calculator to figure out the angles that I would need to cut, based on the design.

Then I tilted the blade to start cutting some angles.

This online calculator made it pretty easy to figure everything out.
These pieces will end up needing a compound cut - the wood will be both angled, and tapered. A little tricky, but - hey, my saw and I can handle it.

If I've learned anything, I know that jigs are the way to go. So I made a jig to cut the tapers, called staves, and cut 24 of them in total.
It was easiest to glue them together three staves at a time, instead of trying to glue the whole thing up at once. (Trust me, I learned this the hard way many years ago.). Masking tape makes life a little easier.

And since there were 24 staves, I glued three together,

and then three more,

and so on…

until I had eight parts.

And then four parts. You get the idea.
Finally, I wound up with 2 halves.

Gluing up angles is tricky, your clamps can slip, which makes life hell.
So gluing everything into some sections made life a lot easier.
I actually got pretty good at it, and the final glue up was super easy.

I did have to add a few tapered shims, so that the strap clamps wouldn’t slip off.

Once it was glued, I needed to trim the top and bottom.

I learned a trick along time ago for fixing chairs that don't sit flat on a floor. If you extend your blade about a 16th of an inch or so above the table saw top, you can do very light skimming cuts to slightly trim the leg. So I scribed a line that I needed to cut and trimmed it carefully on the tablesaw. Of course, I kept checking to make sure it was flat, with no wobbles.

Once I had the bottom trimmed and sanded,

I drew a parallel line at the top, so I could trim the top edge. Again, I did this on the tablesaw it was pretty simple to accomplish. A little sanding and breaking the edges and this stool was starting to look fabulous.

This was a super tricky build, and I didn't consider how I would put a bottom in the stool. A rabbet on the bottom edge? A disc dropped in from the top, and fastened in place?
I'll think about that tomorrow!


