Friday, February 28, 2020

Parts R Us...


My shop could probably be renamed "Parts R Us" and it would be fitting. I've been making a ton of parts lately. 

It's always interesting to see what projects people are undertaking. I had a client bring a couple of antique baby carriage wheels to my shop - one was intact like this, and one was in pieces.


 And missing some pieces - specifically, missing two of these wheel spokes. 


They had an odd shape - I could tell that it was turned on the lathe, but it also has some flat spots and some scoops in the profile. Not a particularly hard piece to make, but one that took a few different steps. 

I started with a couple of pieces of sassafras, which matched the coloring and grain of the original spokes. 


Once I has a piece roughed out, I shaped the sides on the NEW bandsaw, 


and smoothed everything out on the belt sander. 


My lathe work is more about utility than making artsy pieces. There's never enough time to make all of the pieces I would like to...  someday! Turning these was the easy part!


Turning these was the easy part! 


Finishing them was a breeze, using Mohawk spray stains. I added a bit of distress to the two new spokes, so they wouldn't stand out against the old ones. My secret weapon for making these look grungy was a Sharpie for some darker highlights. 

And finally - fitting all ten of the spokes into this rigid rim was quite a challenge. And probably why the client asked me to do it. She had done the first one, and struggled with it, so I was tasked with assembling the second one. 


The two new spokes are these two at the bottom - could you have found them, if I hadn't pointed them out?

It would have been easy if I had four hands, but I didn't. An hour later, struggling with each individual spoke wanting to pop out of place, and this small repair was complete.  I love quickie projects like this - they keep me on my toes, and pay a few bills.  And my clients are awfully happy! Still want more? 

By the way, this carriage was made by the F. A. Whitney Carriage Company - click here to read more.


Still want more? Check out this article.


She promised to send me photos when the piece is fully restored, and I can't wait!


Sunday, February 23, 2020

Has Watco changed its formula?


Do you remember last October, when I started working on this small live-edge table?  


A client brought a slab to me, requesting a small side table, so I started flattening it with a scrub plane. It was a lot of work!  


But eventually, the high spots were taken off, 


 and it was flat enough to run through the planer. 


Some weird punky spots popped up... I've never really seen something like that. 


The wood was dense and solid, yet when I started sanding it, small chunks would chip or flake off. 


I'd been given a sample of super glue that seemed like it might do the trick, so I "mended" these punky spots, covering them in CA glue and hoping for the best. It did the trick, sealing and hardening the wood enough that I could sand and finish it. 


All that was left was sanding. 


And more sanding.  And oiling. 


Of course,I always use Watco Danish Oil, wet-sanding it into the wood. This results in a very soft surface, so nice to touch, and one that clients always gush about.

But here's something interesting... I had to open a new can of oil, and I noticed that the artwork and packaging on the can was different. The new can is on the left, the old can on the right. 


This is the new can, with its " EASY wipe on" banner on the front. Over the years, Watco has changed hands several times, being owned by Minwax, Flecto, and Krylon. And probably more.  

This time, I've sensed that the original recipe has been altered. This can seemed really different - thicker in viscosity, and "stickier" in feel. 


The old version had much more flow to it, although both versions resulted in a similar result. I'd be curious to hear if anyone else has noticed the change in recipe. Either way, this table surface was gorgeous.


Sunday, February 02, 2020

Projects...big and small

A few posts back, I highlighted some of the cool projects that everyone built in the shop last year.  

I was scrambling to find pictures of one terrific table that Alvin built, and it took me a while to track them down. 


This was his first attempt at working with a live edge slab, and he knocked it out of the park. 


But we don't just work on large pieces - here's something I helped out on - and had forgotten all about! When your mom and dad don't have tools... we can help with your important project! 


These Pinewood Derby Cars were winners!


Thursday, January 30, 2020

I need good laugh...

You know what? 

I need a good laugh. 

It's been a rough month, and I just needed this video to give me a good diversion. 

Enjoy!


Drunk Scottish Guy Wakes Up In The Wrong House, Gets The Most Scottish Reaction From Homeowners


Sunday, January 19, 2020

Wanna see some of the student's 2019 work?

We had a ton of fun in 2019 - the camaraderie is a really important component in the classes that I teach. We rely on teamwork, on keeping an eye out for our fellow shop mates, and for lending opinions about the designs we're building. 


That line - It Takes a Village - is true.

I wanted to take a minute to acknowledge some of the great pieces that people built at the shop this past year. See, in the classes, everyone mostly builds the same projects, so that they can learn some awesome techniques, refine their skills and get in some solid practice, so that when they tackle a bigger piece, they'll be able to build it properly. 


So we start with some simple things like these cutting boards. 


When you learn to make something simple like that style of board, you can work up to something a little more complex, like this one. 


or these - beautiful scooped charcuterie boards. WOW!


 These pictures don't do them justice. 


think it's helpful to start on a more "utility" project, like a workbench. If someone makes a slight mistake on their workbench, like a small gap on a mortise and tenon joint, or  if it has a funky looking glue line, it's not the end of the world. 

The bench is still going to work fine, and it's certainly something to be proud of. Check these out! 


These are serious, weighty benches, and will give these students years of use.


Starting with a bench is great, but graduating to more "finished" pieces is the goal - and our table making class gave everyone the opportunity to make some AMAZING tables.

 Like this mid-century inspired coffee table with a flip top. 


Or this Sassafras dining table, built for six.


Look at this ridiculously beautiful live edge table. 


It has a waterfall edge, and a beefy custom metal leg. (Thanks, Hugo!)


This rustic sofa table is gorgeous,


 and was designed to fit a few more diners during holiday meals. The woman who made this is so talented, it's ridiculous! 


She brought this meal on the last night of her class. 


MUCH appreciated by everyone in her class. 

She's in the front row, middle, in the solid black shirt... we LOVE her food, and the energy and great vibe that she brings to any class.


We also build some much bigger pieces - usually on Saturdays during Open Shop, where past students can rent shop time and build independently.

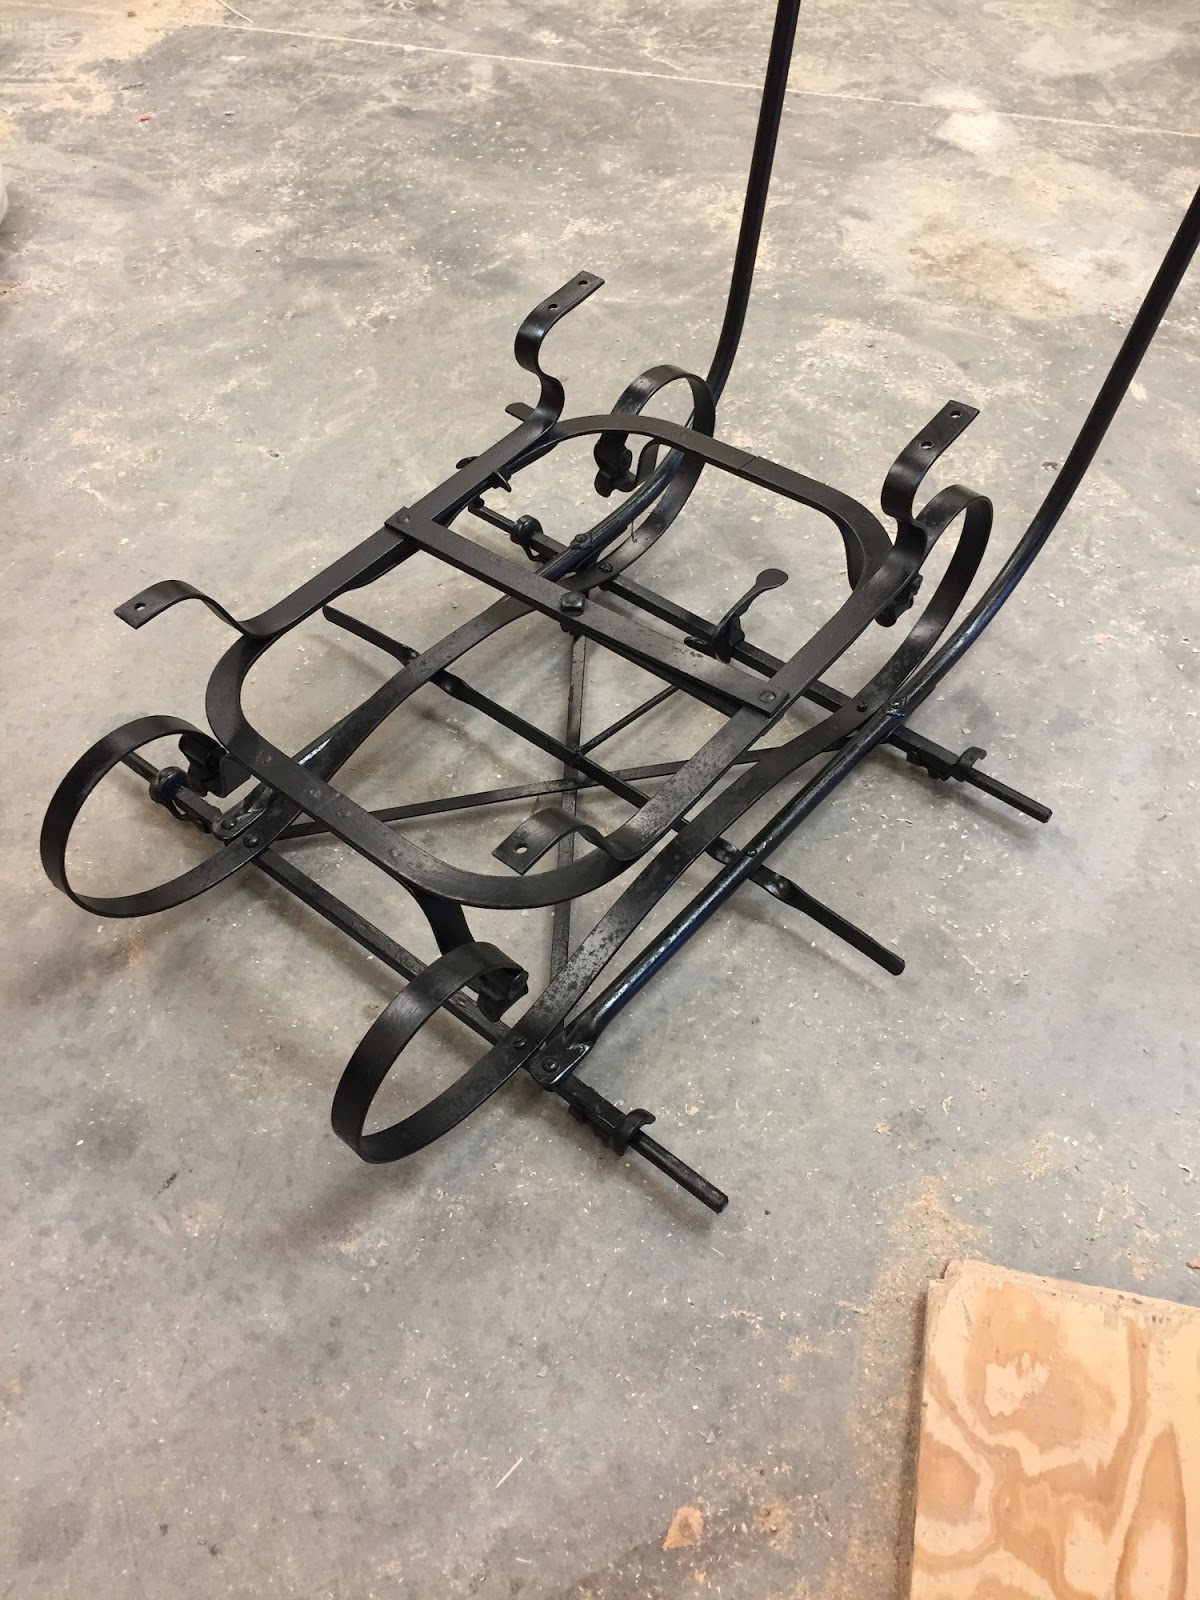
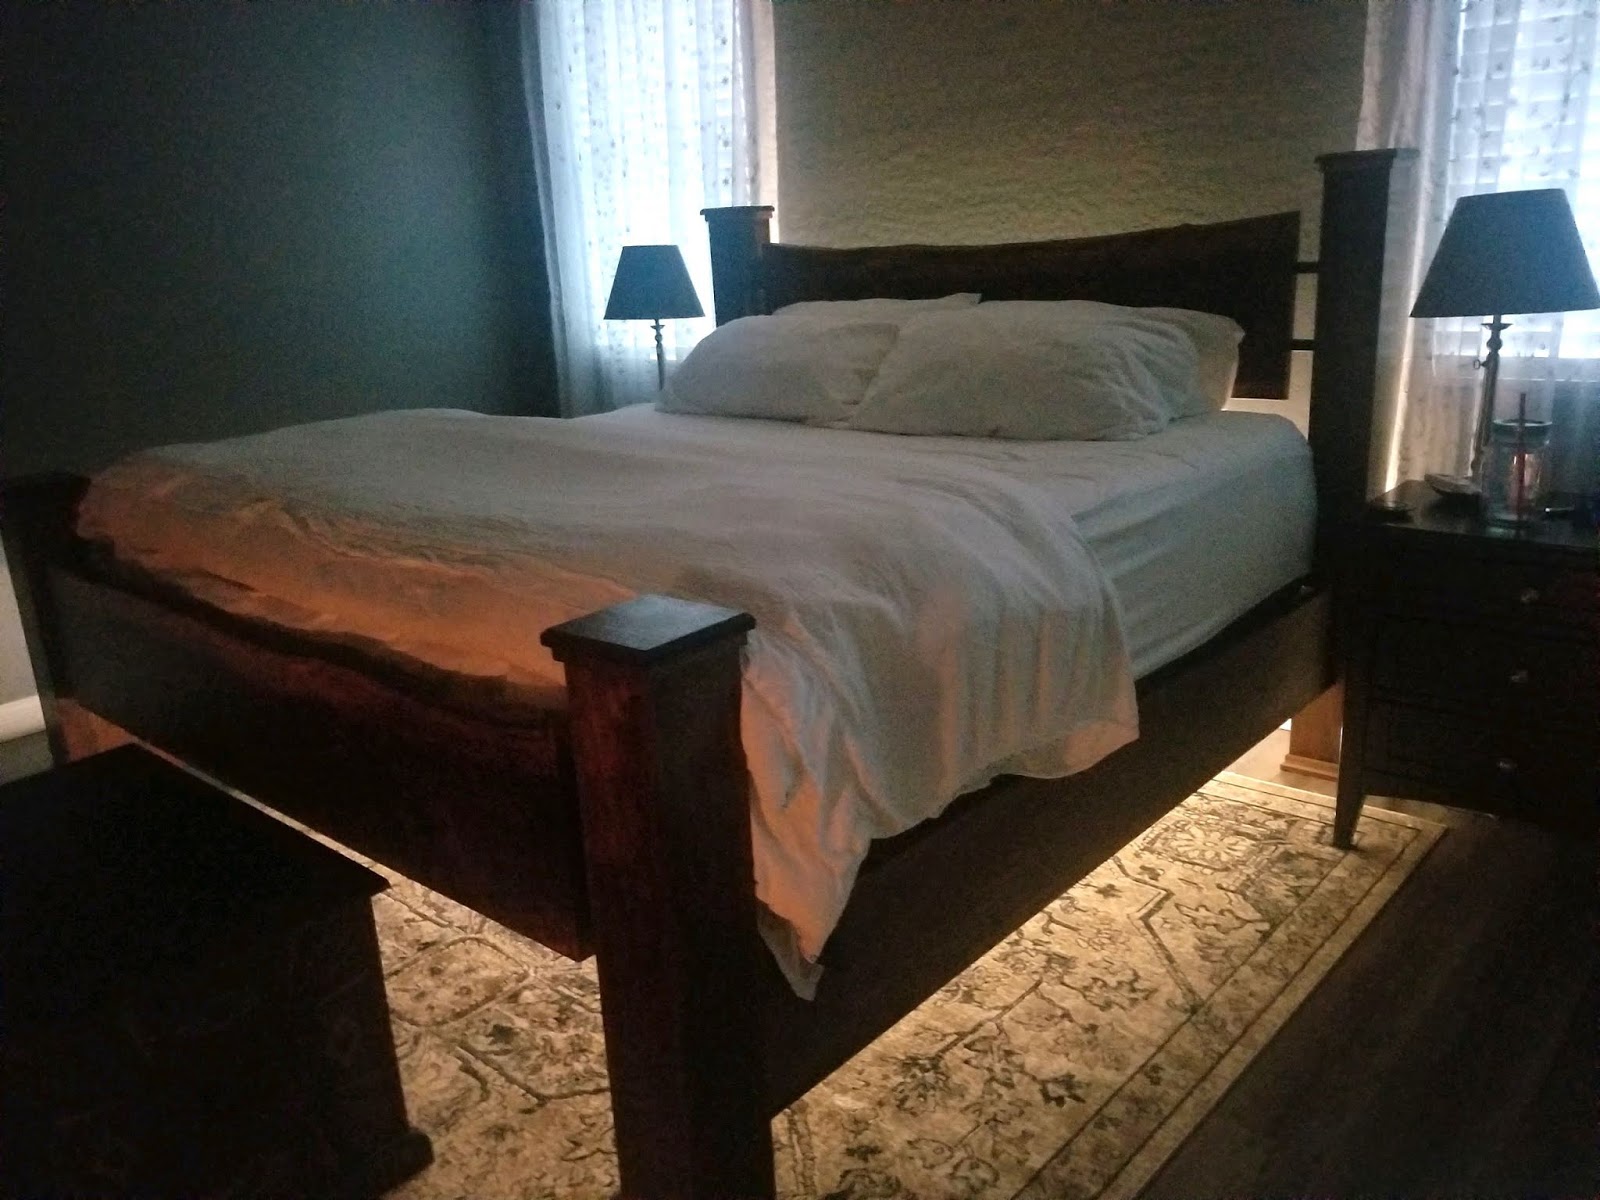
This bed was one of the highlights of the year, built by the same woman who built the live edge corner table shown above.  The bed started out with four massive bed posts, and some  custom made metal brackets for mounting the live edge head and foot boards. 


If I had to guess, this bed took Laura maybe 4 months of building on Saturdays. 


It's just... stunning. 


And when she added motion activated lights under the side rails, it blew us away! I could not be more proud of what she built!


We had another ongoing project in the shop - this kitchen island made for John's daughter, who likes to bake and needed more counter space in her kitchen. 


It rolls out of the way when she's not using it, 


and the top flips up to give her more counter space. 


I'm guessing it took him maybe 2-3 months of Saturdays to make this, and it's so functional and matches her existing cabinetry... it's just a wonderful gift!


These next photos are from a few years ago, buy John also made this crafting table for his wife, and he's told me that it gets a TON of use. (He made the lamp on it, too!)


Ann's been working on building bathroom vanity for a while, it matches a piece in her home, and the ornate trim was quite a challenge to match. 


and the final piece with its granite top is perfect. 

This is a masterpiece!


She also made this matching medicine cabinet - a small piece, but a wonderful touch in her bathroom.


They say the most challenging piece to build is a chair, and Kareem knocked it out of the park with this design. 


He based the design on the back on a QR code, and his execution was perfect. 


I'm always happy to see his name on an upcoming class roster, as he's SO creative and wood-curious.


John didn't make this piece in my shop, but brought it by for us to see... what amazing colors and texture he got in the resin! That delicate spindle work is SO difficult, and he's producing some amazing turned pieces lately.


So what's the key to building amazing pieces?

Practice, practice, and more practice. I know it sounds silly, but making small projects like these candles (with built-in matches!) 


or these cool "wristwatches" will really increase your skills and help you when you tackle larger projects. 

I apologize if I forgot anyone's work... if I've forgotten a piece you built this past year, send me some photos and I'll add it to the next post!


Me? 

I have this amazing piece of curly Purpleheart to tackle, 


and some big projects in the pipeline... it's going to be a busy year! 

I'm going to post a few pics of my 2019 projects in my next blog - stay tuned!