Friday, September 28, 2012

Difficult pieces can be the most satisfying ones to build...

Sometimes the hardest pieces to build are the ones that are close to your heart. It's even harder to write about them after the fact, to have to go back and revisit what I was thinking about while I was making the piece. Which is what this post will be about.

My friend's mother passed away during the summer, and just thinking about her makes me a little weepy. 

Is there any greater (woodworking) honor than being asked to build a container that will hold someone's cremains? Think about it, and get back to me with an answer. 

The only constraint I had was that the box had to fit within this vault liner. 


I actually learned quite a bit about funerary boxes while building this one. There are single boxes, and companion boxes. This one needed to hold three sets of cremains, so it was a bit larger than normal.


This board has been with me for a while, I've been saving it for something special. It's funny how you put a piece of wood aside with the hope that you'll find that "special" project to use it in - and then that special project presents itself. 


My friend's mother who passed away was an amazing woman, very salt of the earth; she lived a long productive life. Somehow, when I tried to translate her life into a choice for wood, I kept thinking about Oak. To me, Oak seems rock solid. Not flashy, but a reliable, sensible, durable wood. 

Oak it would be.


Of course I had to lay out the box parts so the grain would wrap around it.


I'm a fan of using subtle curves in my pieces, so I made a curved template, and then routed the two sides so they would match perfectly.


Using the same template, I routed a groove to hold the lid panel.


Notice I left this piece a little longer, so I could screw the template directly into it? 


When I cut the mitered corners, the screw holes are cut away.  


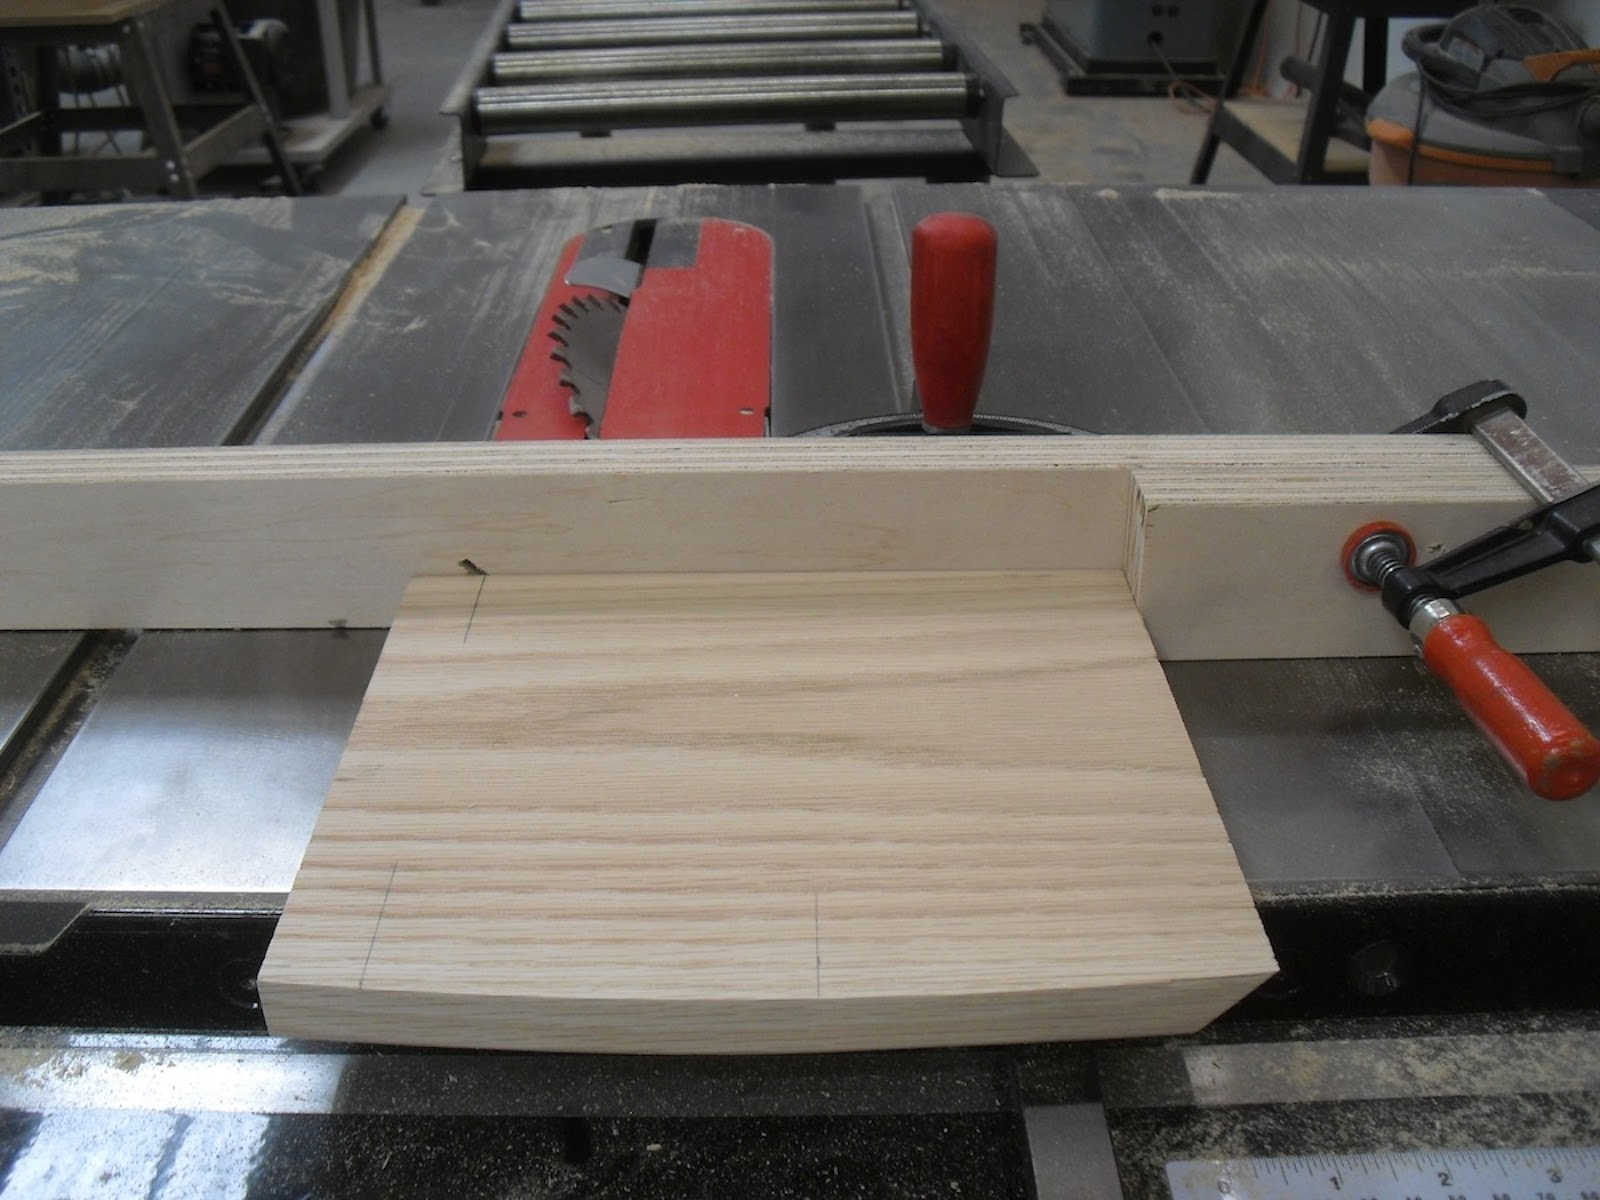
Because of the curve, I had to flip my miter gauge around to cut the other miter. 


I'm a big fan of tambours - and wanted to make this lid to mimic a tambour. That required making about a dozen slats that would nestle together inside that groove. It's always wise to cut a few extra, as they tend to twist a little bit when they're cut away from their block of wood. 

Here the box is glued together,


and then cleaned up, once the glue dried. 


Everyone always asks why I glue a box up as a solid cube - but most woodworkers know the reason why. Do you?


The box was cut apart, and the two sawn surfaces flattened with a hand plane. 

Yes, hand tool work. Don't faint. 

Many of the guys in the Sin City Woodworkers group tease me about being a power tool addict, but they probably don't realize I have an arsenal of hand tools, and use them liberally. But only when necessary. Why would I want to plane a board by hand, when I have a perfectly good planer to do that for me? I pick my battles carefully. 


You can't even see the seam when it is planed correctly. 


Technically, this was one of the best boxes I've ever made. Perfect miters, perfect hardware installation, perfect grain management. It doesn't happen like this very often, so when it does - I'll take it. 


The hardware came from Rockler, and featured a casket lid locking device. It's a little labor intensive, but adds a very nice touch to a box like this. The latch had to be installed with a couple of mortises, 


which can be done with a plunge router or a mortising bit.


The plate that fits down into that mortise has to be recessed, as well. I like to screw the plate down into place, and then outline it with a knife. Remove the plate and you can clearly see where you need to remove the wood. 


I will say this - installing hardware can be difficult. And it only gets easier with practice. I might make it look easy here, but I struggled with it for years. So if you have problems with it - grab some scrap wood and a chisel and practice installing it until you get better. It's the only way. 


Here's the box, everything installed and awaiting oil.


I used a chain to support the lid - you can read about it here.


I'm pleased to say that this box was very well received; the family was quite pleased and touched by it. The sad part is that I had to make another one about a month later, for a family member of mine who passed away. 

Like I said, making boxes like this one is difficult and emotional, so I hope to not have to build one again for a long time. 


Monday, September 24, 2012

Comparing apples to... apples?

A few months ago, Dennis Patchett taught a carving class at the school, so I thought I'd share a couple of images with you.  One thing that really fascinates me is taking everyday objects and replicating them in wood. 

Like this apple.


 Dennis carved this one and gave it to me last year - the really intriguing part is how he carved the "bite" out of it in a different wood. 


 If you look closely, you'll notice the "bite" isn't just a simple hole drilled and plugged with a contrasting wood - the bite isn't perfectly round.


 This is Lupe's apple below - I think she did a terrific job carving the bite.


 I've been playing with a new camera app in my phone and I find this one particularly interesting. (Thanks for the app tip, Susan!)


 In the carving class, everyone worked on a couple of different pieces - here's one by a student who works with animals here in town.  Her photo of an elephant's eye was the inspiration for her relief panel. 


 It's a little hard to see all of the wonderful detail she put into this carving, but it was simply gorgeous! She achieved the colors on the panel by mixing up some MilkPaint and applying it as a wash, allowing the wood grain to pop out through the color.  


Finally, Lupe decided to carve her panel with a logo on it - with plans to eventually turn this into a box lid. 


Here's a great video of Norm. Only in Las Vegas do you get to rub elbows with elephant trainers and magicians!

Saturday, September 22, 2012

How a chisel is made

So many people send me cool links that sometimes it seems like this blog almost writes itself! Eric sent me this one - enjoy! 

(Watch it full screen and turn your volume up!)
(Thanks, E!)


Thursday, September 20, 2012

On being the chief cook and bottle washer...


For the last couple of classes, I've sensed that something was wrong with my planer. It might have been the sound, or just the way the boards fed through it - but something has been going on with it.

So when I noticed a little shredded rubber coming out of the bottom of the belt guard (like this)


and smelled rubber burning, it became clear that there was a belt issue. I removed the right side of the planer, exposing the gears and pulleys that feed the wood through the machine.

Awesome.

Cool looking parts like this make me smile.


And sure enough - it was easy to spot the culprit - a belt that was disintegrating. It had actually flipped upside down and was riding in the pulley backassward.


Never saw that before!

Luckily, there is a machine supply house minutes from the shop, so I picked up the new belt, and a little woodshop fortification.

I love how the barista labled my cup.


The new belt slipped into place, and I cleaned and greased everything, before re-attaching the cover. Right about then, Eric stopped by the shop. He's my boy-Friday.

Well, OK, my man-Friday.

Second in line to being chief cook and bottle washer.


As he was checking out my work, he remarked about the fact that when you acquire tools - you not only have to learn to use them, but you have to learn to repair them, too. Isn't that the truth?

And frankly, I think performing repairs on your tools makes you a better woodworker. I feel like it helps you understand how the tool works, and how you can baby it, or coax a little more out of it.


I used to feel a little intimidated by some of my repairs, but now - I'm feeling somewhat fearless.

In fact, just last week - I took apart a plunge router


and went to my local independently owned hardware store to pick up a couple of parts.


I love this sign on the front of their store!


Sure enough, I found what I needed. Think you're going to find a selection of switches like this at one of the big box stores?


Think again!


All in a day's work!

Now if I can just come down off my quad latte high.


Tuesday, September 18, 2012

You have the key...


Artists are funny people... we tend to work inside our head a little too much, and can often lose sight of the bigger picture. It's easy to lose perspective when we get frustrated with our work. Or life. Or whatever.

Which happens a lot, in my case!

I have a good friend who is sofuckingtalented, she makes my head spin. But lately - she's been in a bit of a rut. So I wanted to make a piece for her - for inspiration, and as a reminder of how talented she is.

In our discussions about art and work, I would constantly remind her that she has all the knowledge and talent she needs. She just has to find the key to unlock everything. I end almost every conversation with her by saying - you've got the keys, girl!

That got me thinking about keys. And then Google images flooded my brain with things like this


and this


and these.


I've always been fascinated by taking everyday objects and blowing them up. No, not literally, but size-wise. Like a six foot crescent wrench or an eight foot ruler.

In fact, one of my favorite restaurant chains back in Ohio had a giant hamburger hanging up in its ceiling and for years - I wanted that hanging in my yard, above the deck. So bad.

I chose a half dozen interesting keys and blew them up, then traced the images onto wood. Cutting them out was easy, but sculpting each one was the real challenge. Some of them were routed with a small roundover bit.


Others had to be carved by hand.


Finally, I made a plywood "keyring" to hold all of the keys - slicing it open in one spot, to slip the keys into it.


When it was glued back together, you could barely see the glueline.
Sweet.


It started me thinking about adding some new artwork to the woodshop's wall.

Picture a giant saw piercing through a wall


or a giant chisel handle popping out at you.


(Don't worry, they'll be made of paper-mache.)

As for my friend - I'm happy to report she's back in her studio, once again making some amazing pieces. And feeling inspired. I'm not sure if the keys did the trick for her, but I have to say - making them was a good inspirational break for me.

I highly recommend it!