A forum for discussing woodworking, specifically furniture making. Feel free to post comments and questions about your current projects, tools, studio set-up, or whatever is on your mind.
This blog is moderated by Jamie Yocono, owner of Wood It Is! Custom Cabinetry in Las Vegas, NV. Her website is wooditis.com. If you need to speak to an actual human... call 702-672-8981!
Now...let's talk wood!
You've heard me mention more than a few times how much of a hassle it is to change the blades in my jointer. The hardest part is setting the height of the blades to the exact level of the outfeed table.
I just came across this link, which took me to Fine Woodworking's website, where I watched a slick video on making a simple jig for setting jointer blades. I can't figure out how to post it here, so this link will have to suffice.
If you're fighting with your jointer blade set-up, this video will solve your problems. What a smart and simple solution! Click here to see this video, it's well worth a few minutes of your time.
Before I get started with today's blog, I just wanted to share an old picture of happier times. We lost my dad nine years ago today, and life has never been the same without him. He was creative, smart, and resourceful, and I know that's where much of my design sense originated. I still have small sketches and pieces of his artwork around my home and shop. They're both a comfort and an inspiration for me.
Miss you, Pop!
OK, on to the blog....
Codependency.
codependency |ˌkōdəˈpendənsē|nounexcessive emotional or psychologicalrelianceona partner, (my computer, in this case) typically a partner who requires support due to an illnessor (design) addiction. Yes, I will admit it - I am codependent on (with?) my laptop. As much as it frustrates the hell out of me, it is a tool on which I rely for much of my design work.
OK, most of my design work.
About a year ago, I was sketching ideas for a headboard that I wanted to build. I was in a "beefy" phase, and everything I was drawing was oversized and heavy. But it was attractive, and a nice counterpoint to some of the other pieces I was making. So I made this simple sketch in my sketchbook.
You know, the sketchbook that is attached to my hip.
You have to be very careful when you make a small sketch, and then try to turn it in into a full sized drawing. It's so easy to look at something and think - oh, this stretcher needs to be 3" wide, and when you cut the actual piece, the scale is all wrong. That is why full sized drawings are so important.
Which leads me back to my codependency.
With my Mac, I can scan my small sketches - yes, the ones on napkins from Capriotti's or the poke carry-out up the street, with splotches of greasy goodness on them. If the sketch has the right proportions, the scan it will enlarge it perfectly, to the full sized dimension you want. In this case, I wanted that vertical piece of wood to be about 8" wide.
After scanning and enlarging it, this is the result. Considering this paper is 8.5" x 11", this drawing is more or less full scale.
That also brings up another valid point - scanners and digital cameras are just as important woodworking tools as my planer or tablesaw. If you have a small sketch and don't have a suitable printer at home, head to Kinko's and let them print full scale drawings. Sweet.
That's all for today, I'm heading to the shop. If I'm lucky, I'll have some time to find some suitable wood and hopefully put together this headboard. Since all of the proportions have been worked out ahead of time, it should go together pretty easily.
I've been working on a blog post about hand care for woodworkers. We even discussed this at the Sin City Woodworkers meeting the other night. In an upcoming post, I'll share what some of the other members suggested, as well as a few tips of my own.
But - while I was doing some research, I came across this video. It contains a some images that might be a little disturbing. But - if I could handle, you probably can, too. I have a very low tolerance for looking at blood and gore.
And the technology that this video demonstrates is amazing.
Yes, I've been MIA. If you knew half of the work I've been doing, you would understand.
One of the projects on my plate right now is working with saltillo tile, which can be tricky. Its rustic quality and warm colors make it an attractive flooring choice. But damn! It's a lot of work. There are stacks of it everywhere in my studio.
You usually purchase this tile unfinished, which means you can stain it to match just about anything. You can use regular woodworking stains - like a Minwax, thinning it out with mineral spirits if the color is too dark. I usually mix up a small amount, like a half cup of thinner to a teaspoon of stain. And then paint a small section of the raw tile. Then add another teaspoon and paint another sample area. I repeat this a couple of times, and then the next day, when the stain is dry, I'll compare it to what I need to match. Once you know the right ratio formula, you can do the math and mix up gallons of the correct hue.
Well... that is the theory.
Unfortunately, it didn't work out that way. After staining it with what I thought was the perfect recipe, I felt like it looked a little too light, so I gave it a second coat.
Remember that line in Pretty Woman?
Big Mistake. HUGE.
There was only one solution - and it wasn't a pretty one. Sanding all the pieces.
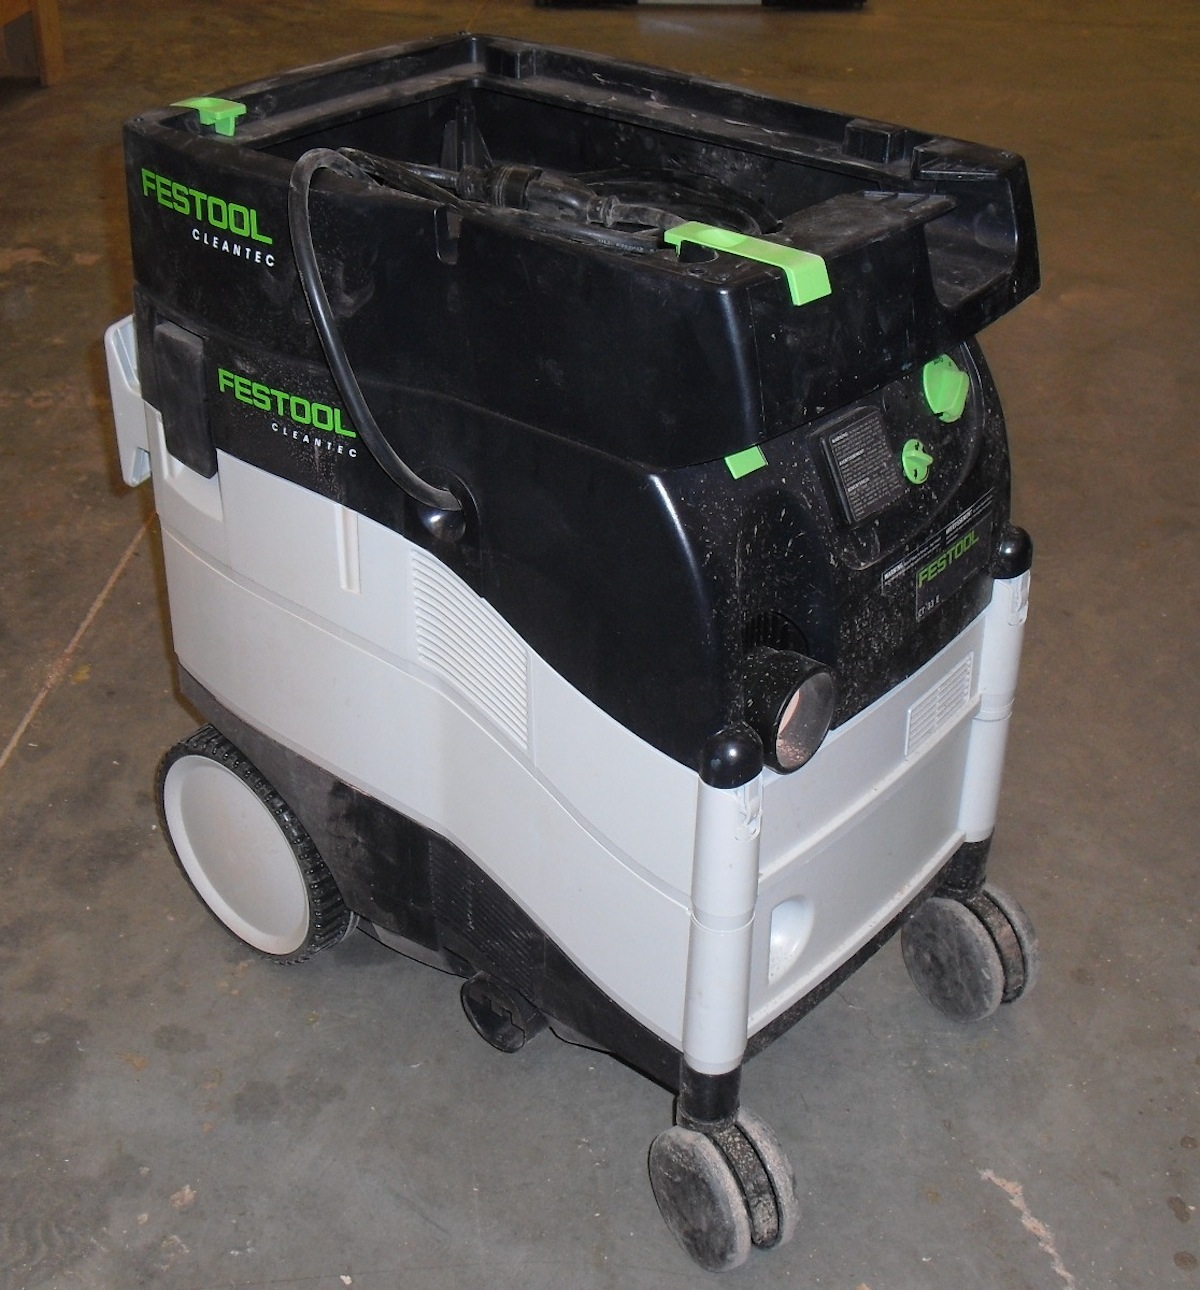
But I'll tell you this - if you had any doubts about Festool vacuums, this should prove their worth.
After sanding down all 250 square feet of tile, with virtually no airborne dust, I needed to change the vacuum bag on this unit. When I pulled off the hose, there was a trace of terra cotta dust in the port.
I grabbed the box of vacuum bags.
They're ridiculously expensive (close to $40 for 5 bags!) but - what about Festool isn't expensive?
When I opened the vacuum to change the bag, there wasn't a speck of dust inside.
Even the air filters are pristine. They look like they're brand new, and I've been using this vacuum for two years.
I pulled out the bag, it was filled with clay dust
and remembered that Festool includes this cool little plug for the filler port. How smart.
After all the staining and subsequent sanding, I am a little burnt on finishing this project. And my hands are simply raw from working with the dry clay. At the Sin City Woodworkers meeting last night, I asked everyone what they use for hand care, because my hands are in a world of hurt. By mutual agreement, Bag Balm seems to be the hand lotion of choice.
Let's just say I wish I had a 5 gallon bucket of it right now, to soak my hands in! This clay dust is extremely harsh on your hands, and mine are rough as 80 grit sandpaper. Oh well, my days of hand modeling are long behind me, so I guess it really doesn't matter. I just want them to feel normal again!
How can it be possible that this is my 400th blog post? Some people have written to tell me they've gone back and read every post I've written. All I can say is - thanks for sticking around, some of the stuff here falls right into the drivel category. Especially some of my earliest stuff. What was I thinking? Sure, I could go back and delete it, but it is sort of like erasing pages in your diary. What's the point?
I saw this video today and I can't tell you how much I loved it. Grab a cup of coffee, and put your feet up.
That video made me remember something that I had forgotten. I was recently in e-mail contact with a cousin of mine, and we were talking about family stuff. She's an artist, too, and I mentioned to her that I thought my sister was really the talented one in my family, the one with true artistic vision. And our conversation reminded me of this book that my sister gave me, many many years ago.
I think she gave this to me right as I was heading off to college, and of course, I had no idea what I was going to study. I used to joke that during my first year in school, I majored in majors.
But I eventually found the path I wanted to take, and honestly, looking back, I think this book may have nudged me in the direction of furniture making. I remember looking at every single page, with the images searing into my brain. I just grabbed the book from my bookshelf and thumbed through the yellowed pages. It was a little shocking, I see little details in my current work gleaned from pieces of furniture in this book.
I vividly remember seeing this cabin and thinking to myself - I want to live like that someday.
And ten years later, I built this home for myself.
First of all, how is that even possible that I can remember that, when I can't even remember what I wore yesterday, or had for dinner last night? But I swear, I remember it.
All of this reminds me that is the small things in life that really do give us a good deal of joy. Like owning a really good knife, or having a really perfect overstuffed chair where you might enjoy that whiskey sour in the evening. Life can't be perfect for us; in fact, it is often so imperfect that it is frustrating.
Oh, don't get me wrong, I am not preaching about acquiring things. I am writing about having good, solid things in your life, that make you happy. It could be something handed down, or bought at a flea market. The origin isn't as important as the thought and reasoning and inspiration behind it.
That is why I so badly want to buy one of those knives, even though I have a drawer full of Wusthofsand Santokus and a Henckel or two.
It isn't like I woke up one day and noticed my dining room table was missing, but - well, that's pretty much the way it turned out. I won't bore you with the details, but I've had an empty dining room for over a year, and eating dinner on the couch was getting old. The good news is - tables are my specialty!
I had an idea in mind.A couple of months ago, I built this table base and really loved it. So that is what was inspiring me when I started to build this new table. My table.
Actually, I had three ideas floating around in my brain, so I started sketching them, full sized, on cardboard. There was a point early in my career where I didn't enjoy sketching; I just thought it was better to grab some wood and start cutting. Luckily, I've learned to appreciate working things out on paper first, and I'm positive it makes me a better woodworker.
It only takes about 15 minutes to come up with a decent sketch. I usually just grab some set-up blocks and a couple of straight edges, and turn the music up.
(Double click on the video below to view it full screen)
(A HUGE thank-you to Lupe for helping me with this video! You rock!)
The hardest part was deciding which of the three designs I liked the best. I decide by propping up the drawings, side by side, and comparing them.
I chose the one with curved sides, which was odd. I usually don't prefer curves for my own pieces. More about that later.
These Ash boards were screaming to be made into a table.
This kick-ass radial arm saw is perfect for rough cutting large timbers to length.
I matched the grain very carefully,
and then glued them up into wider panels.
This is what a day of planing, shaping and machining the tenons will accomplish.
The top and bottom rails were next; here the mortises are located,
and then cut into the pieces.
At this stage, there is a fair amount of fitting to be done; a shoulder plane and a chisel are perfect for this task.
These sides were made over the course of two or three days, and one thing is for sure -
I make a hell of a mess when I am in the middle of a project!
Stella was watching me from the other room. You know what she wanted.
With everything fit, shaped, and sanded, it was time to glue the sides together.
The small details, like this mounting hole and the gentle taper on this rail, all add to the beauty of this piece. I can't stress how important it is to have all these details clear in your mind ahead of time, instead of just working them out as you go. Like I did.
When the sides were complete, I added a couple of center stretchers to connect the two sides. These were nice, beefy boards that were tucked back far enough so you won't smack you knees into them.
This table top is nearly four feet wide, and seven feet long; it will seat eight comfortably. The last bit of work required on the table was was two rails, so that the top could be attached to the base. I've always like these dovetailed joints, so I decided to utilize them on these rails. First I routed a dovetailed mortise in the rails.
And then machined a dovetail in a scrap piece of wood, testing the fit.
It took a few tweaks to get a nice, tight fit. I labeled the piece and made the rails.
All that was left was to cut a small shoulder on the bottom of the tenon, so the rail could sit flush.
I added a KD (knock-down) bolt - to keep everything snug, square and parallel. Damn, I love these bolts - I use them all the time, and they're perfect for furniture that you might have to disassemble some day.
And finally - the completed base.
All that is left is to attach the top.
But... here is my dilemma. Remember earlier when I said I wasn't completely sold on this design? As mush as I preach about sketching everything out ahead of time, about working out all of the details before cutting a single board, sometimes things just look different in wood than they do on paper.
So while I like this table a lot, I'm not 110% sure it is the table I want in my dining room. I'm just picky that way, I drive myself crazy sometimes.
So I'll just keep it in the shop for a while, co-existing with it until I jump off the fence and decide. Meanwhile, if anyone is in need of a new dining room table, I'll make you a heck of a deal!
The school is in recess right now, til the end of the month, which is nice. It gives me a chance to work on some things around the shop, do some repairs, and hopefully, clean the place up a bit.
People who hang out at the shop know I'm working in a dining room table right now. I'm on the bubble about it - not sure if I love the design yet, although it seems to be getting some nice comments. Let's just say I haven't bonded with it yet. I'll be blogging about it soon.
But for right now - I got nuttin'. Except this...
I got this in the mail the other day, and it just made me laugh.