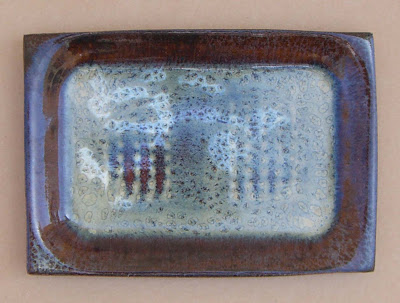
I've been known to buy a piece of meat or seafood not for dinner, but for the styrofoam container on which it's packed. A simple trip to the grocery store can provide potters with a multitude of forms - perfect for making plaster slump molds. My studio is filled with them, in fact, I mix small batches of plaster once or twice each week, filling the latest booty from my weekly shopping excursion. The photo below shows the transition - from foam mold to plaster cast to fired ceramic dish.

There aren't too many shapes you won't find- especially in the meat/seafood department. And one single foam tray can make a variety of slump molds, depending on how much plaster you pour into it. A shallow pour of a half inch works well for plates. Pouring the plater deeper will allow you to make molds for casserole dishes, platters and more.
Here are some of the slump molds I have laying around, I keep them in racks near the slab roller, where I can quickly grab the appropriate form.

In the next photo, notice the two small square trays in the top row. I use those for soy bowls when making sushi dinnerware sets. I couldn't find any styrofoam trays small enough for the soy bowls, so I cut down a long narrow tray and spliced it back together to make the small square. The plaster cast revealed a small seam, where the two halves were joined. It's quite easy to clean the seam up with small tools, such as dental picks, X-actos (my personal favorite), files, or even small surform tools.

A recent visit to Costco, where I purchased one of their heavenly roasted chickens, set me in a new direction. The dish on which it's served reminds me of a tire tread. I've been experimenting with platters that look as if they've been run over by a tire. Since this mold is so textural, it works best with softer clay that won't tear around all the knobs.

As nerdly as it sounds, I've become somewhat of a meat tray snob. Some of the trays have a lovely texture in the bottom. I'm sure it's so the meat doesn't sit in it's own juices. Other trays are plain at the bottom. Both are shown below, in the exact same size. The textured trays provide some lovely effects on the plates that are made with them. When shopping, I'll choose something with a textured tray over a plain tray. If I decide later that I don't want the texture, it's easy to eliminate with a surform tool.

After a while, it's easy to find you've accumulated MANY plaster molds. I've started building small shelving racks for them, using pegboard for the shelves. The pegboard promotes air circulation, keeping the molds dry when they're not being used. I've found it's handy to have duplicate slump molds, so that when I'm making a dinner ware set, I don't have to wait for the clay to set up to re-use the mold. I just grab another one that's available. I've learned that a quart of water, and the appropriate plaster (2 lbs, 12 ounces) will make roughly 4 of these small molds.

The end result? Here are 3 plates that were quite successful.


